Create Docker blueprint
This guide will help you create a blueprint for existing Docker containers. In this example, we'll create a blueprint for Path of Titans using Auhrus's Docker container.
Intro
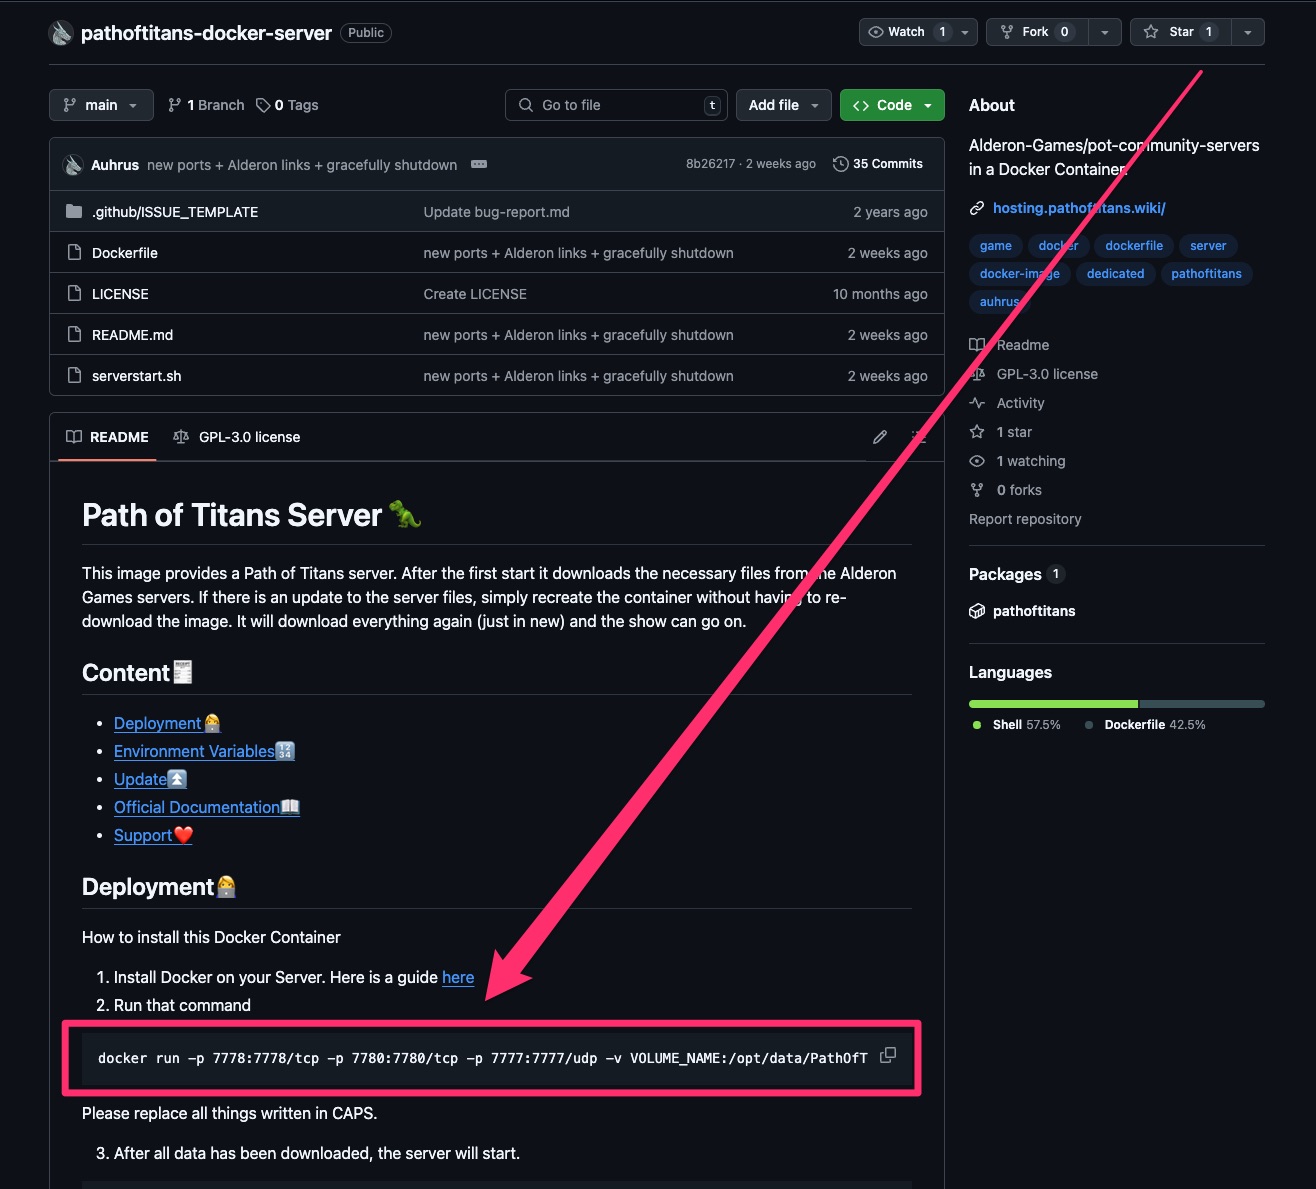
This guide assumes you have found a Docker run command for the game you want to host, similar to the one we found for Path of Titans:
docker run -p 7778:7778/tcp -p 7780:7780/tcp -p 7777:7777/udp -v VOLUME_NAME:/opt/data/PathOfTitans/Saved -e username="ALDERON_MAILADDRESS" -e password="ALDERON_PASSWORD" -e authtoken="AUTH_TOKEN" -e guid="GUID" --name CONAINER_NAME ghcr.io/auhrus/pathoftitans:latest
If you haven't found a Docker run command yet, the easiest way to find one is using your favorite search engine and search for [game] docker container. Make sure to replace [game] with the name of your game.
1. Import Custom Docker Container
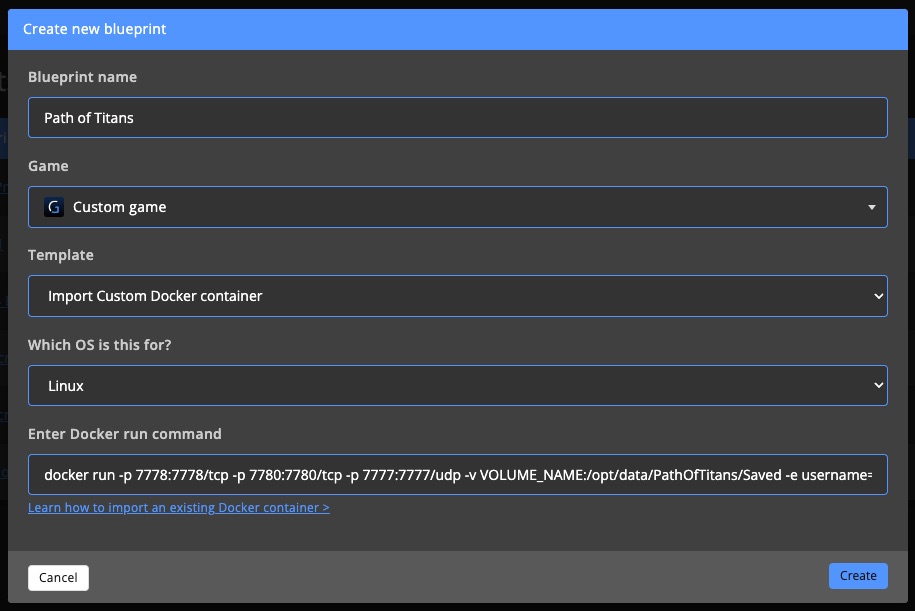
On the Create new blueprint popup, select the Import Custom Docker Container template. Choose the Operating System (OS) that matches the supported OS for the Docker container.
Then, copy and paste the Docker run command into the Enter docker run command field and click Create.
2. Check Blueprint Settings
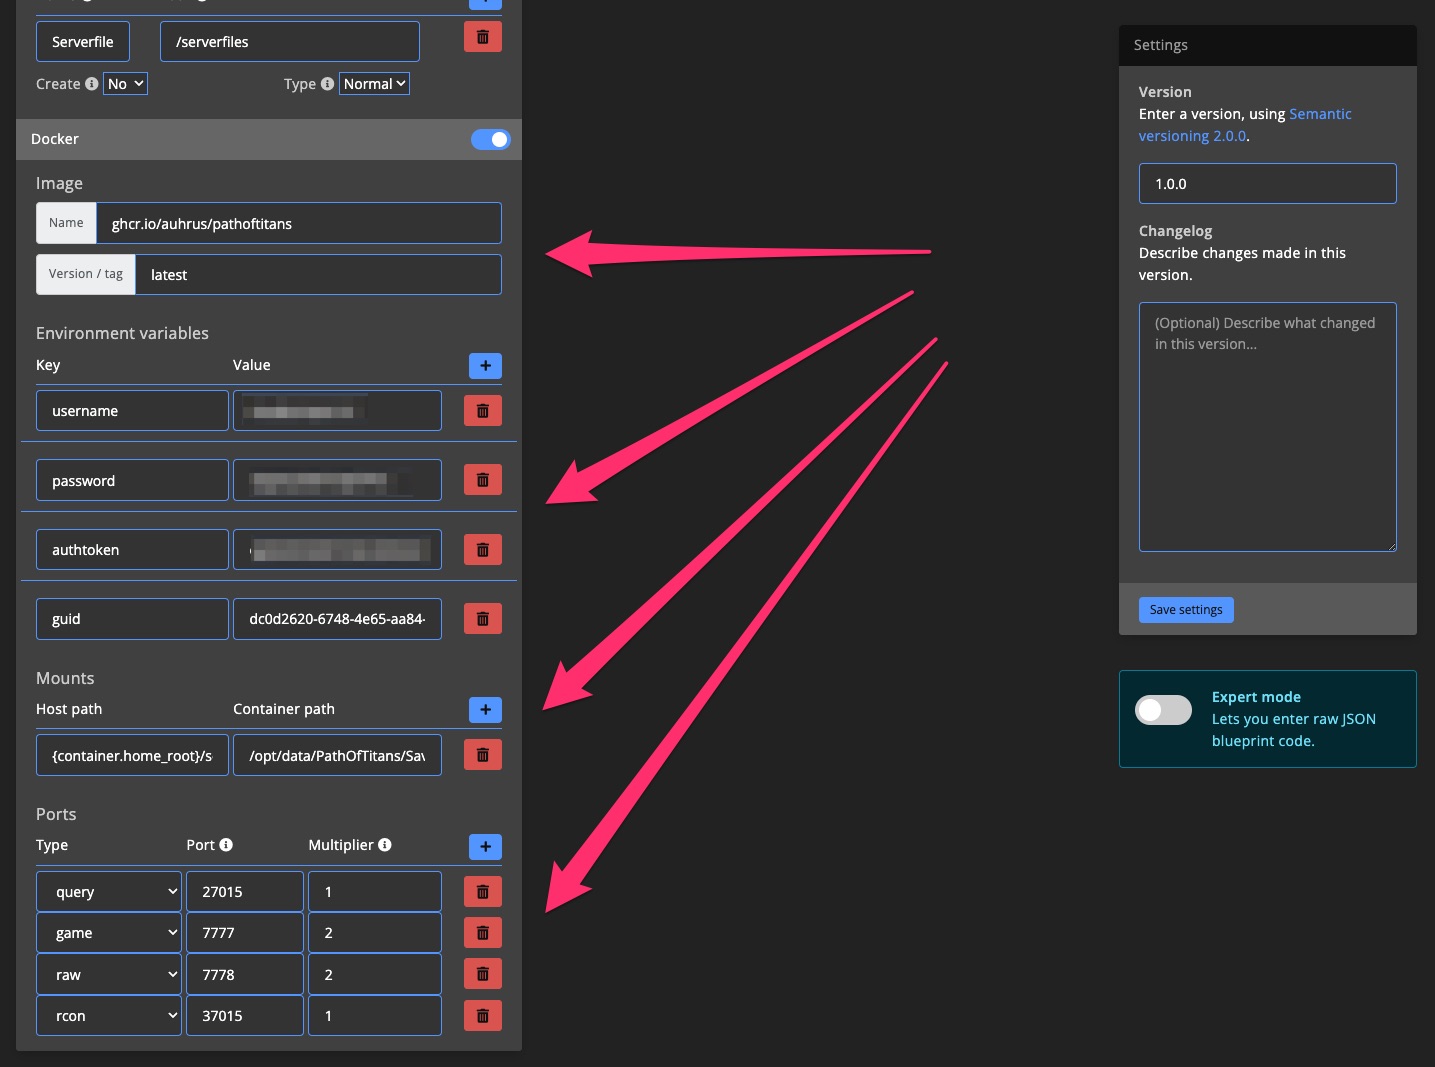
In this case, we had to configure some of the Environment variables because it was necessary to install the Path of Titans game server. For most games, this won't be necessary, and you can immediately save the form in that case.
Save Blueprint Version
After confirming that most settings were imported correctly, you can save the blueprint by clicking Save settings.
3. Launch a Fresh Server with the Blueprint
In this step, we'll confirm that the basics are working as expected. To do this, launch a new game server with the blueprint you just created.
Go to the Install New Game Server page and launch a new game server using the blueprint.
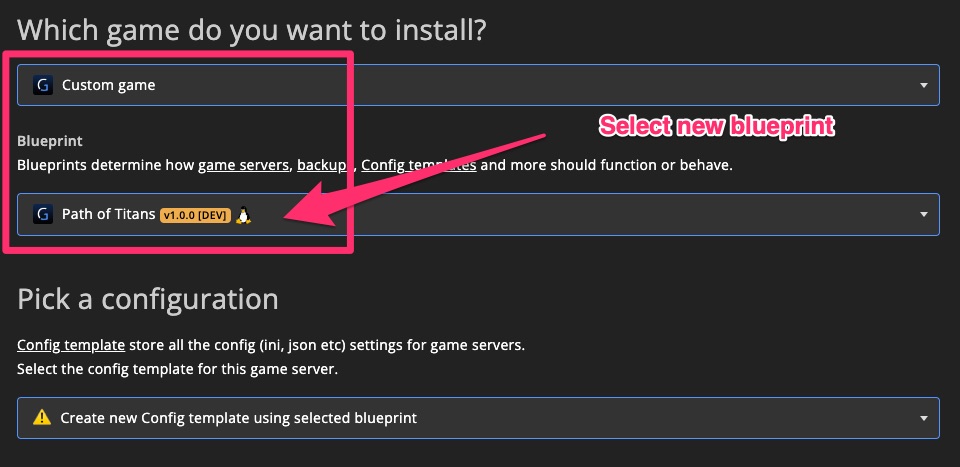
Click Install game server now and wait for the installation process to complete.
3.1 First Launch
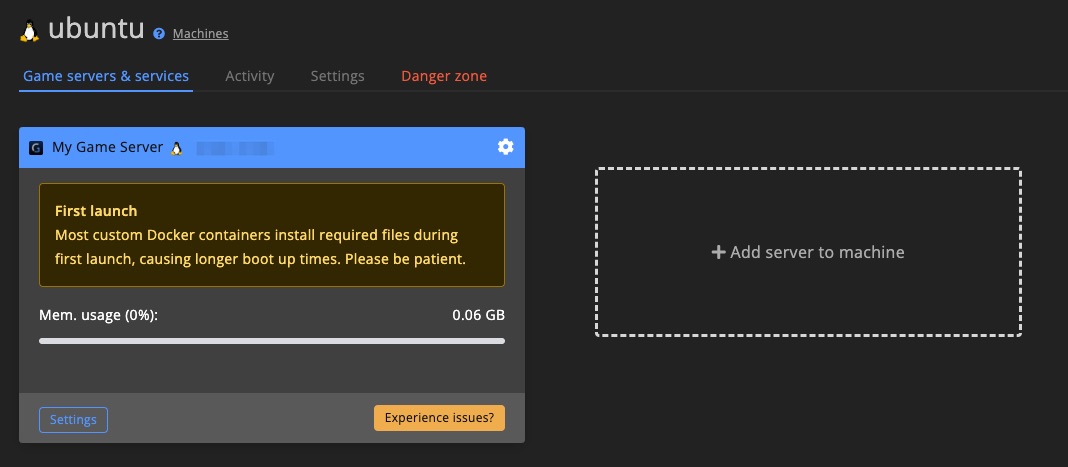
Once the installation is complete, launch the game server without making any changes to its settings.
Most custom Docker containers will download the game server files on the first launch, so the initial startup will take some time. Allow the game server at least 5-10 minutes to boot up and complete the setup.
3.2 Installation Progress
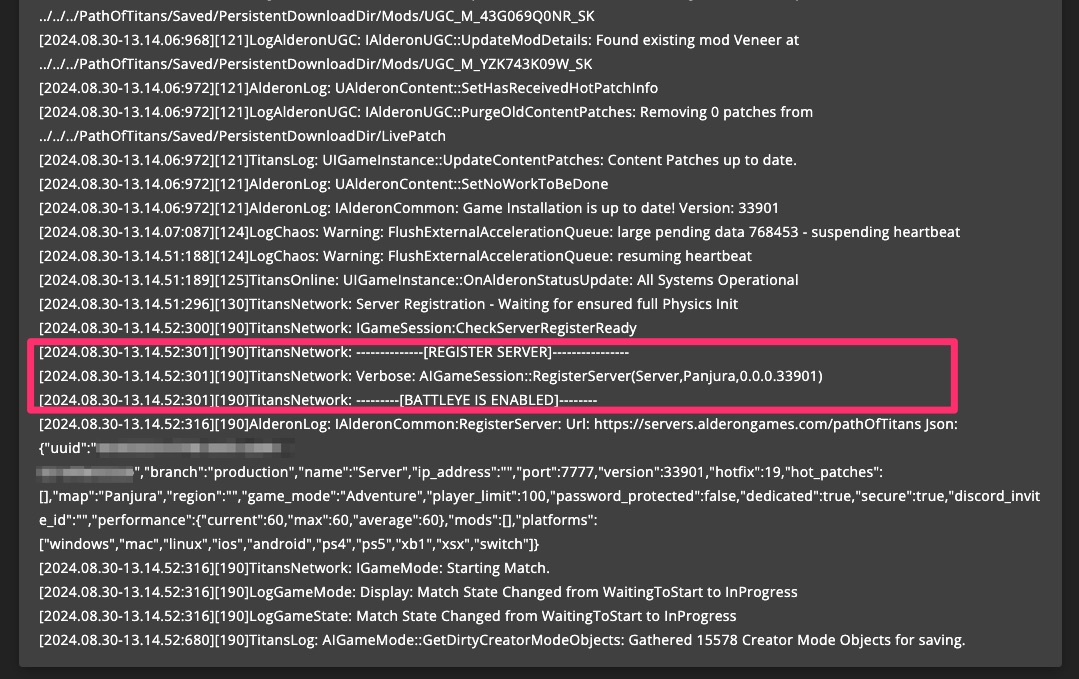
You can monitor the game server installation progress in the Docker container logs.
Wait until you see a log message indicating that the installation is complete. The exact information will vary by game, but generally, you should look for a message indicating that the game server is starting.
3.3 Confirm Booting Up
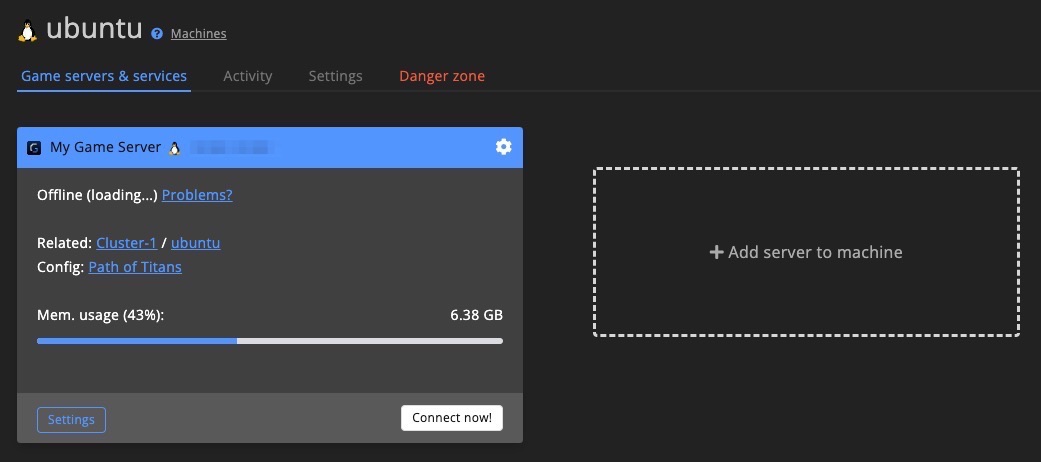
Since we provided minimal settings for the game server, it's likely that there will be some issues. However, even with the bare minimum settings, the server should start.
If the memory usage stays above 0.5 GB for a while after confirming the installation is finished, it's a good sign that the basics are properly configured. You can then proceed to the next step.
4. Finalize Settings
After confirming that the basics work, it's time to add the missing settings to ensure the game server is using the correct ports and is ready for players to join.
We're adding these missing settings to our Path of Titans blueprint. To do this, add a new version so we can configure the config files and launch parameters.
If you're working with a different game than Path of Titans, the file names and settings may differ. However, the same principles will apply, and you should be able to follow these steps as well. Just make sure to use the appropriate settings for your game.
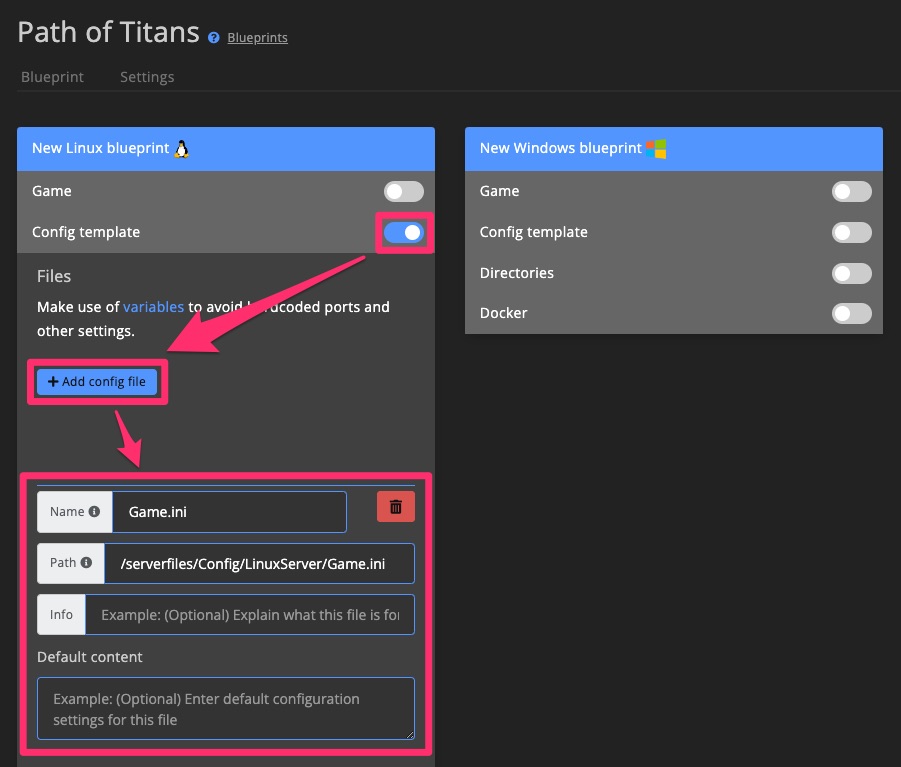
4.1 Register Config Files
If you've worked with game servers before, you've likely encountered configuration files. These are usually .json, .ini, or .cfg files.
Blueprints allow you to register configuration files so you can manage important settings through Config templates. Changes made are then automatically uploaded to the game server(s).
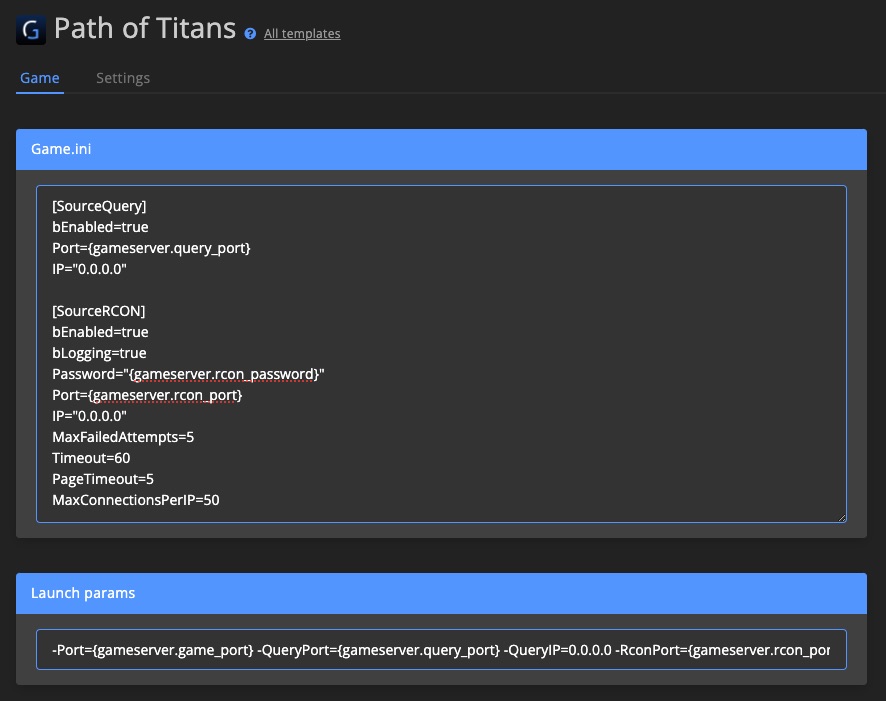
For Path of Titans, we need to register the Game.ini, which is used to configure the ports and slot limit.
If you're working with a different game, you may need to look up the configuration file path. Learn how to find the Configuration file path >
4.2 Register Launch Parameters
Most game servers use launch/start parameters for settings like ports, passwords, and server list names. These settings often look like -Ports 7777 or -QueryPort 27015.
If you're unsure whether your game has launch parameters, check the game wiki or docs. You might also be able to skip this step if you've already registered Config files.
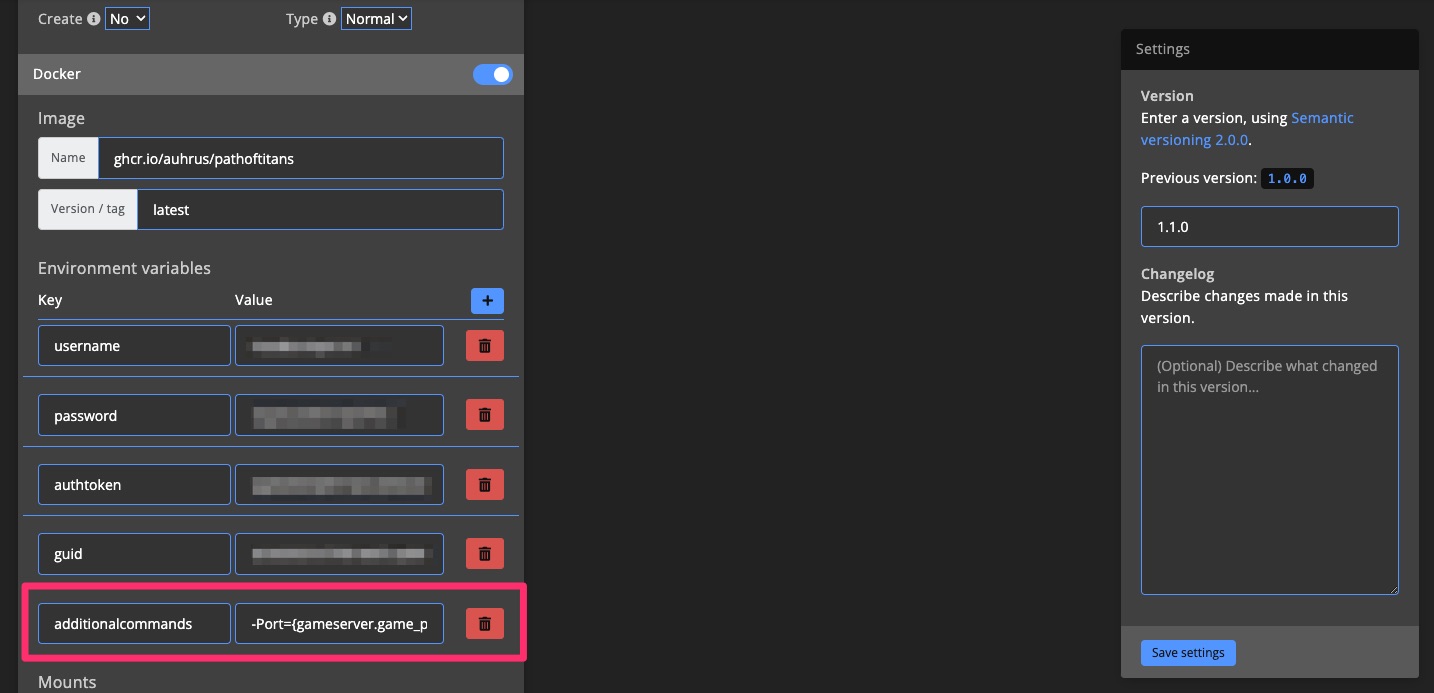
For the Path of Titans Docker container we're using, the documentation indicates that we can provide additional launch/start parameters by adding a new Environment variable named additionalcommands.
We found these launch/start parameters for Path of Titans:
-Port={gameserver.game_port} -QueryPort={gameserver.query_port} -QueryIP=0.0.0.0 -RconPort={gameserver.rcon_port} -RconIP=0.0.0.0 -RconPassword={gameserver.rcon_password} -MULTIHOME=0.0.0.0 -ServerName={gameserver.list_name}
Hardcoded vs Config Templates
You can choose between entering the launch/start parameters directly in the blueprint (hardcoded) or making them configurable through Config templates.
The main difference is that the hardcoded route only lets you change the launch/start parameters by creating a new blueprint version. In contrast, the Config template option allows you to change the launch/start parameters through Config templates. The latter is recommended when the parameters can change per game server.
Hardcoded
For the hardcoded route, paste the launch/start parameters directly into the Environment variables on the blueprint, as shown below.
Make sure to check your Docker container documentation for the right key, if you're working with a different game.
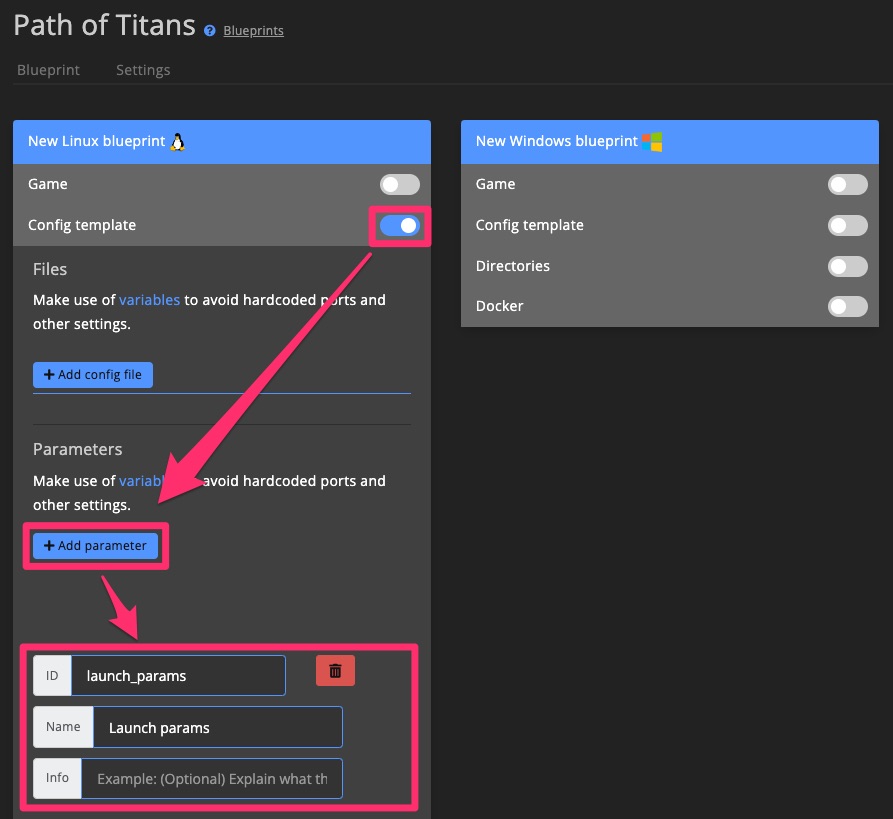
Config Template
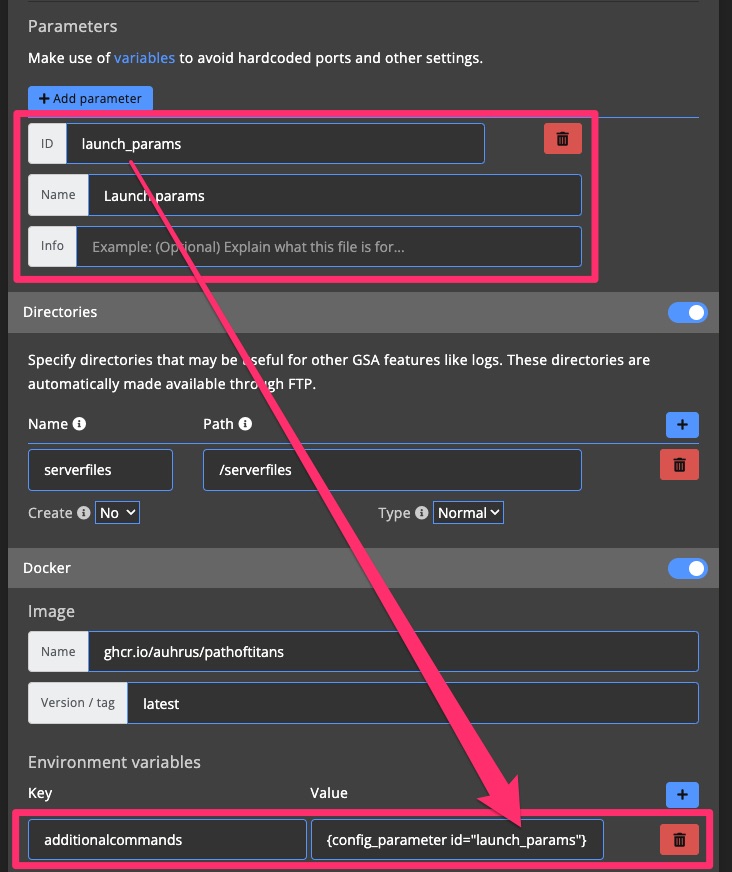
To make the launch/start parameters manageable via Config templates, first register a new Config template parameter. Here we're registering one with the ID launch_params.
After registering the launch_params parameter, you can reference it using a config_param variable like so: {config_parameter id="launch_params"}.
Make sure to save the blueprint and activate the new version on the game server and Config templates for Path of Titans.
4.3 Set up Config Template
Create a new Config template for the blueprint or update the blueprint for existing config templates.
Enter the required configurations onto your Config template. If you're unsure what settings you need to enter, we recommend to check the game wiki or docs.
Save the Config template and reboot the game server.
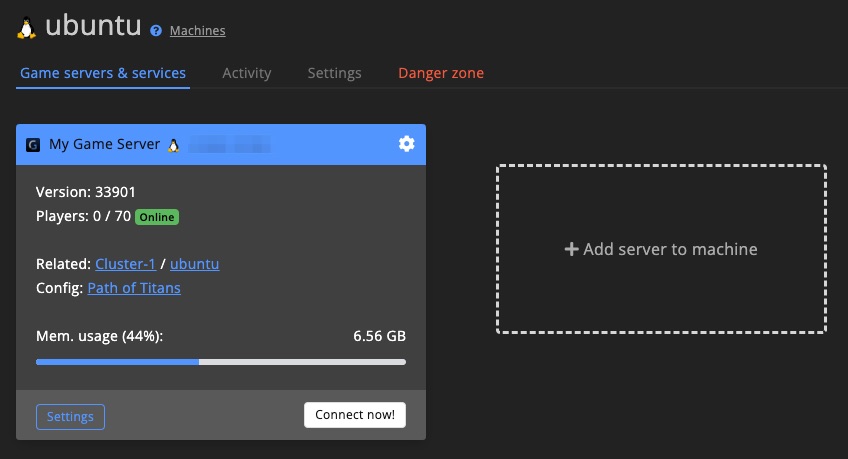
5. Hooray!
If you're lucky, like us, the game server will show up, and you'll be able to join.
Learn how to configure settings like uptime monitoring, RCON, backups, and more in the blueprint form section >.