Access control
Manage access to game servers using groups. For example, restrict access to VIP-only servers or RP communities.
Customize the rules, settings, and requirements for each group.
Access groups
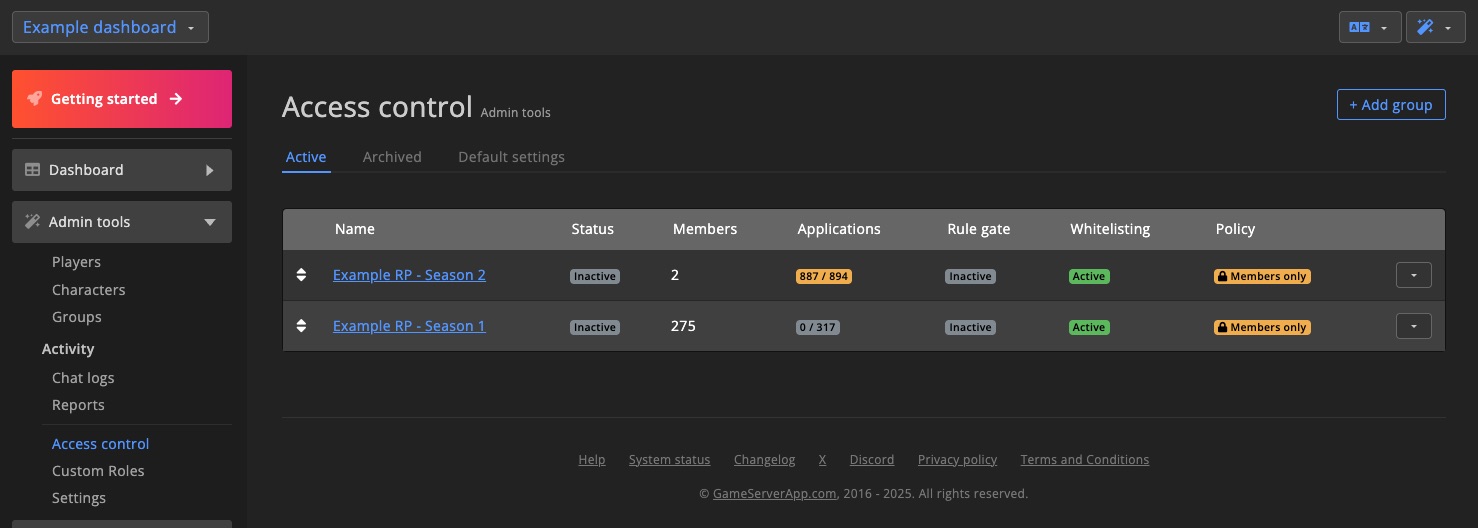
In the Access Control section, you can create groups to manage access to game servers.
Access groups can be used for purposes such as:
- Rule-gated servers
- VIP-only servers
- RP communities
- Invite-only servers
There is no limit to the number of groups you can create. For example, you can have a "VIP-only" group alongside a group that acts as a rule gate.
If your community has clusters with different rules, you can create a group per cluster and assign each a different Rule gate.
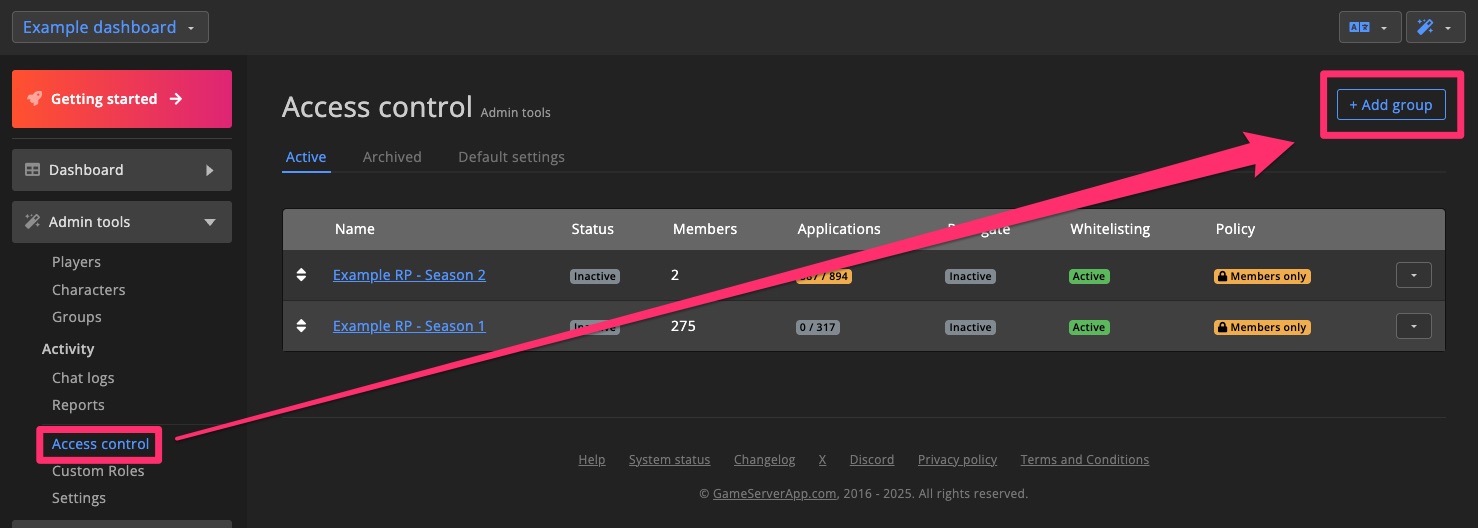
Create group
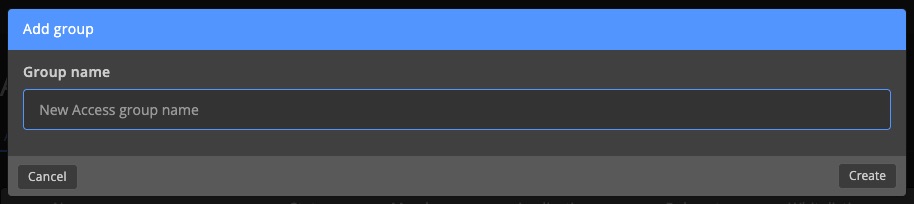
Click + Add group in the top-right corner of the Access control overview page.
Enter a name for the group and click Create.
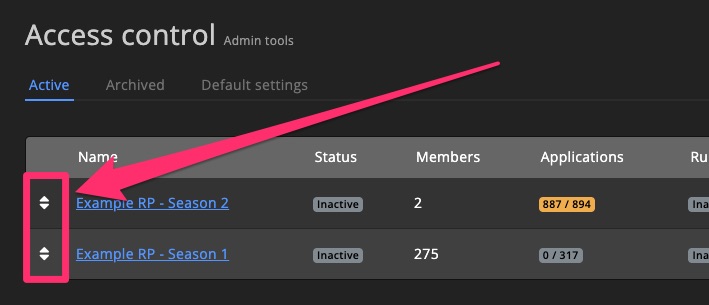
Group matching priority
The order of groups in the Access control overview determines their priority.
It's recommended to place Members only groups at the top.
If multiple groups are configured, GSA will check them in order. The first group that matches a player is used.
If no group matches, the default policy is applied.
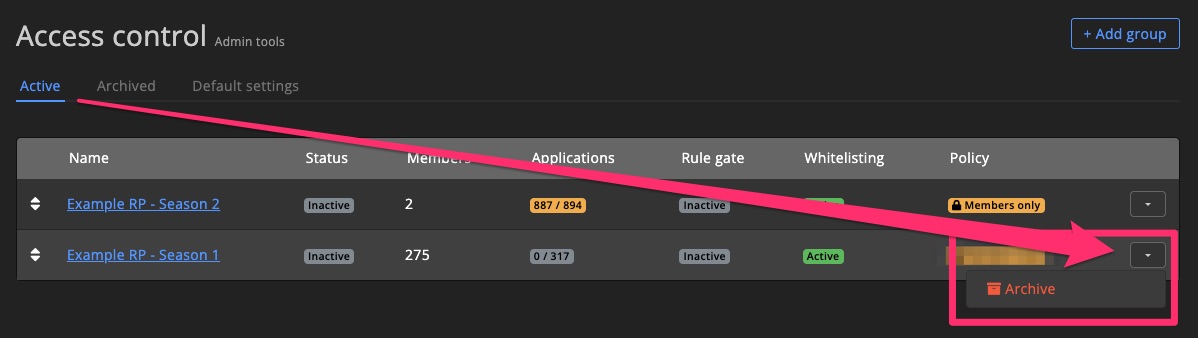
Archive group
Click the Archive button under the dropdown menu to archive a group.
Archived groups are hidden from the Active view but can be found under the Archived tab.
Default settings
The default settings define the fallback policy and kick message.
Click the icon to edit them.
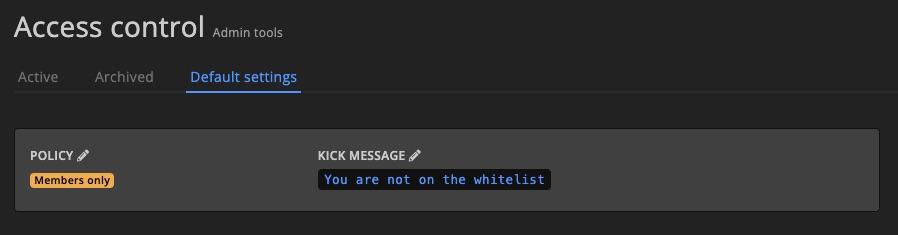
Policy
Two options are available:
Everyone can join: Allows anyone (not banned) to join.Members only: Only members of an Access group may join.
This applies to:
- Servers without a specific Access group
- Groups using the
Use dashboard defaultpolicy
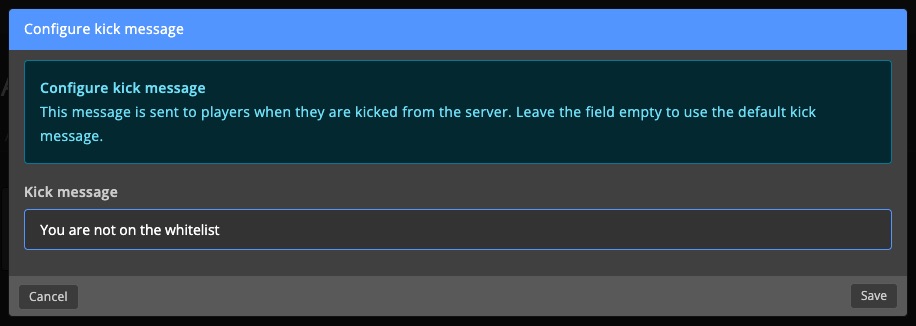
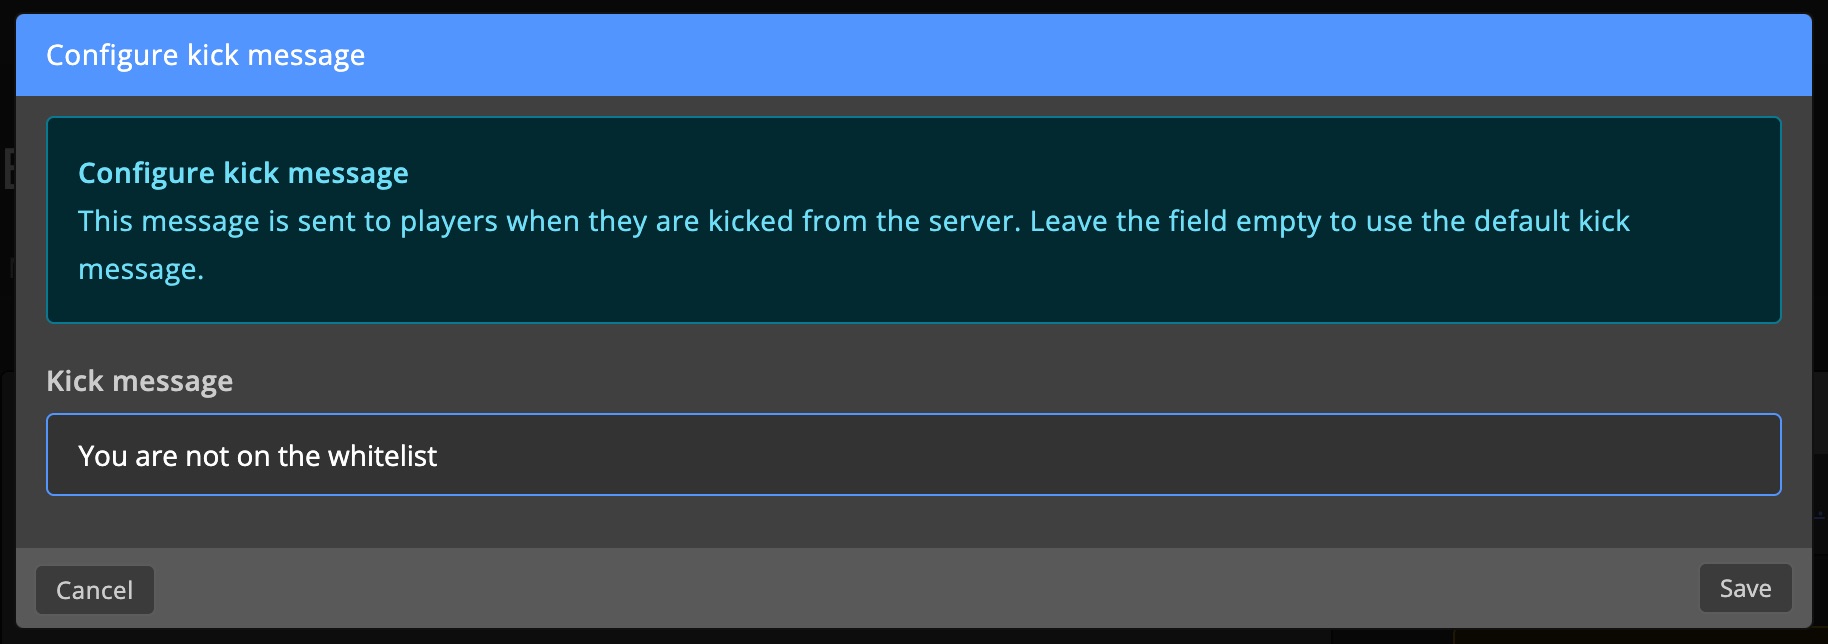
Kick message
Customize the default kick message shown when a player is removed from a server.
If a group has its own message, that message takes precedence.
Members
Players can be added to an Access group manually or automatically via Tasks, Shop packs, Supporter Tiers, Application forms, or Twitch subscriptions.
All players in a group are considered Members.
Search & filters
Search for players and filter members by membership type or Custom Roles.
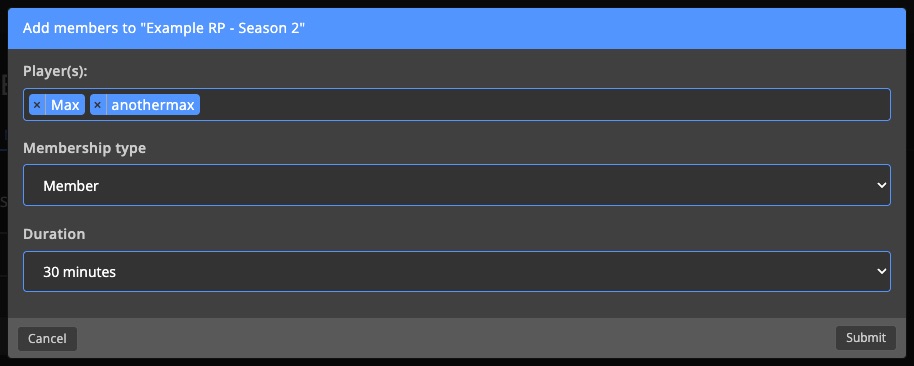
Add member
Click + Add member to add a player manually.

Search for players by name, select one or more, set the membership type and duration, and click Submit.
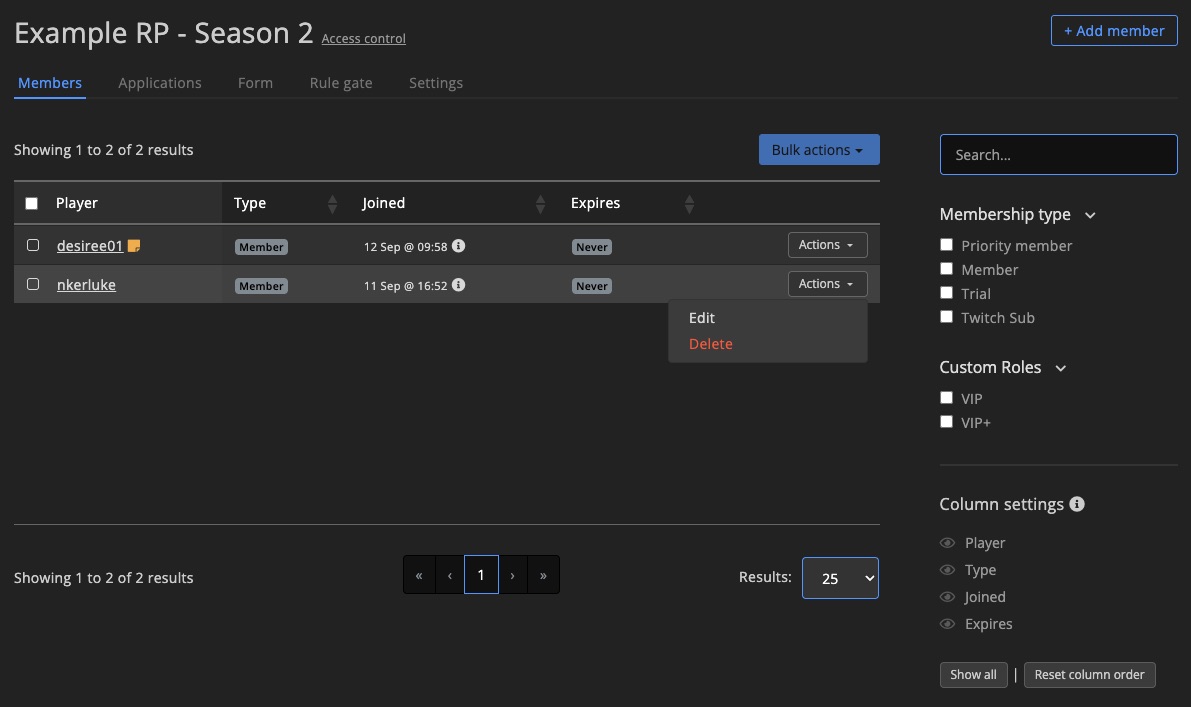
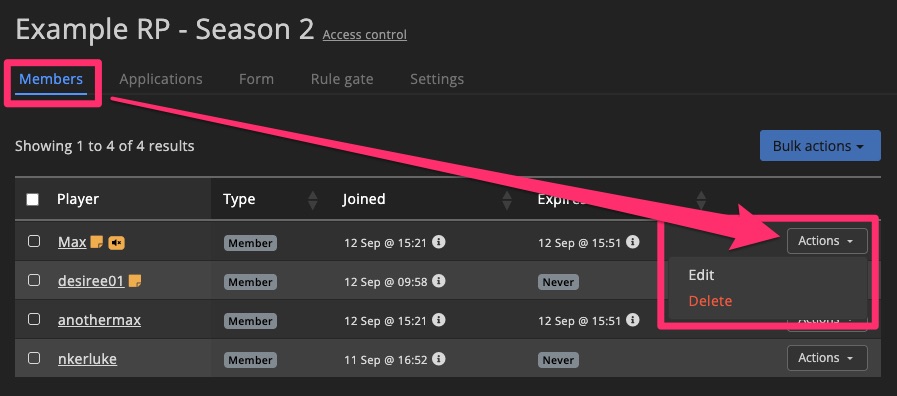
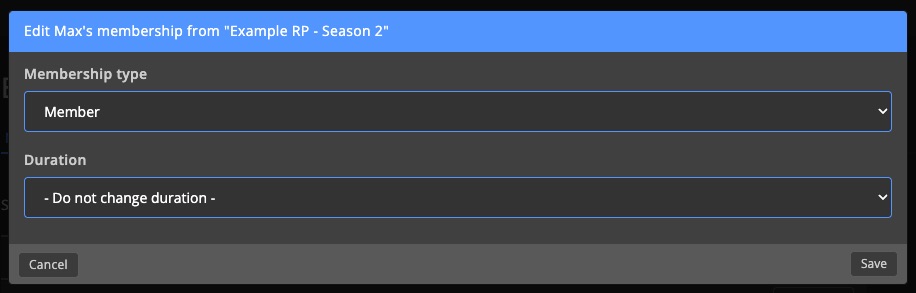
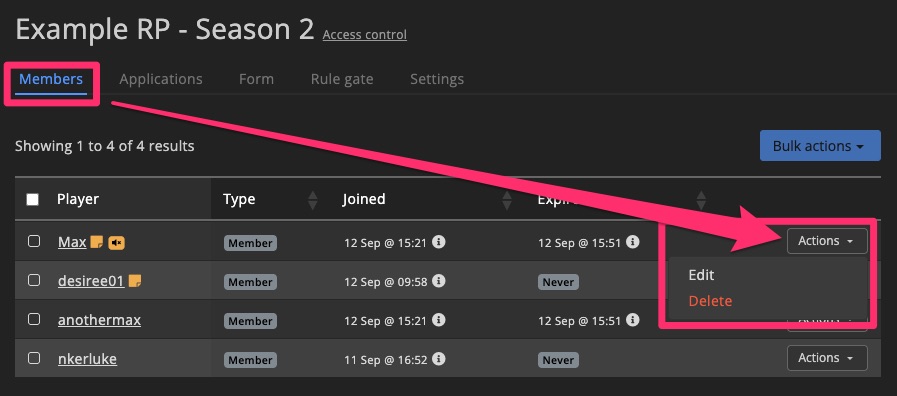
Edit membership
To change a member's type or duration, use the Actions dropdown and select Edit.
Update the details and click Save.
Delete member
Use the Actions dropdown and select Delete to remove a player from the group.
Removing a player from a group does not remove them from the game server or dashboard — only from the Access group.
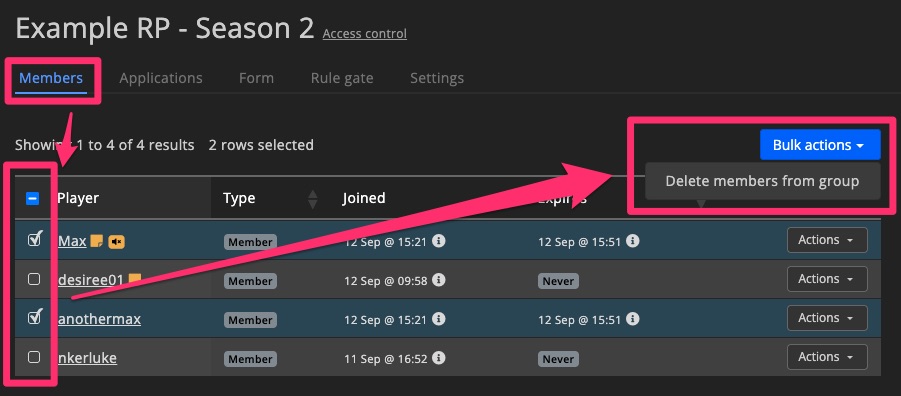
Bulk actions
Select multiple members and click Bulk actions to apply changes to all of them at once.
Membership types
Trial
Players are automatically added as a trial member when joining a Rule-gated server.
During the trial, they're prompted to accept the rules. If they don't, they're kicked when their trial expires.
Member
Approved players with standard access. Ideal for RP communities or similar setups.
Priority Member
Functions the same as Member for now. May be used for priority queueing later.
Twitch subscribers
Subscribers are automatically added to the group and removed when the sub expires. See Twitch subs for more details.
Membership duration
Set how long a membership lasts. After the set time, the player is removed from the group.
Set to Never to make it permanent.
Rule gate
Tired of players ignoring your rules?
Rule gate requires them to accept the rules before continuing.
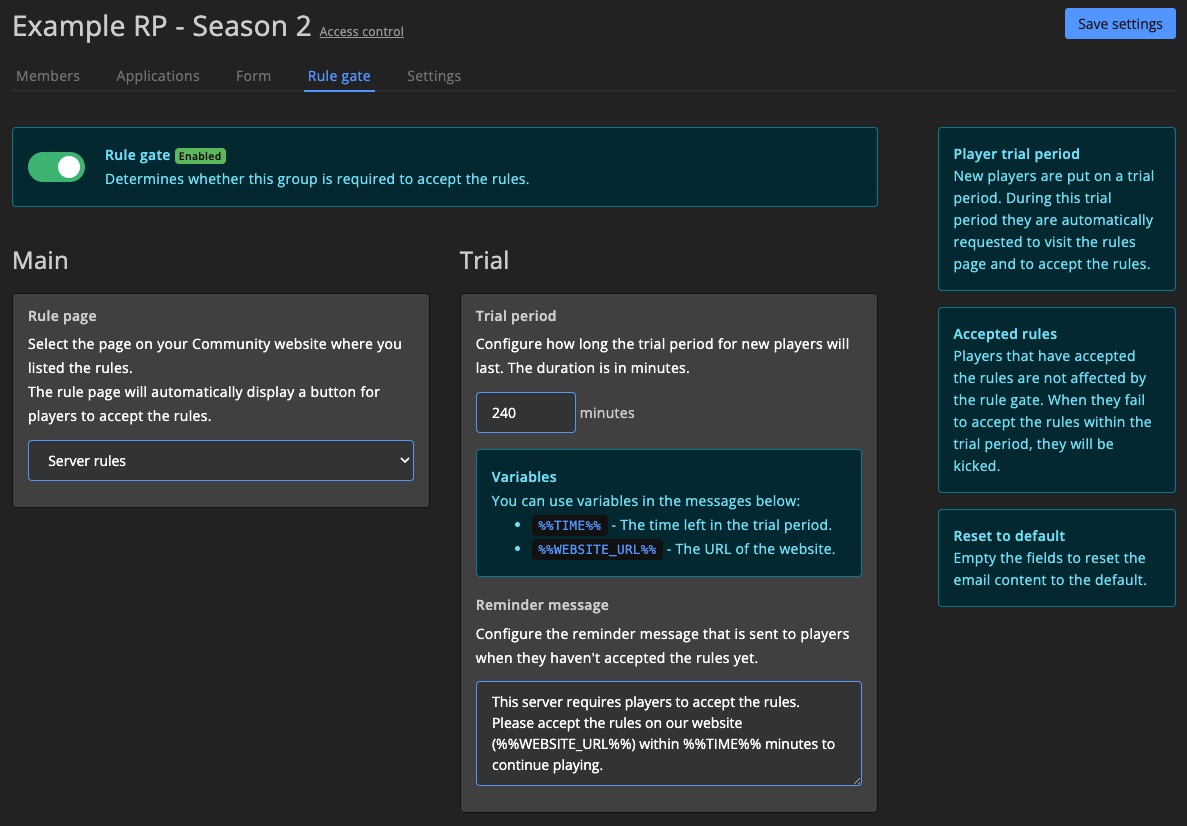
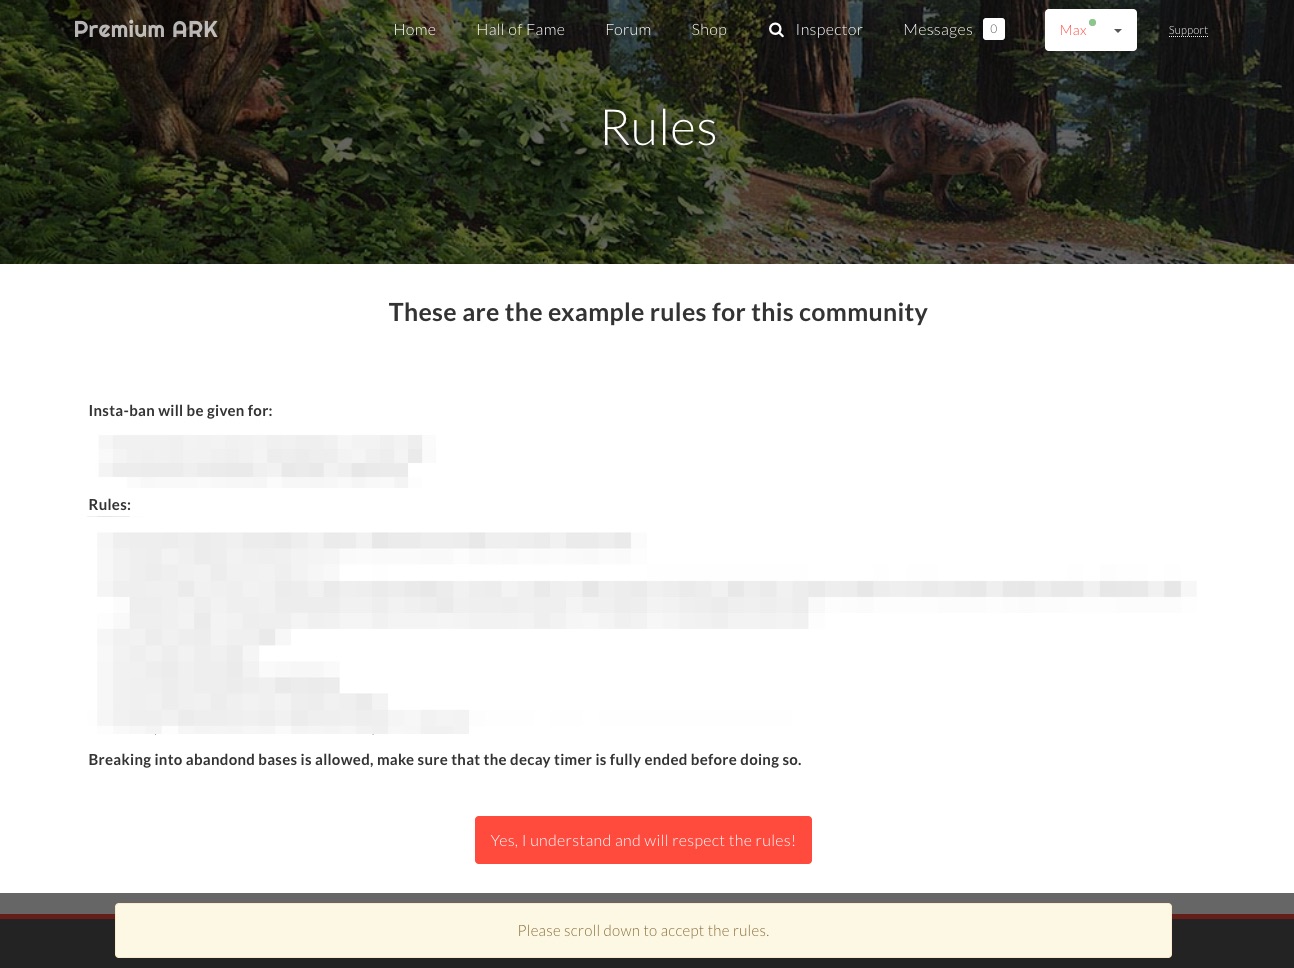
Rule page
Choose a page on your Community site that contains your rules.
This page will automatically include an Accept rules button.
Once accepted, the membership type changes from trial to member.
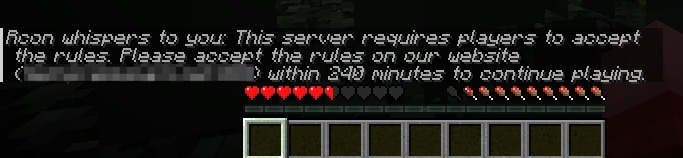
Trial period
New players are added as trial members when joining a Rule-gated server.
Set a custom trial period per group.
During the trial, players are reminded to visit your website and accept the rules.
You can configure the reminder message using variables:
Variables:
%%TIME%%— remaining time in minutes%%WEBSITE_URL%%— your website URL
Only applies to servers linked to a Rule-gated group. Other servers are unaffected.
Form
Use Access group forms when players need to apply before joining.
Each group can have its own form and settings.
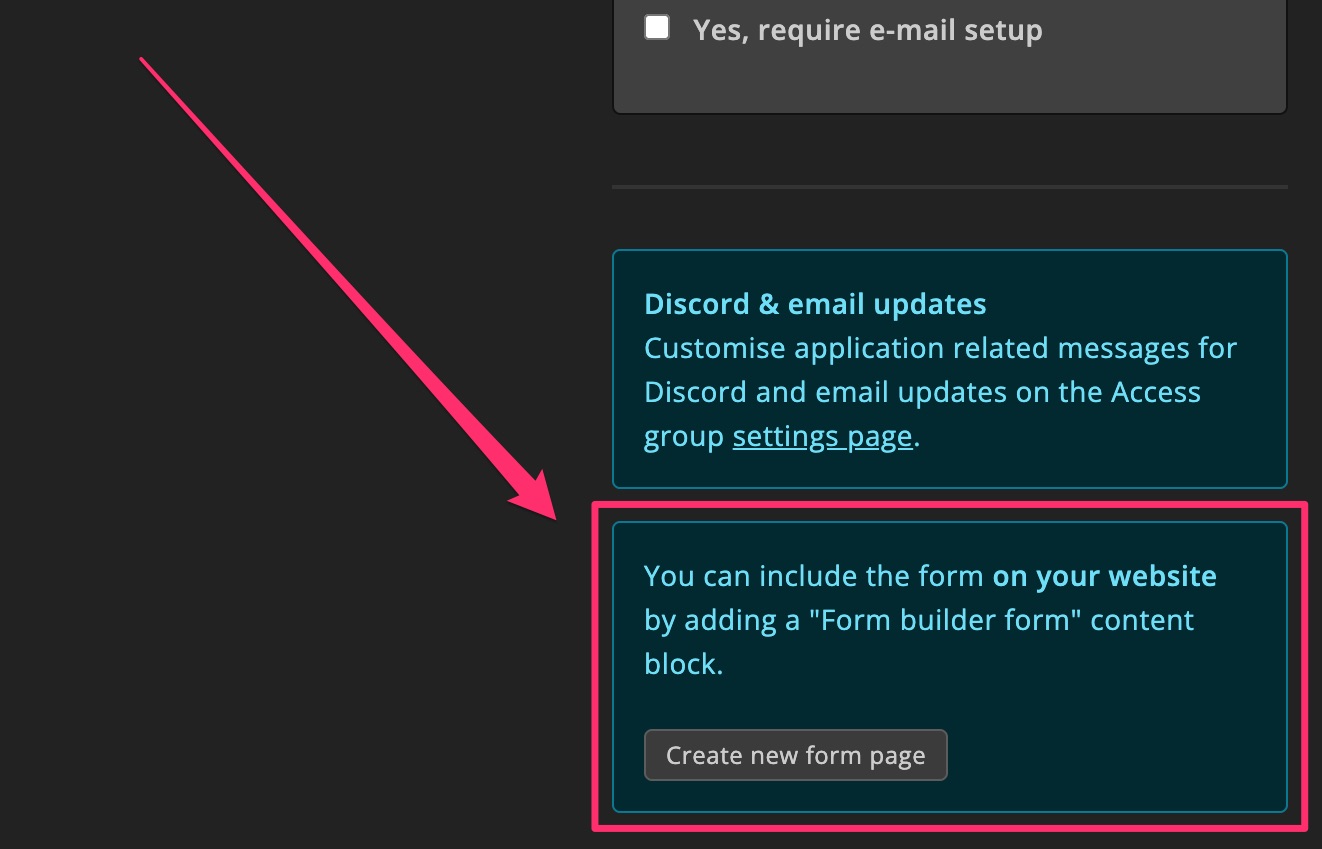
Form builder
If you're familiar with Forms, you already know how to use the Form builder.
After creating a form, use Create new form page in the form settings to automatically add it to your Community website.
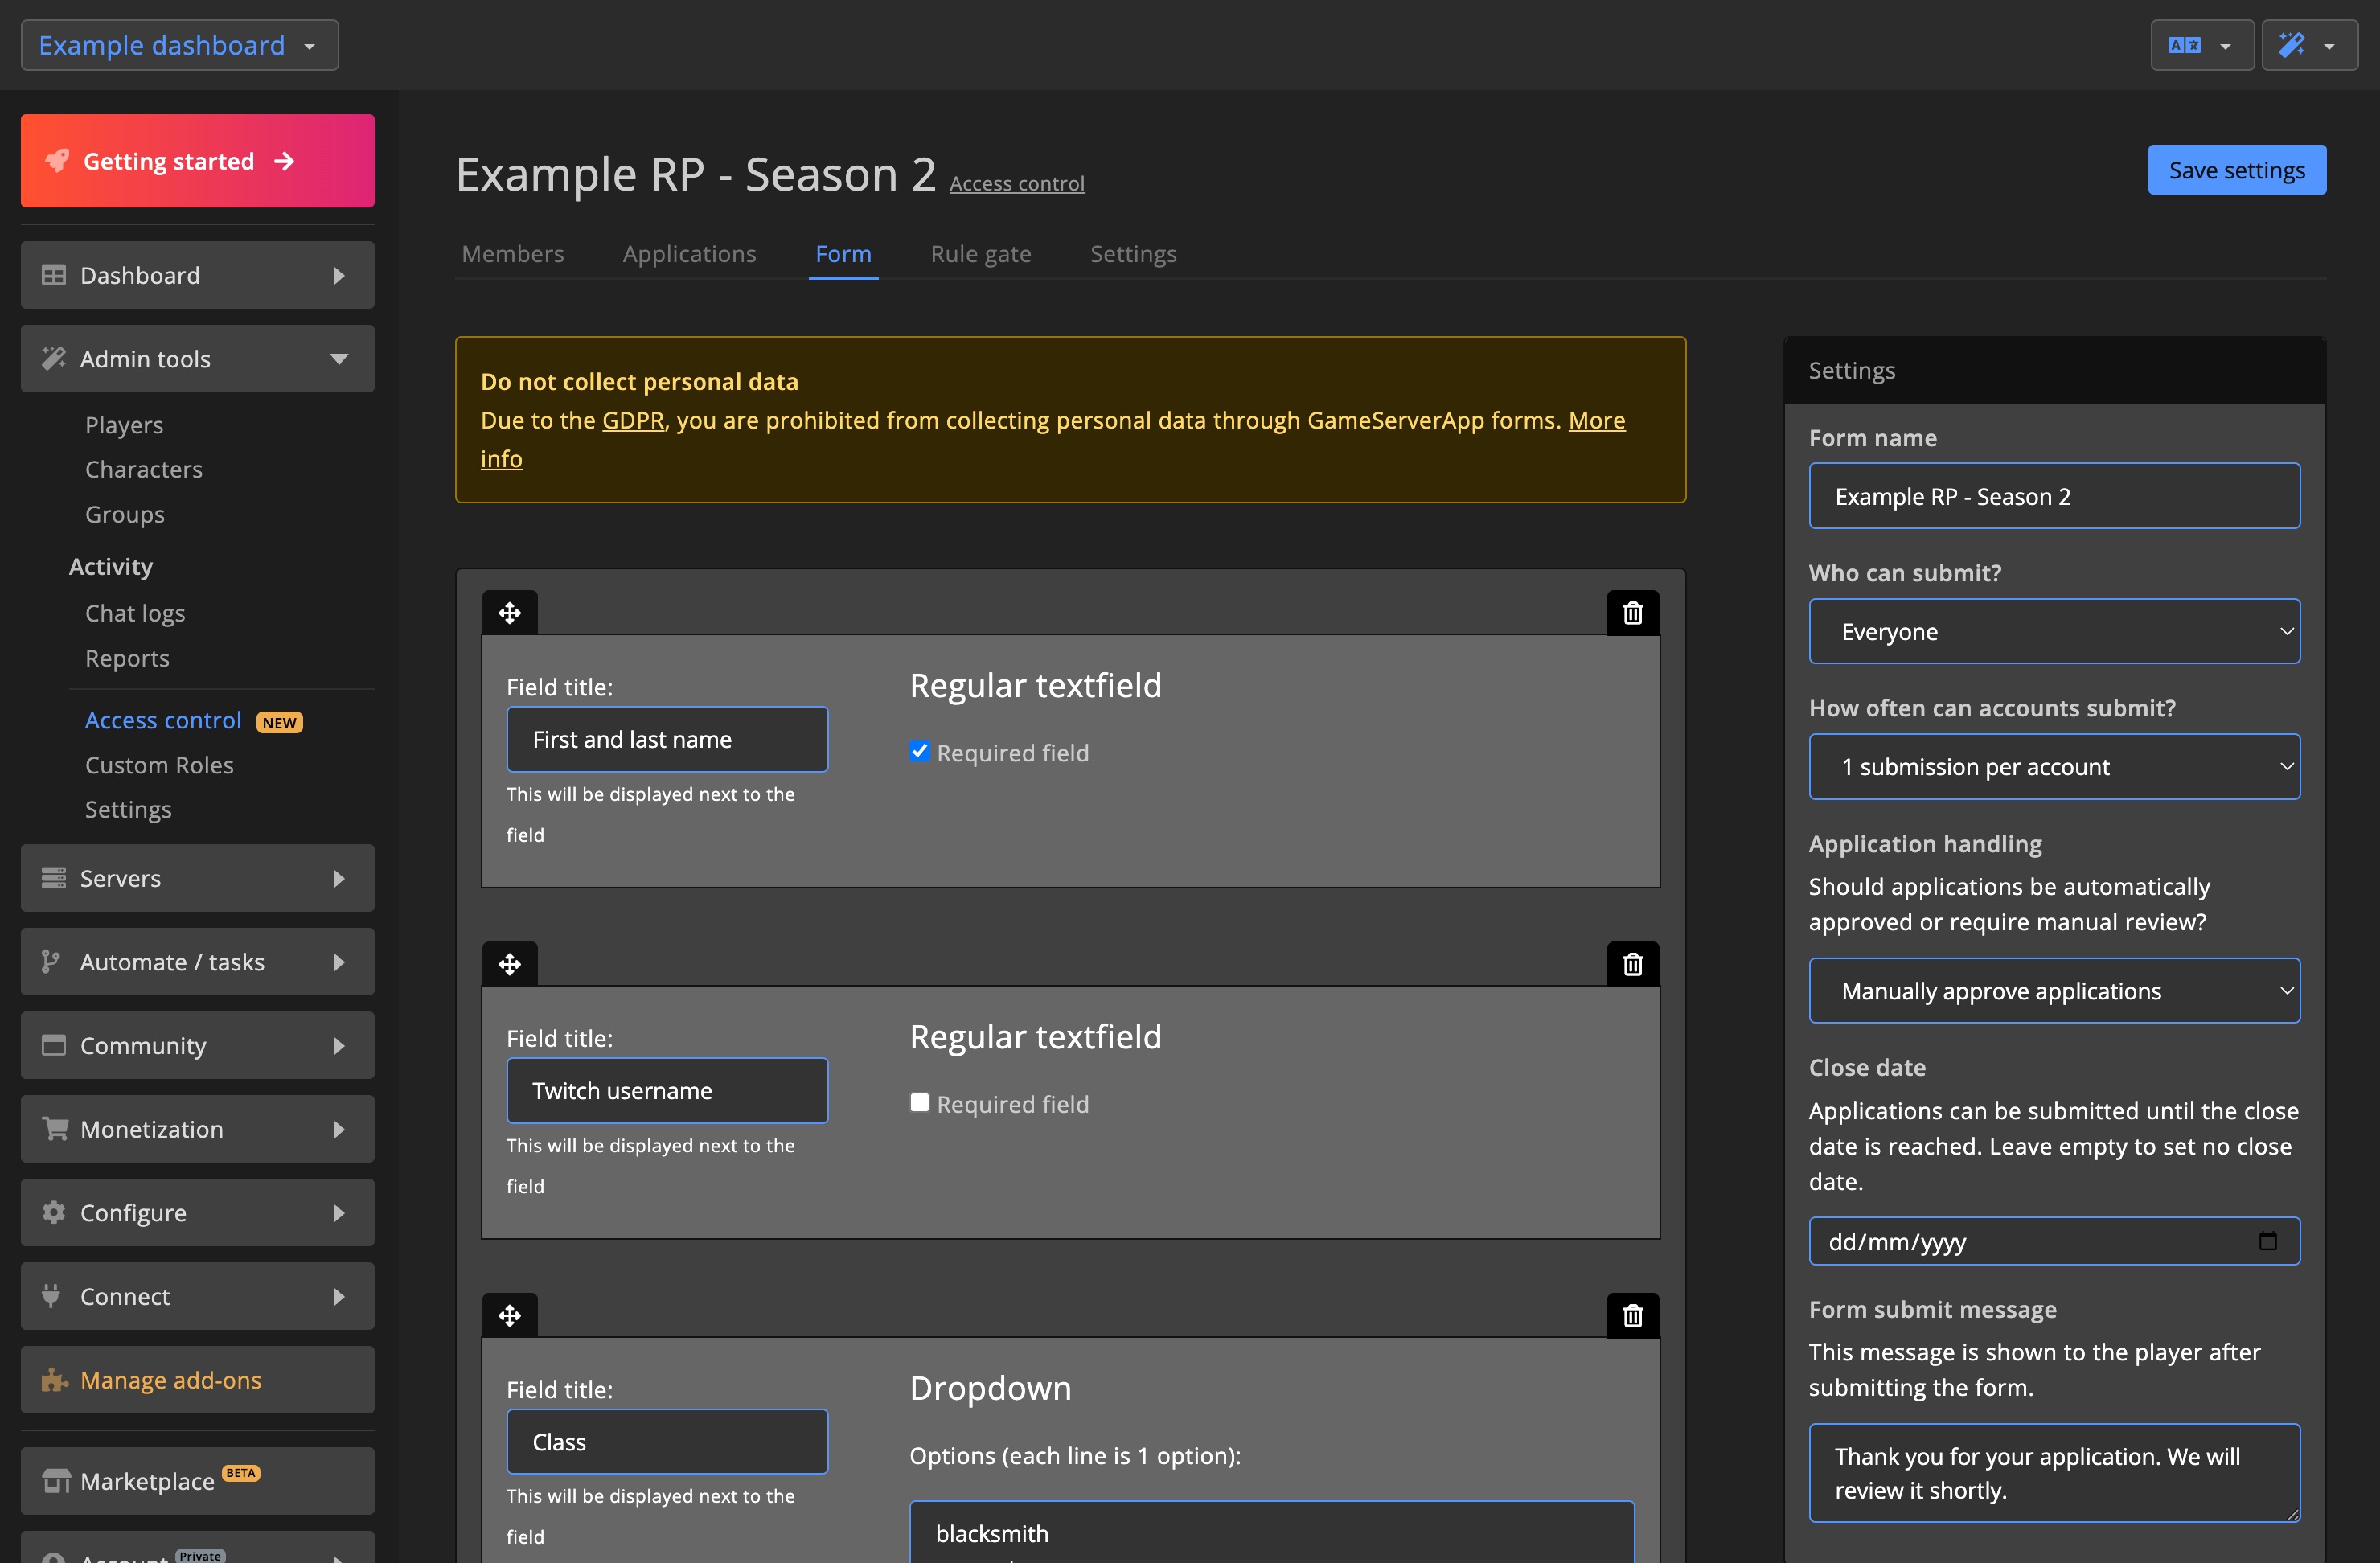
Form settings
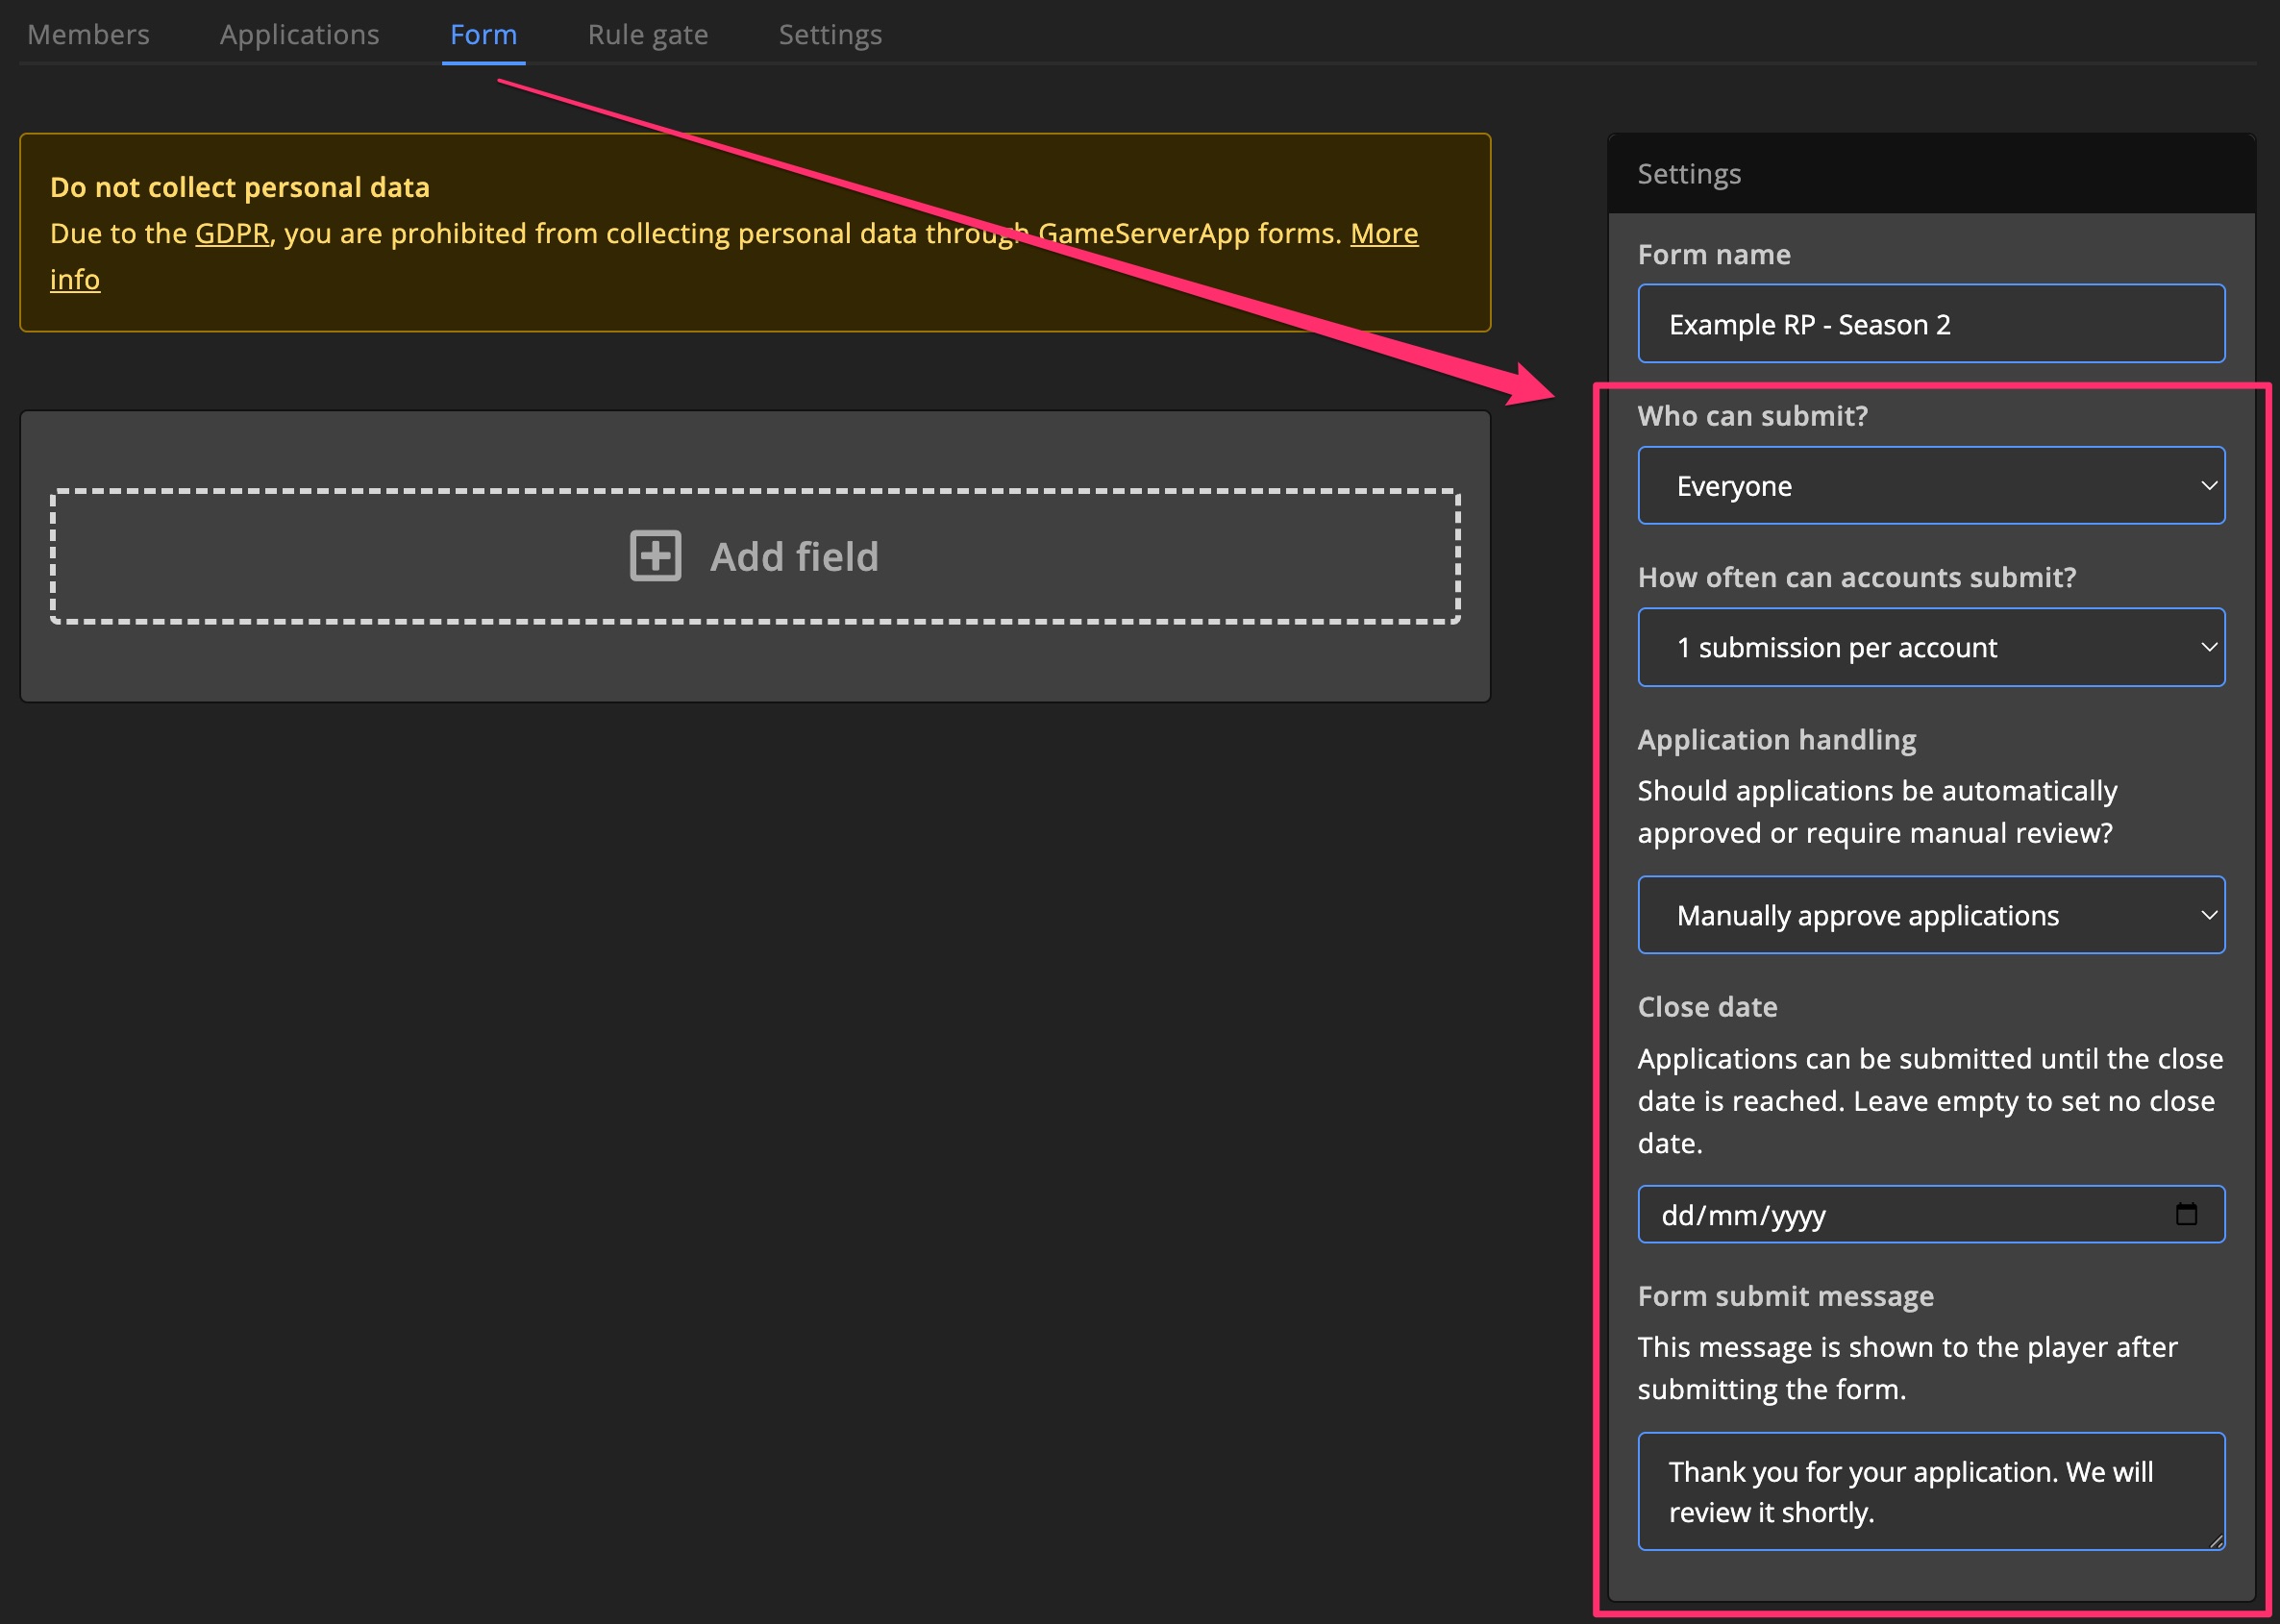
Who can submit
Choose who can submit the form:
EveryoneOnly accounts with characters
Submission limits
Set how many times a player can submit:
Unlimited1 submission per account
Application handling
Choose how applications are handled:
Manually approve applicationsAutomatic approval
Close date
Set a date to disable the form.
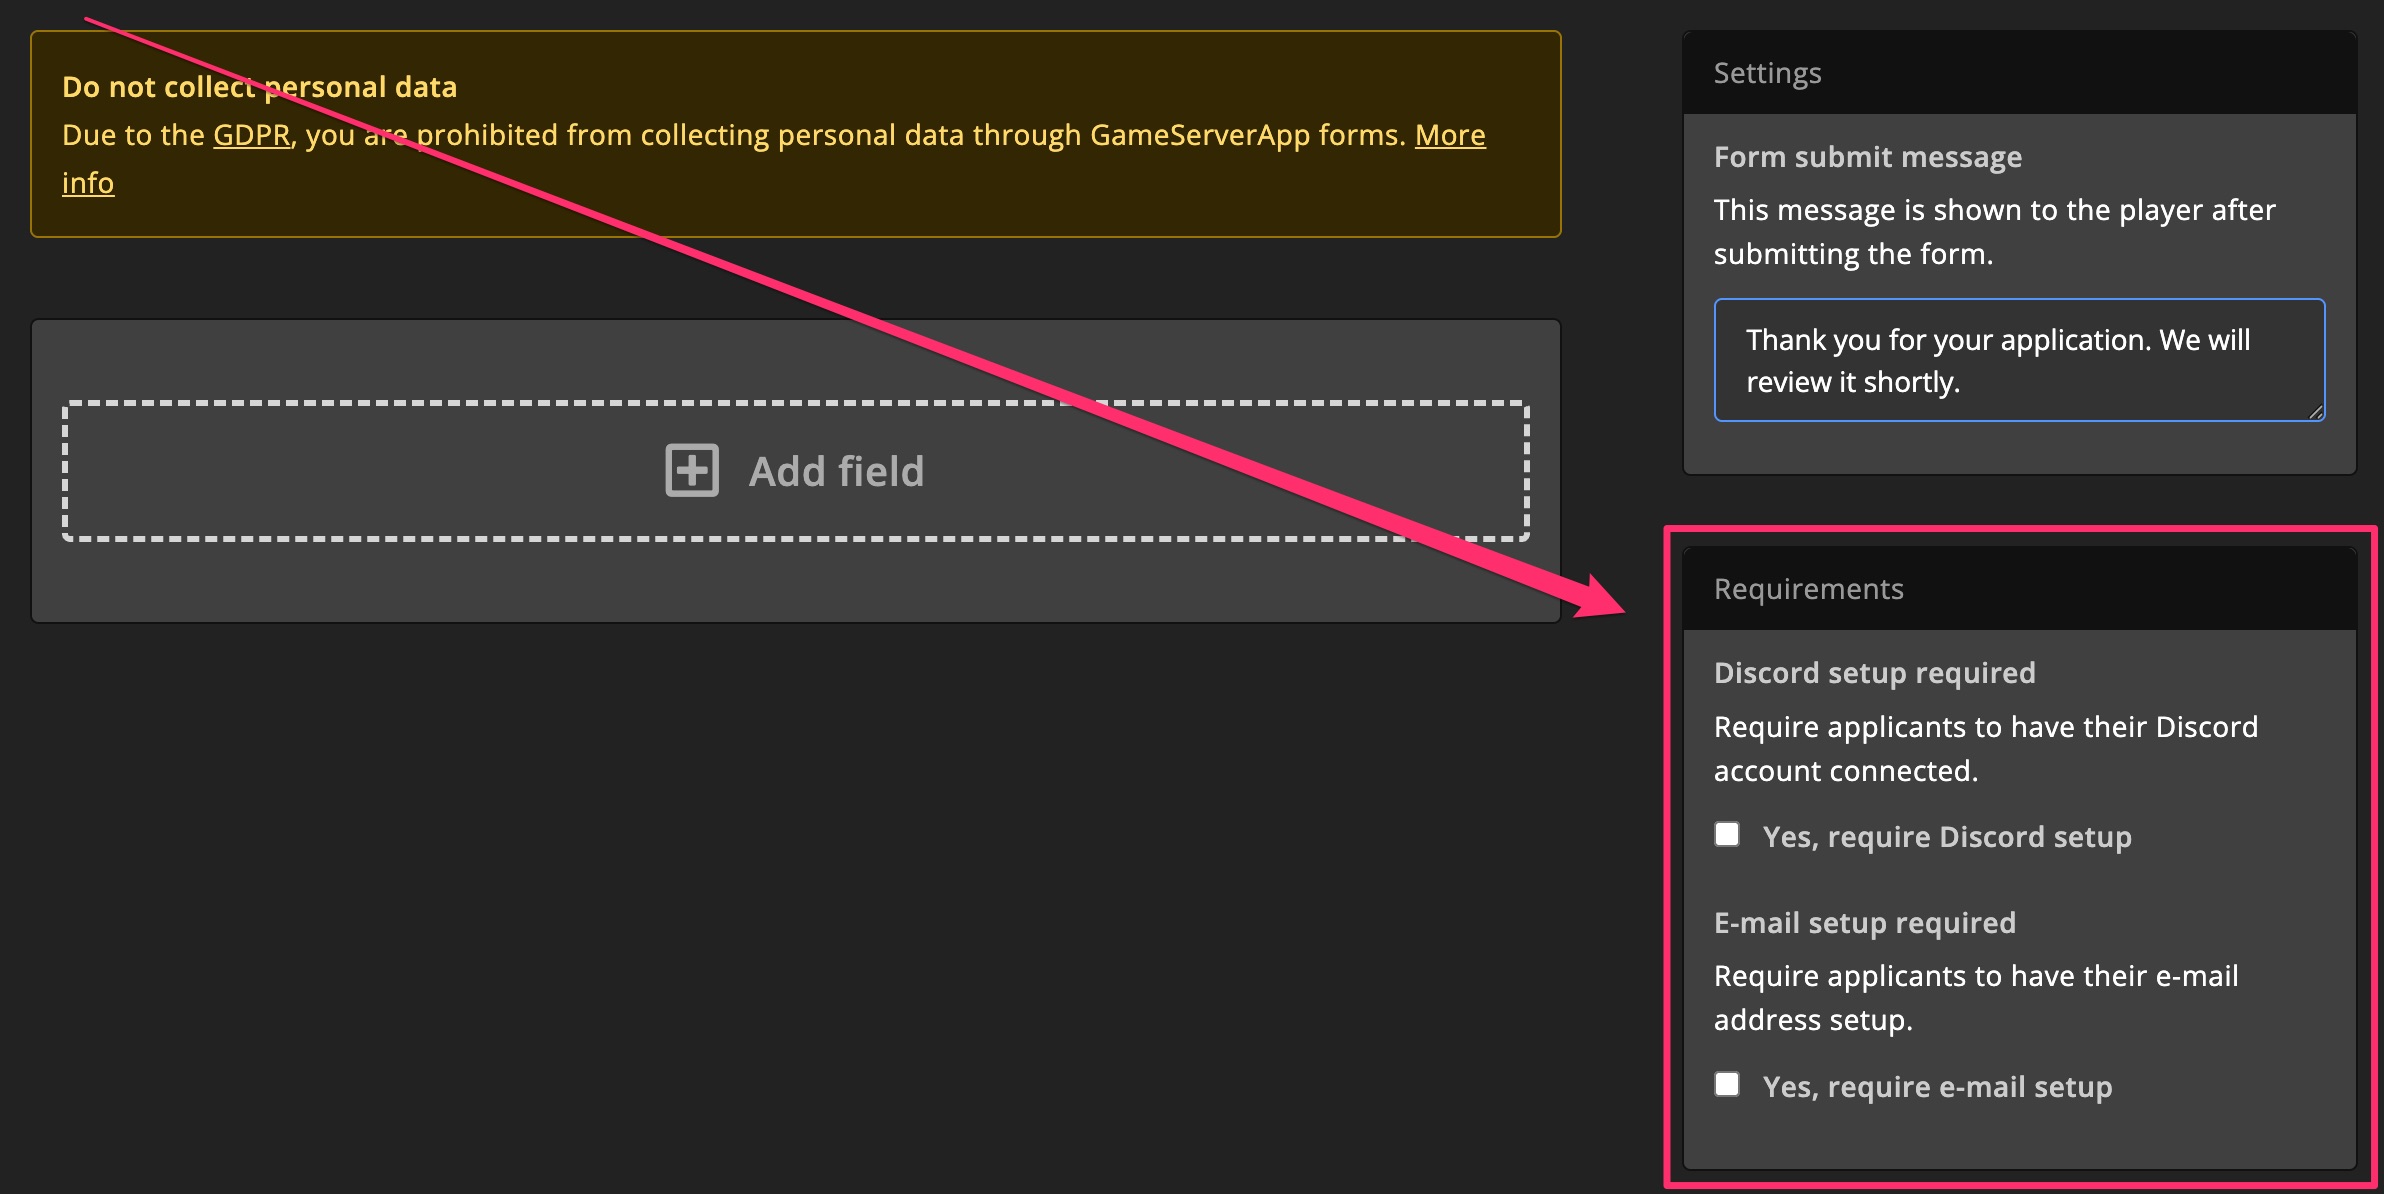
Form submit message
Message shown after form submission.
Form requirements
Require players to meet certain conditions before submitting.
For example, linking their Discord or email address.
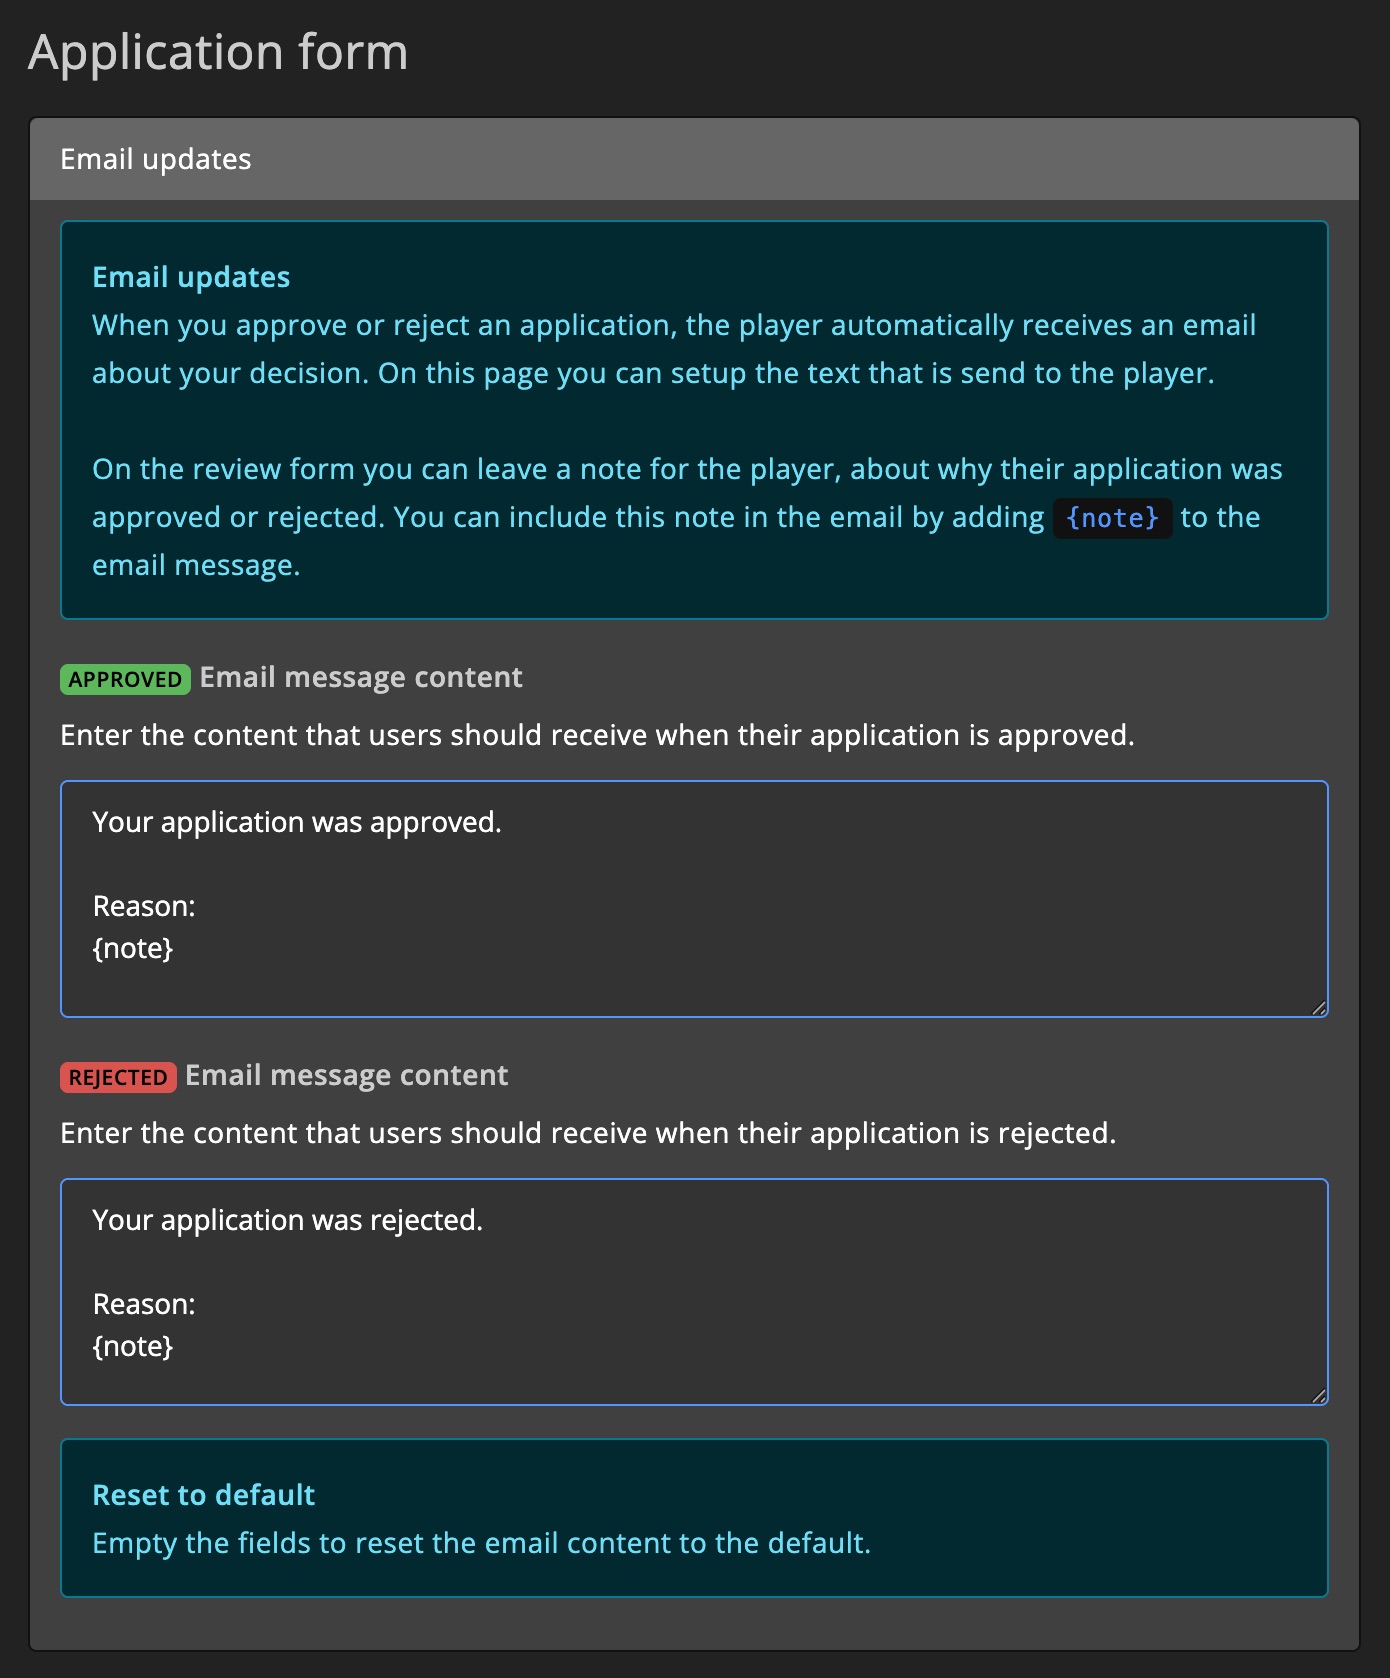
Players with an email address receive notifications when their application is approved or rejected.
Customize these messages in Access group settings.
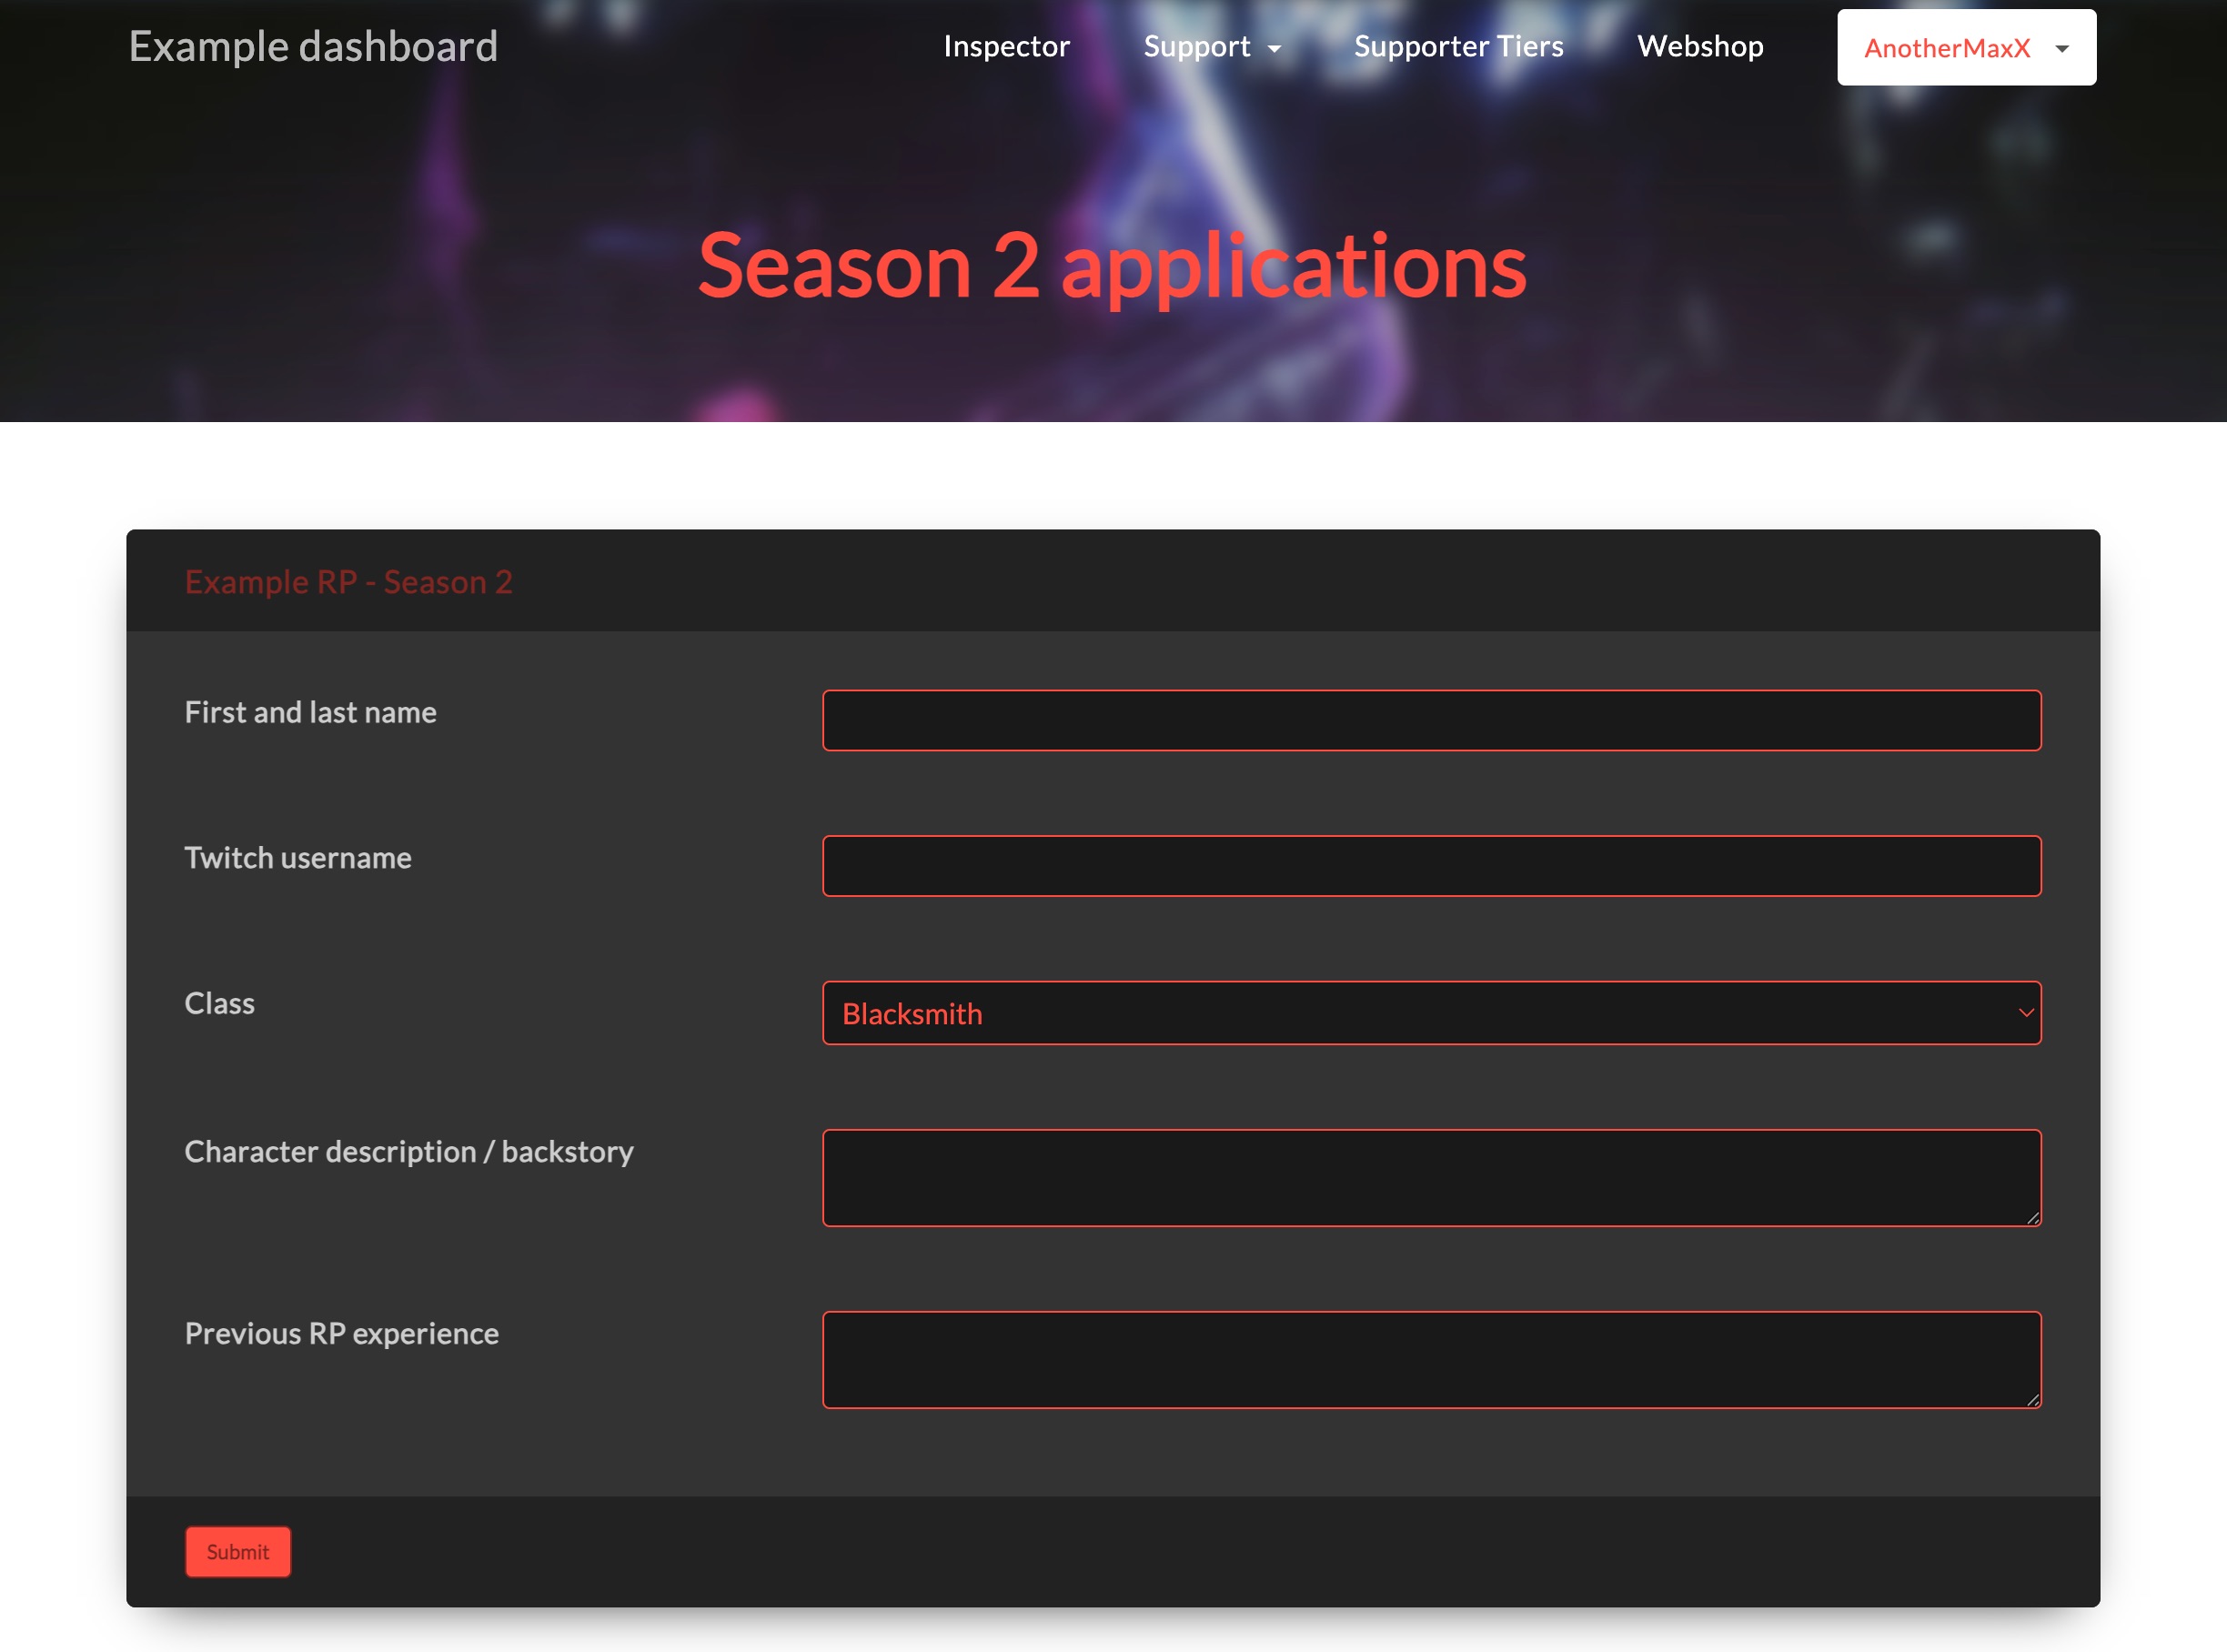
Example
Applications
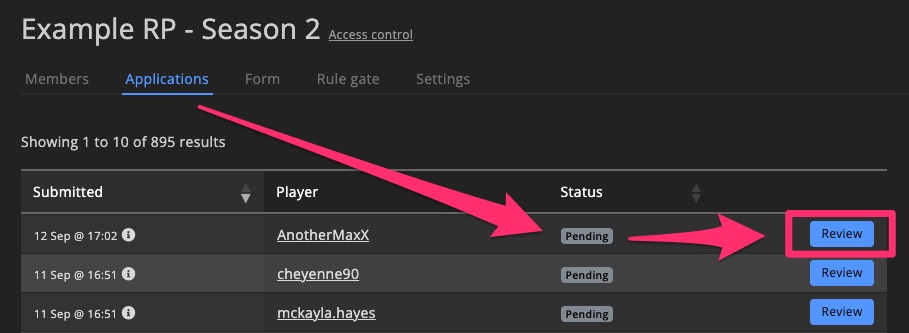
After submission, you can review applications on the Applications tab.
Filter by status or search for players.
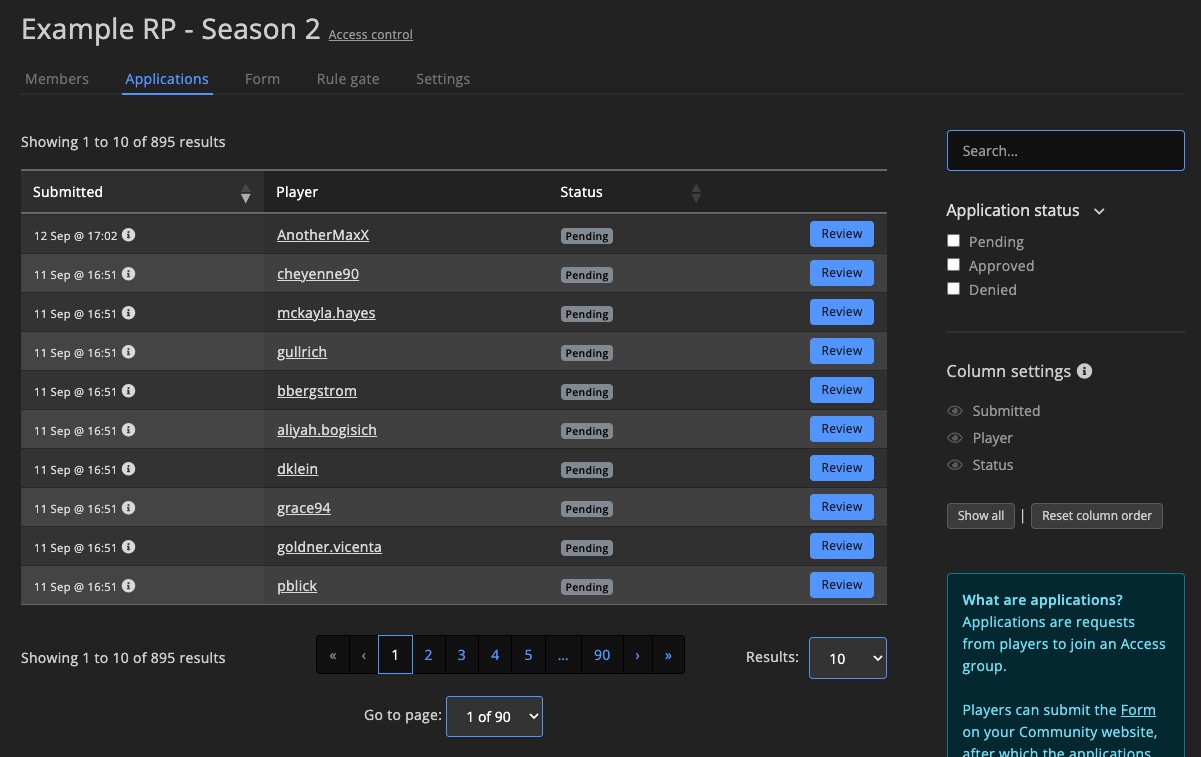
Review applications
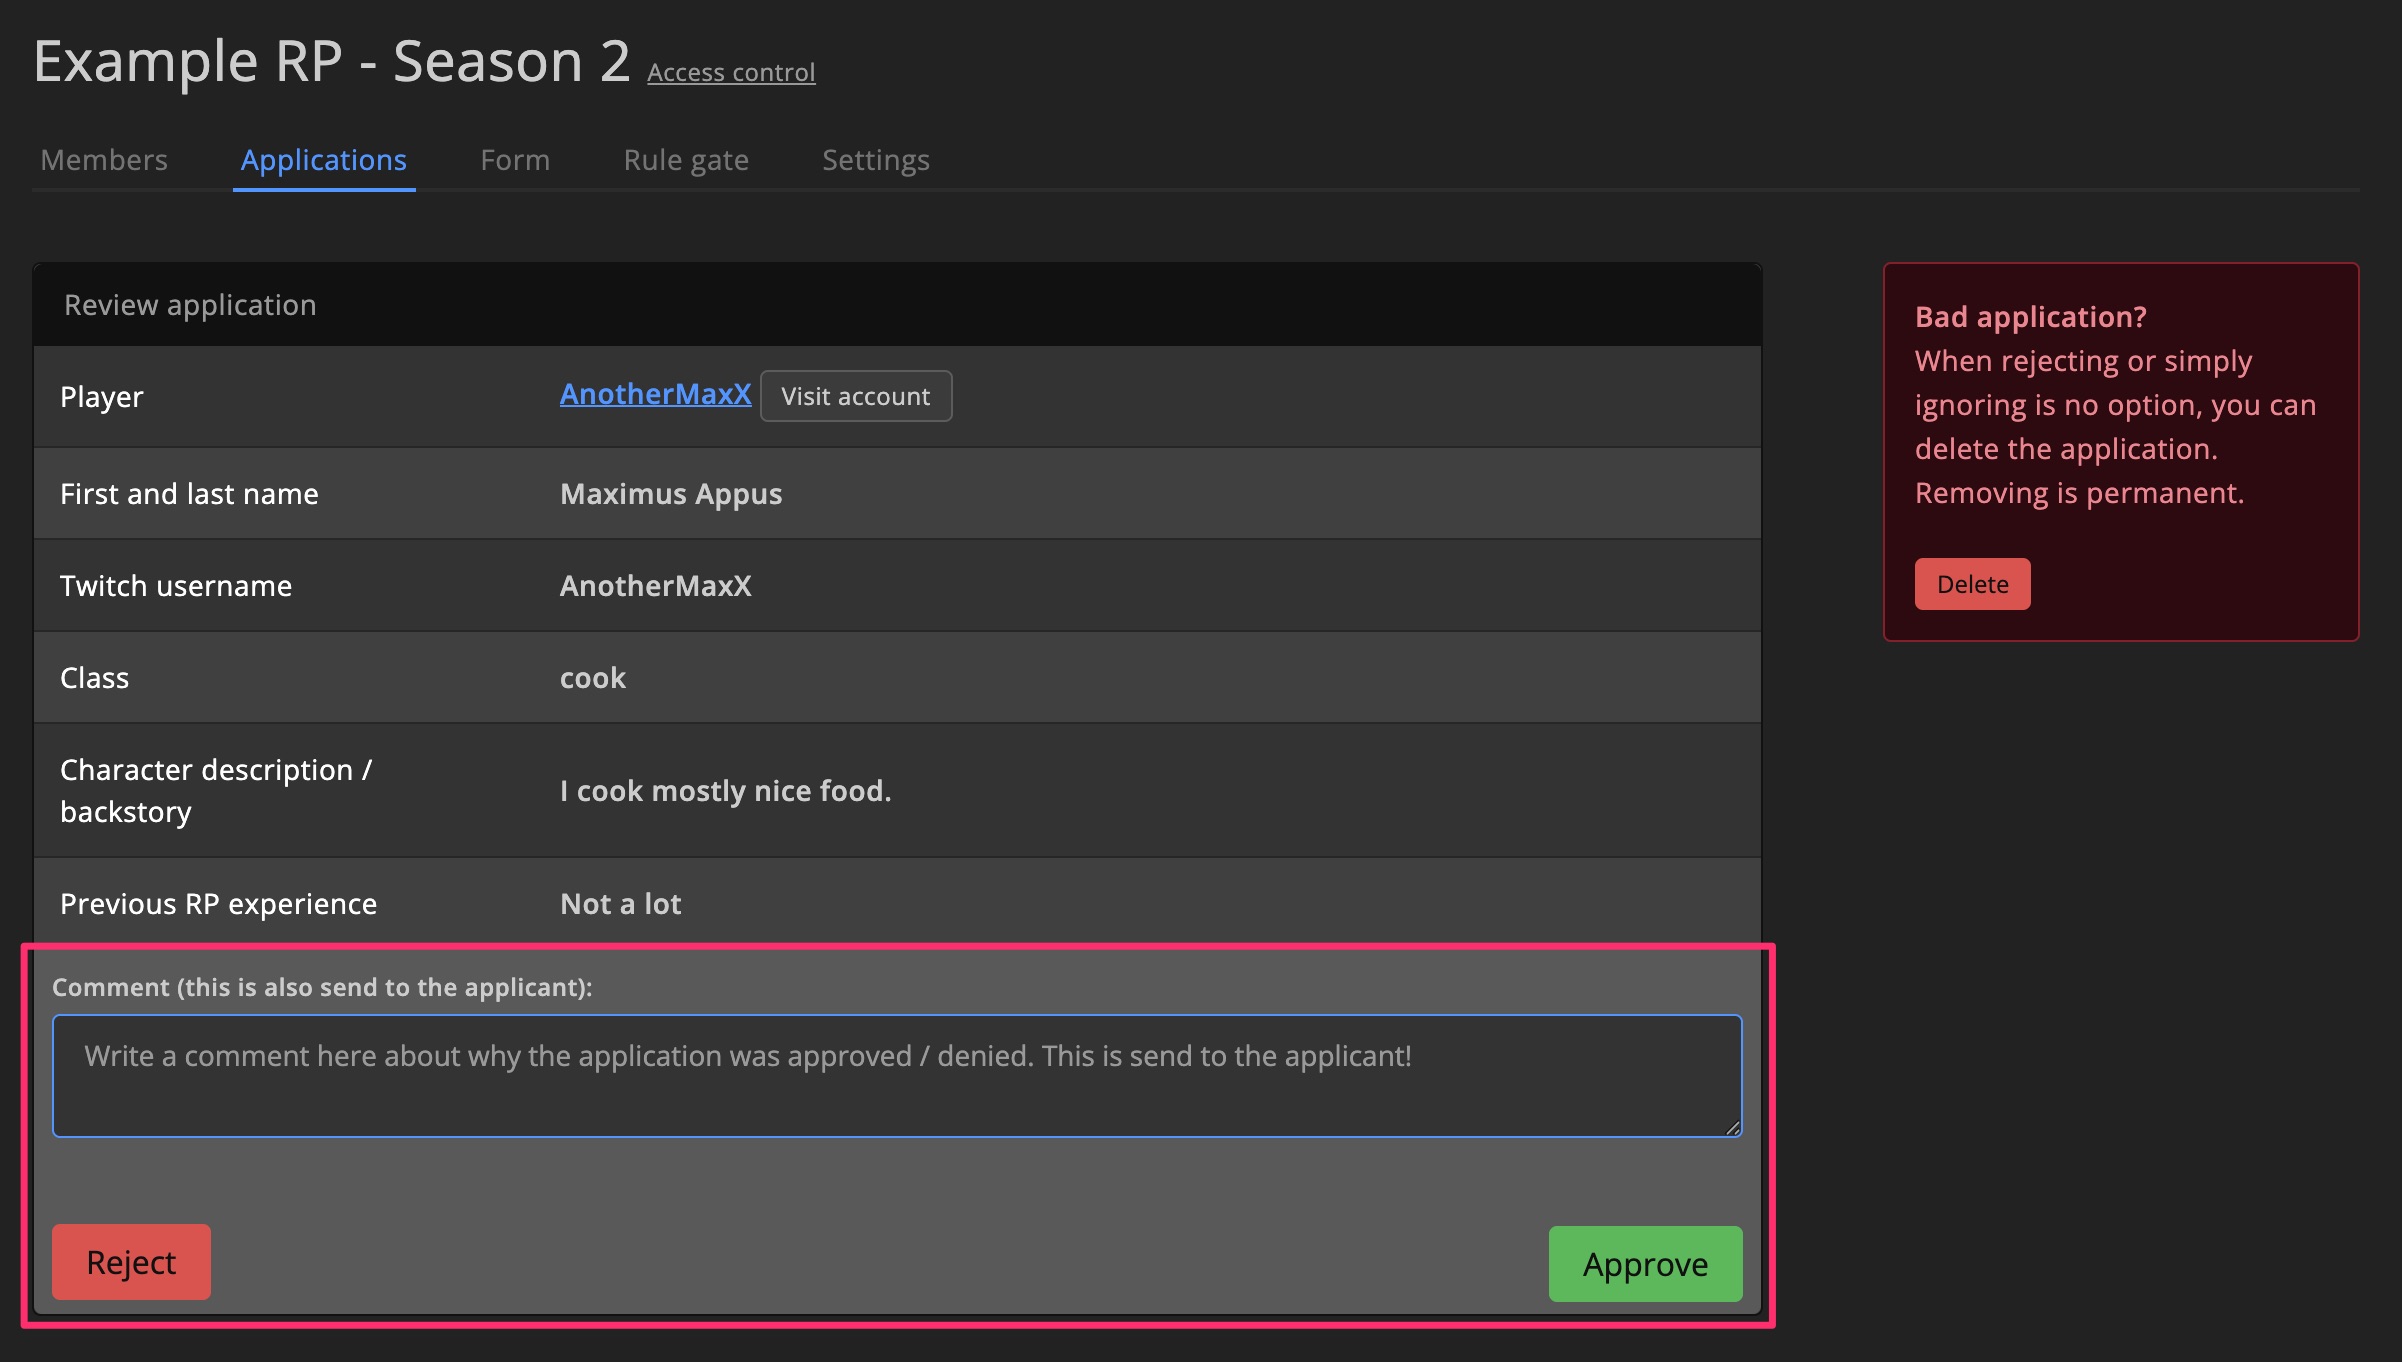
Click Review to open an application.
Add a note (included in the email), then click Approve or Reject.
Use Delete to remove invalid submissions. This also lets the player resubmit if restrictions apply.
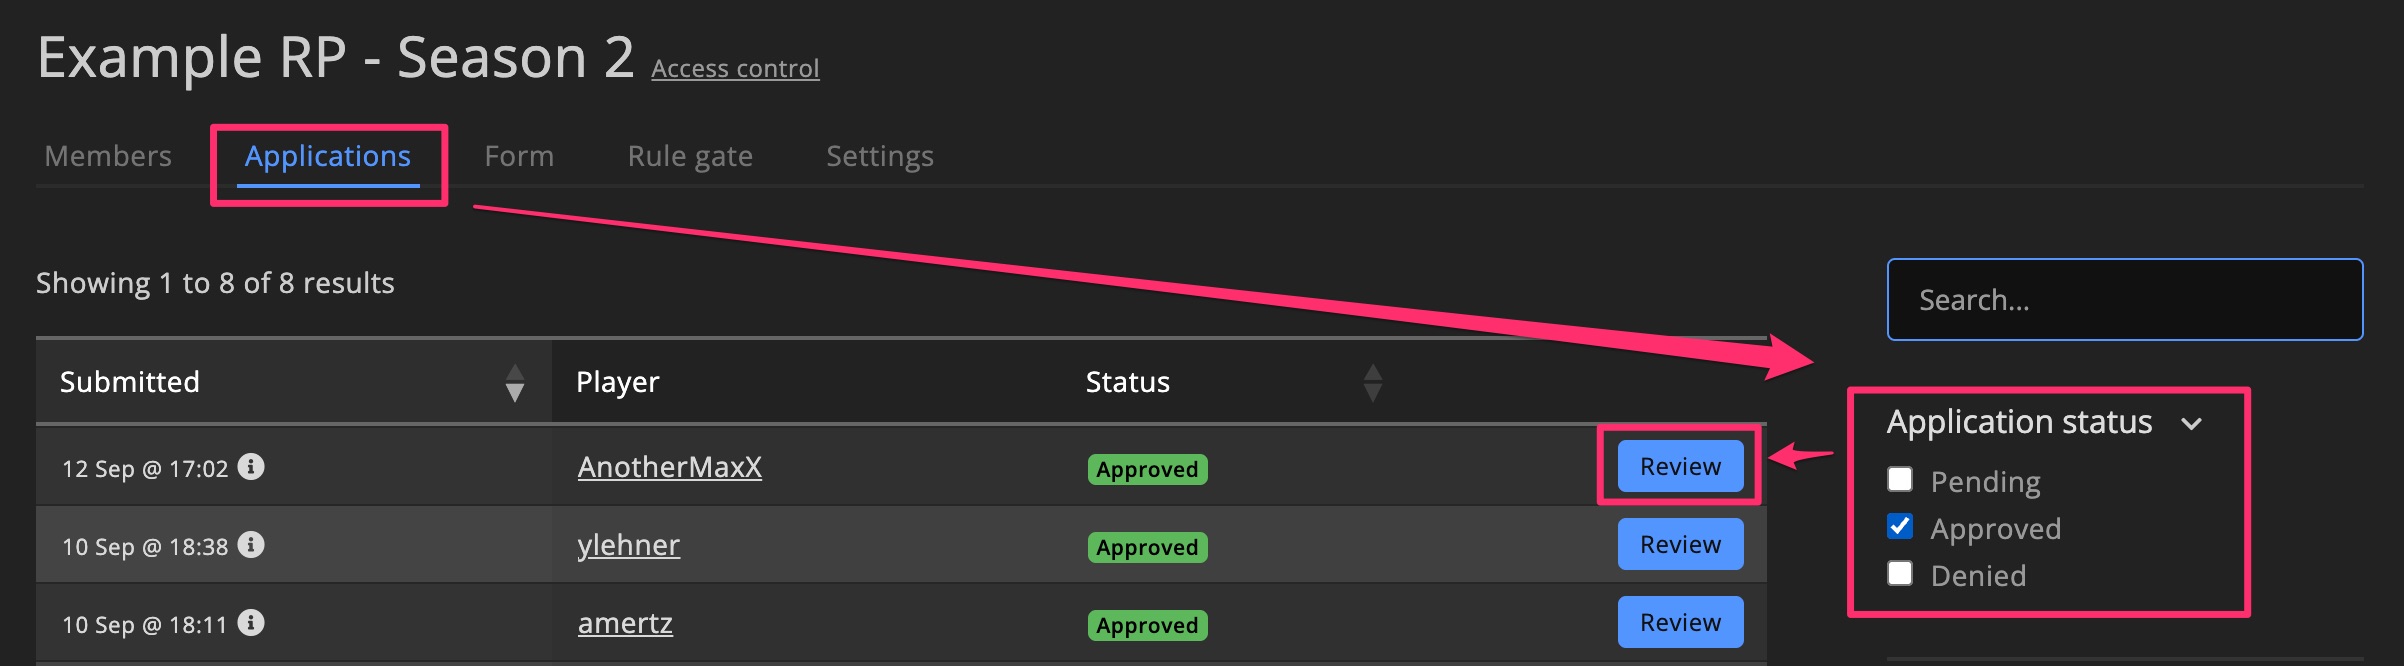
Processed applications
Reviewed applications are labeled Approved or Rejected.
You can filter by status or search by player.
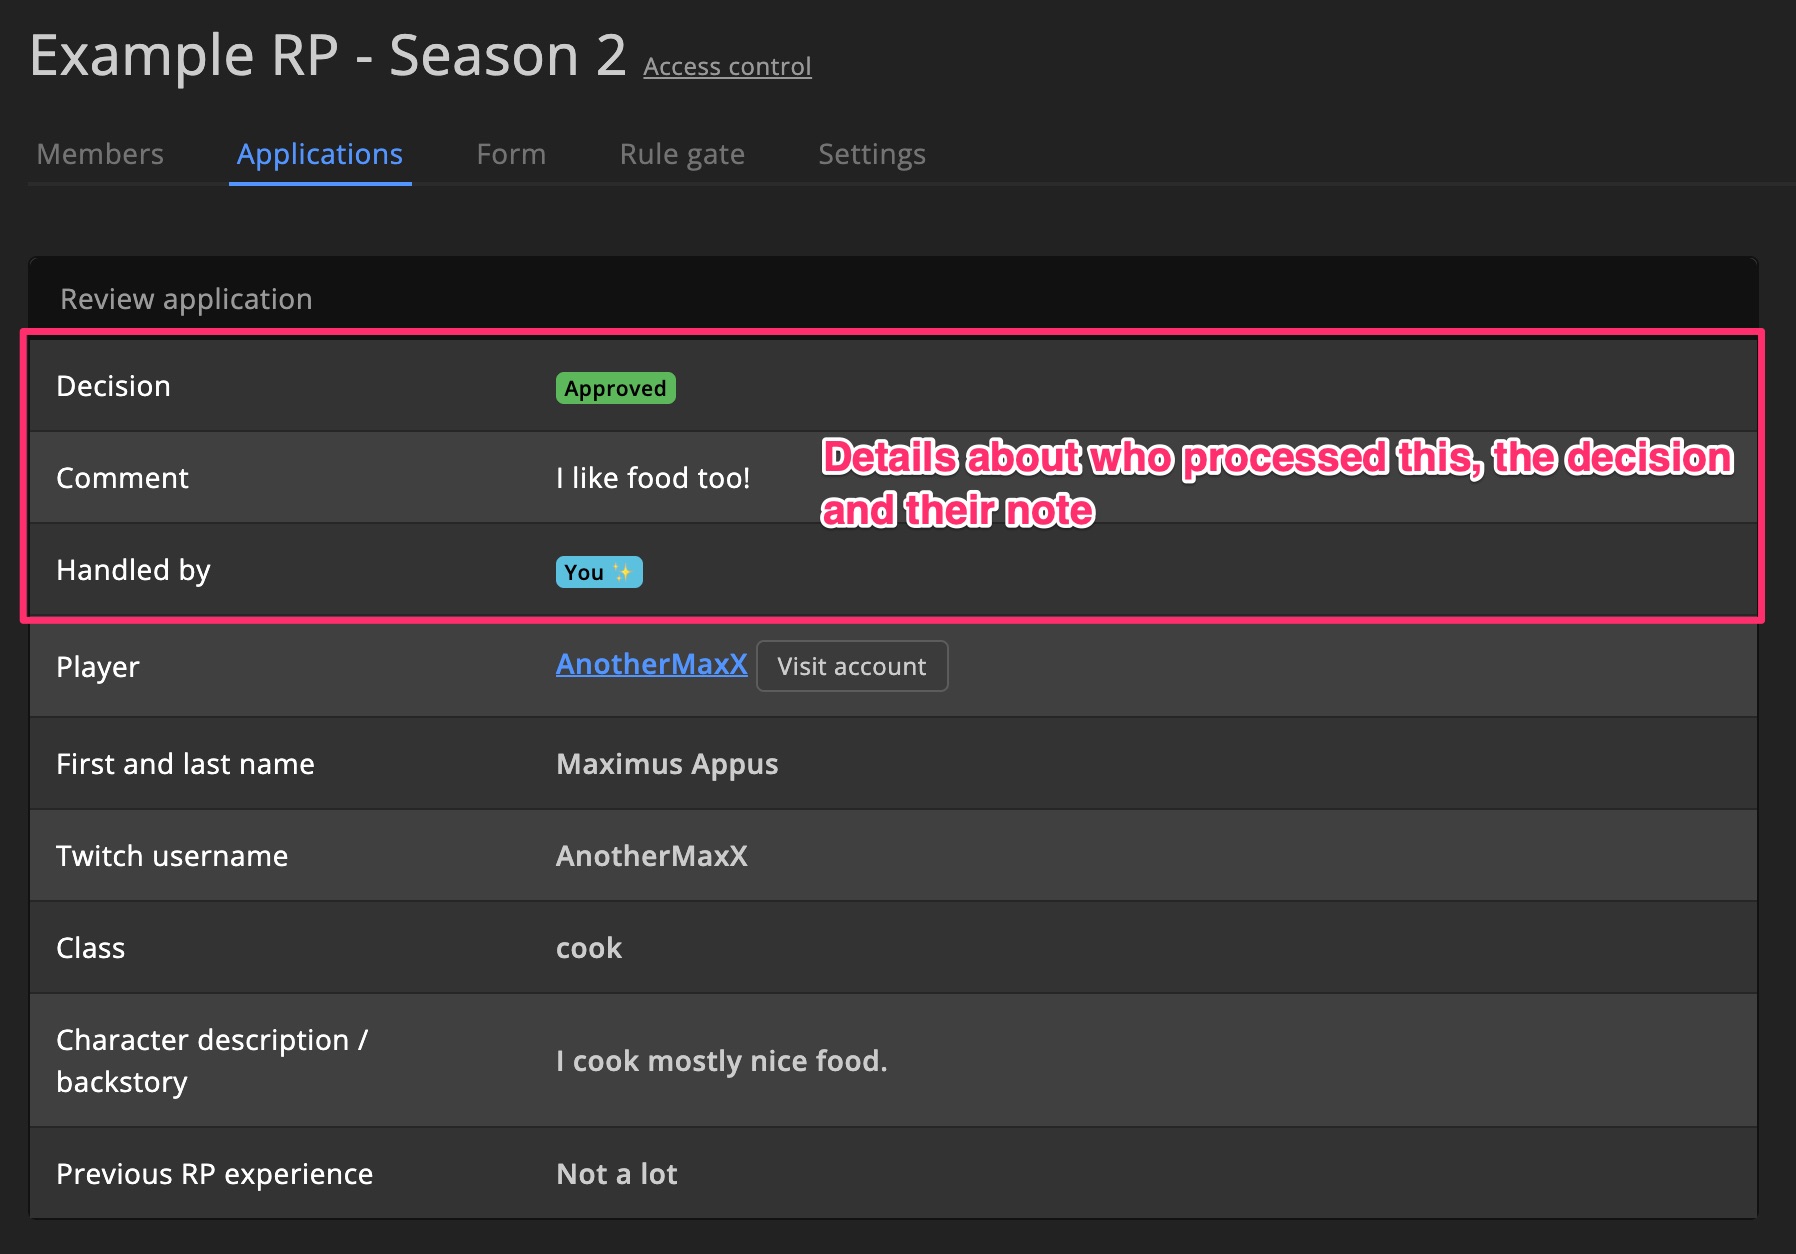
You can also view who reviewed it and their decision/note.
Resources
Access groups can be applied to specific game servers or clusters. These are called Resources.
A server/cluster can be linked to multiple groups. The group order determines which one applies first.
Manage Resources in the Settings tab.
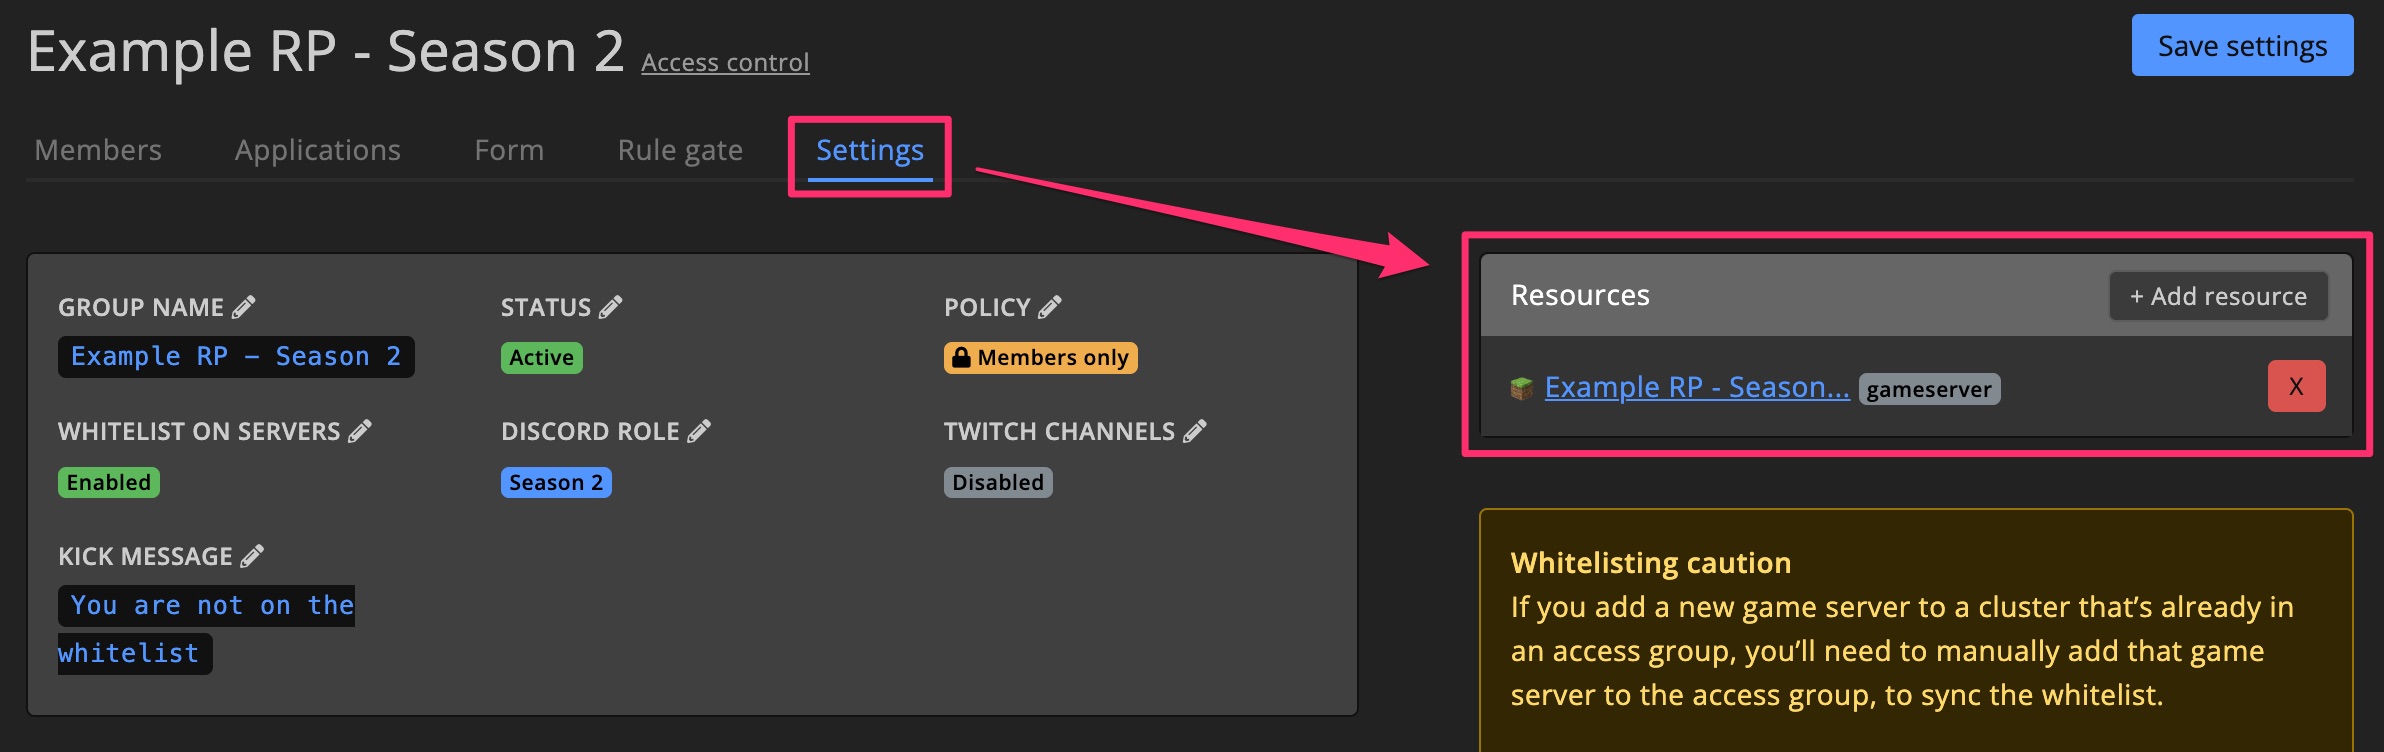
Settings
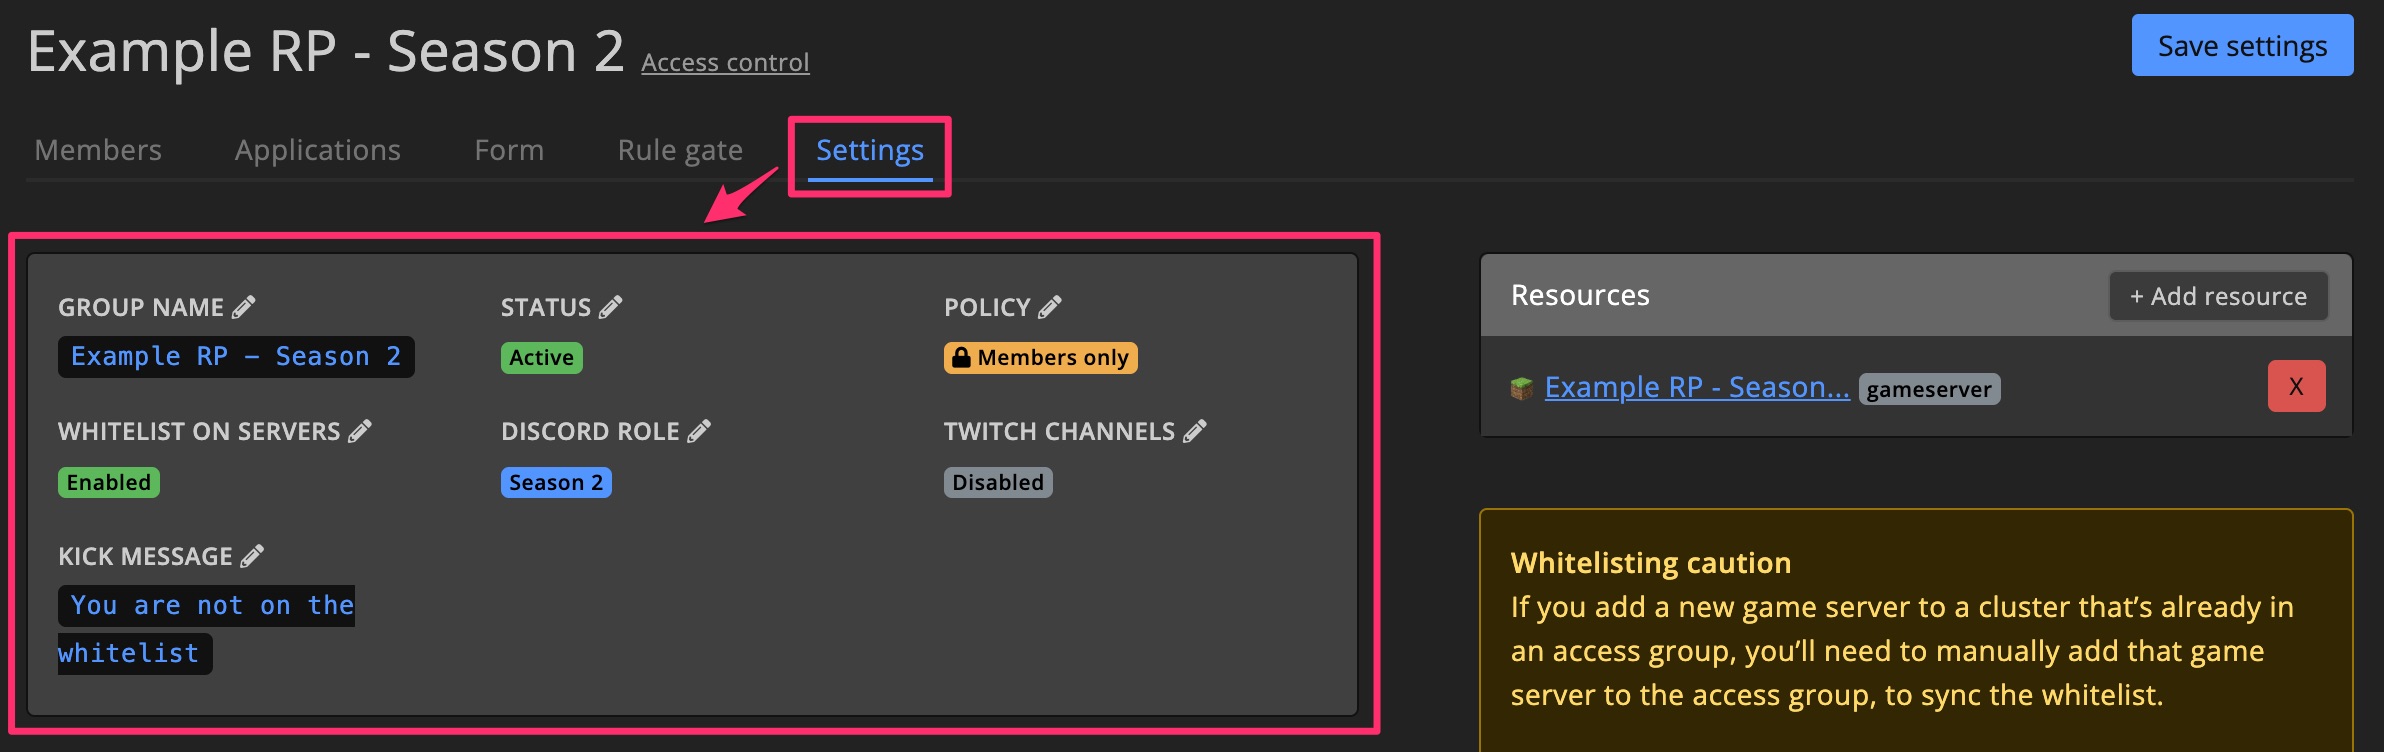
Status
Enable or disable the group.
Policy
Controls who can join servers linked to the group:
Use dashboard defaultEveryone can joinMembers only
Members only
Non-members are kicked immediately.
This requires games that support kick (or similar) commands.
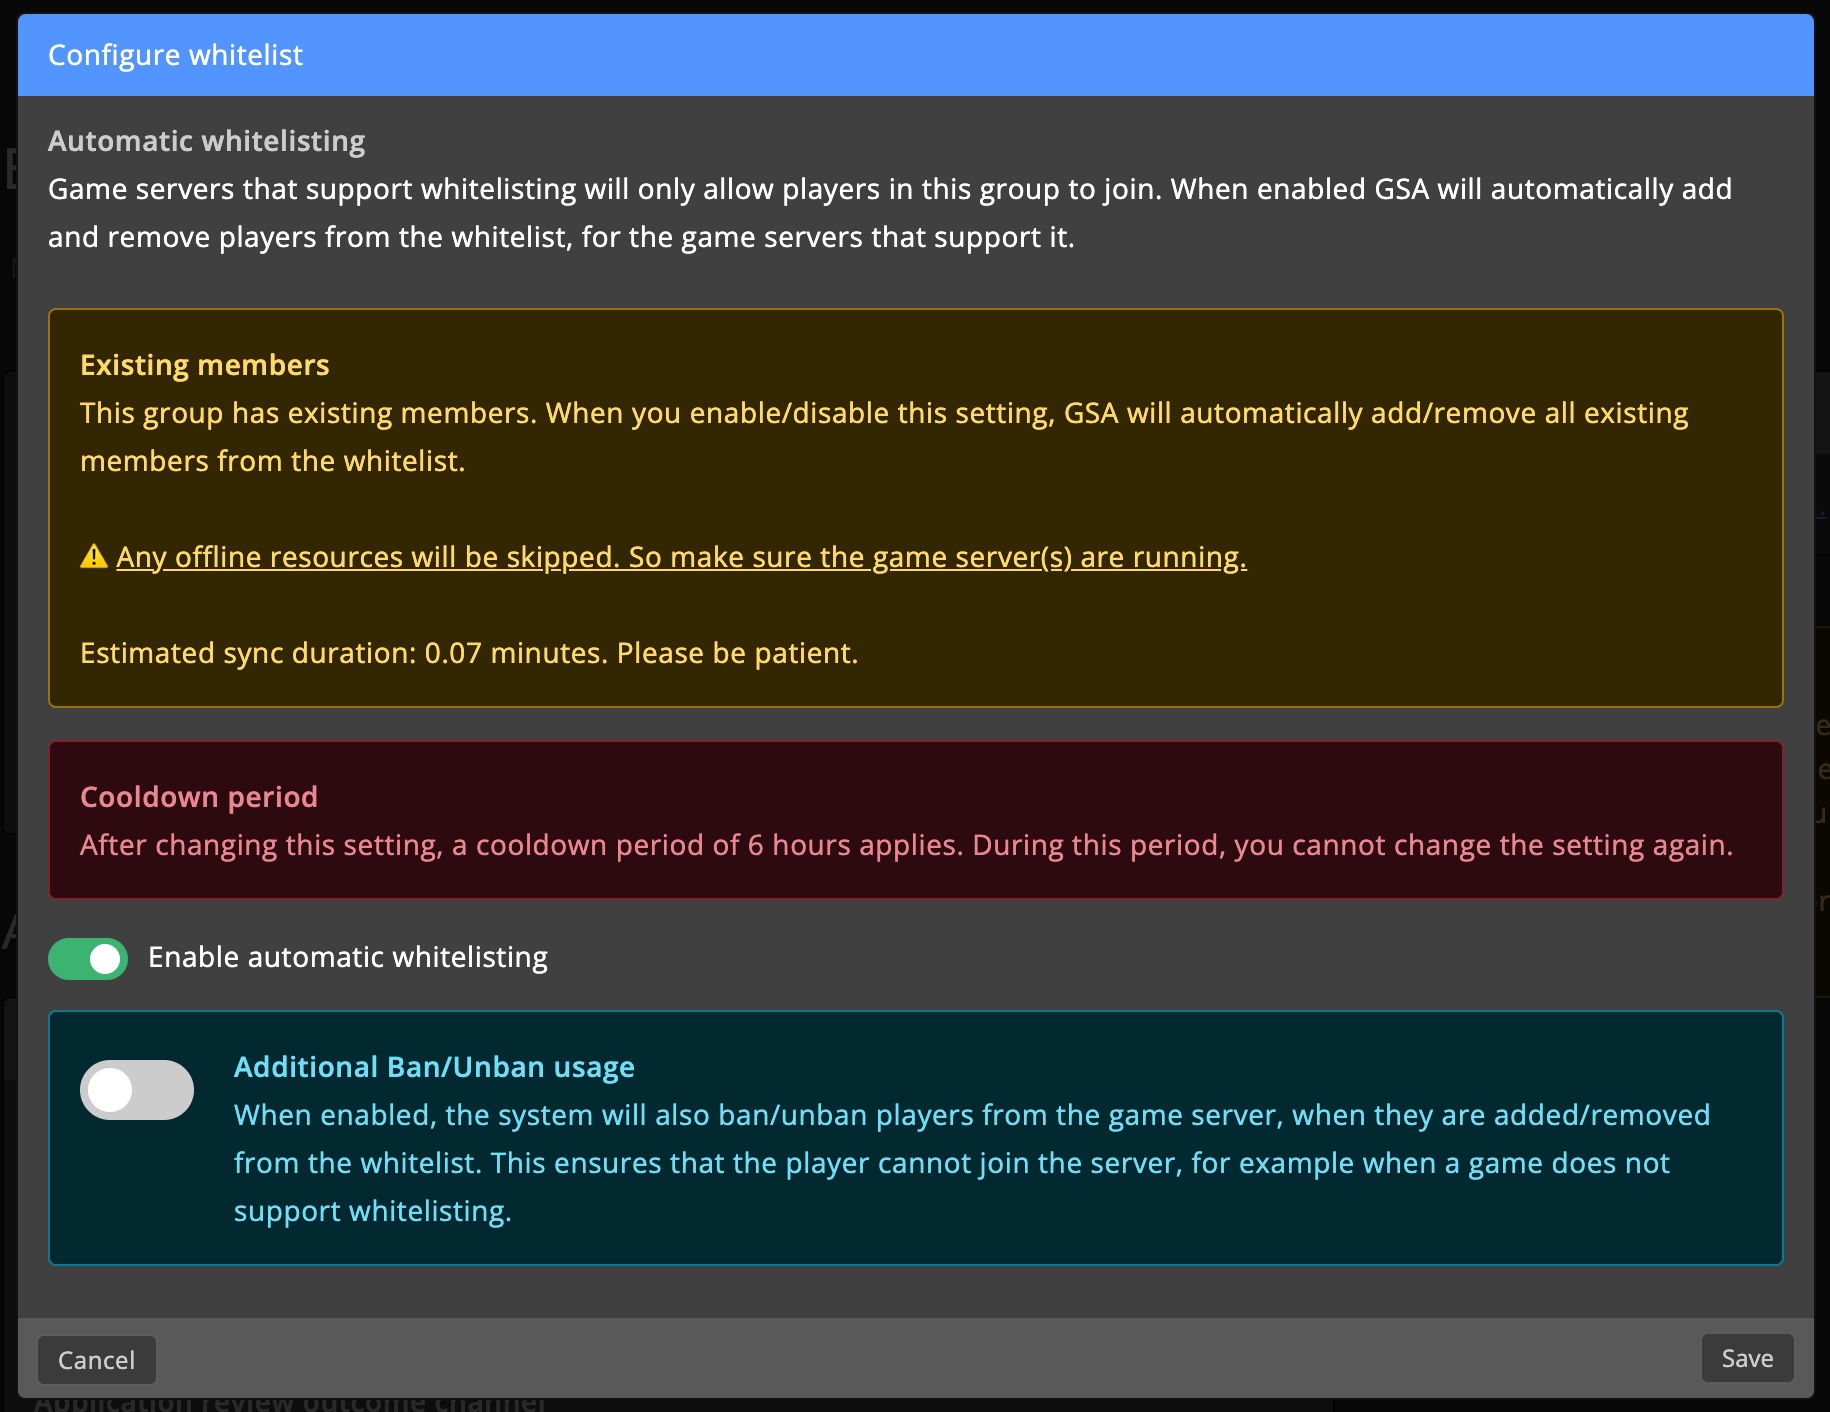
Whitelist
For supported games, members can be added to the server’s whitelist via RCON (or similar).
If a game doesn't support whitelisting but supports Kick/Ban commands, the feature will still work by kicking non-members.
Existing members
Changing this setting will update the whitelist for all current members.
This may take time; the setting has a 6-hour cooldown.
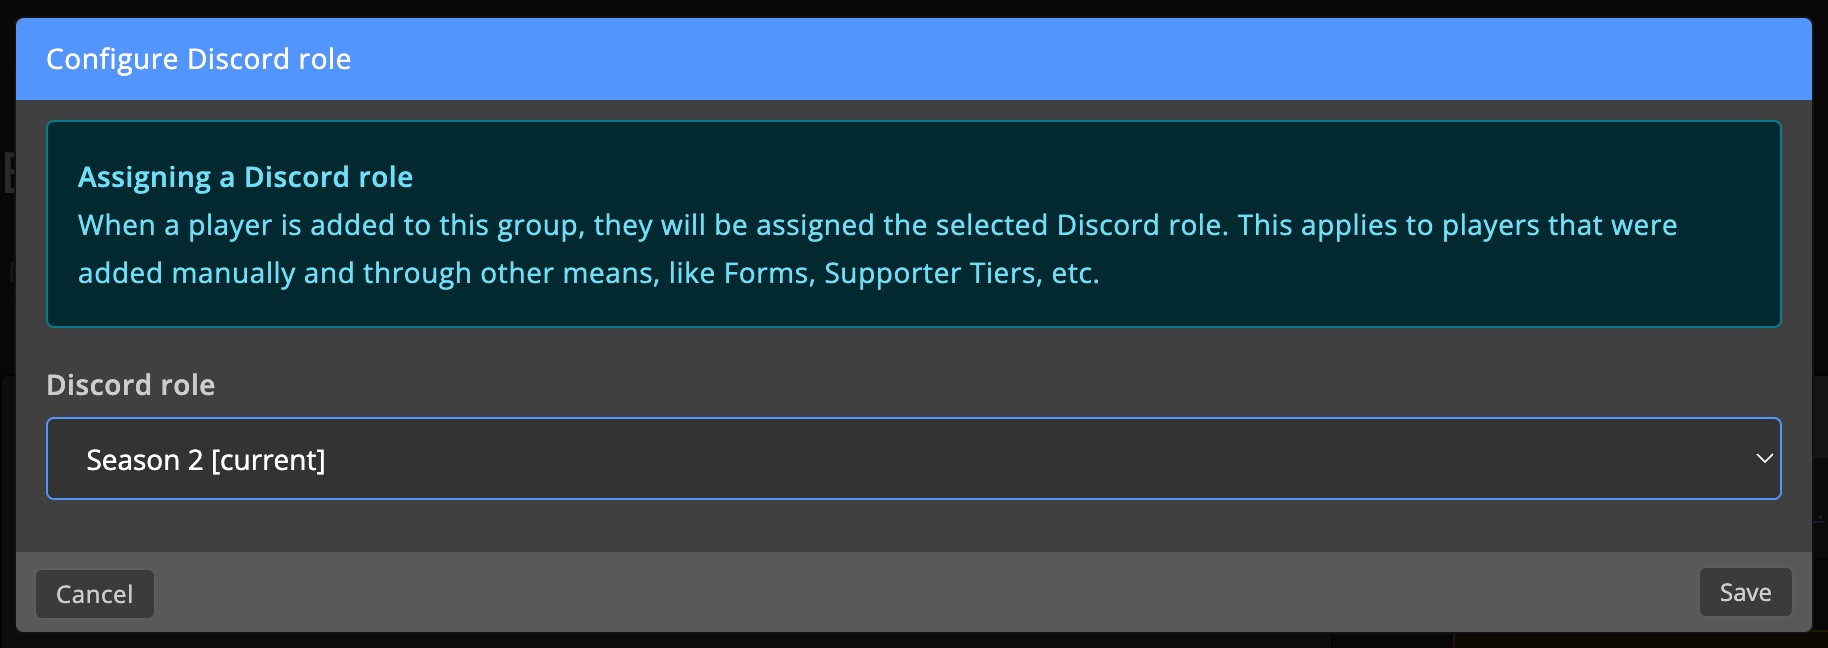
Discord role
Assign a specific Discord role to group members automatically.
Roles are removed when the player leaves the group.
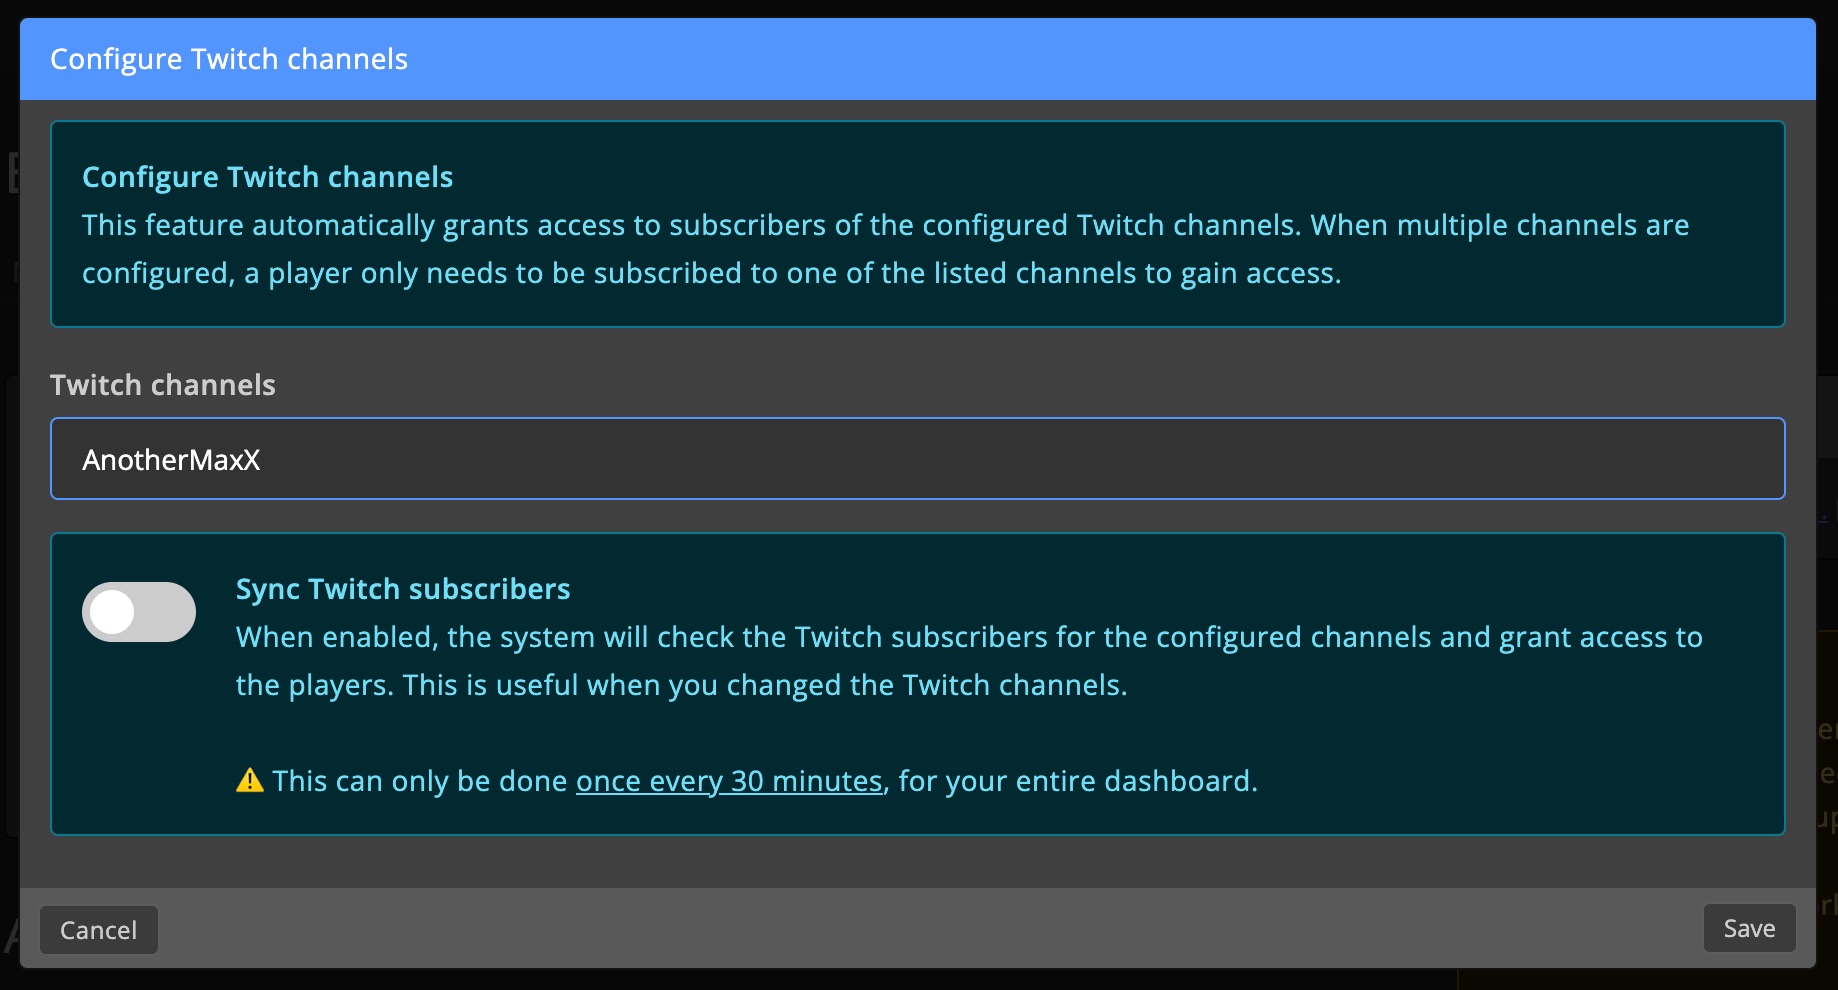
Twitch subs
Automatically add/remove Twitch subscribers from the group.
You can add multiple Twitch channels.
Players must link their Twitch account to use this.
Sync
Click Sync to manually update the subscriber list.
Can only be done once every 30 minutes across the dashboard.
Kick message
Customize the message shown when kicking players.
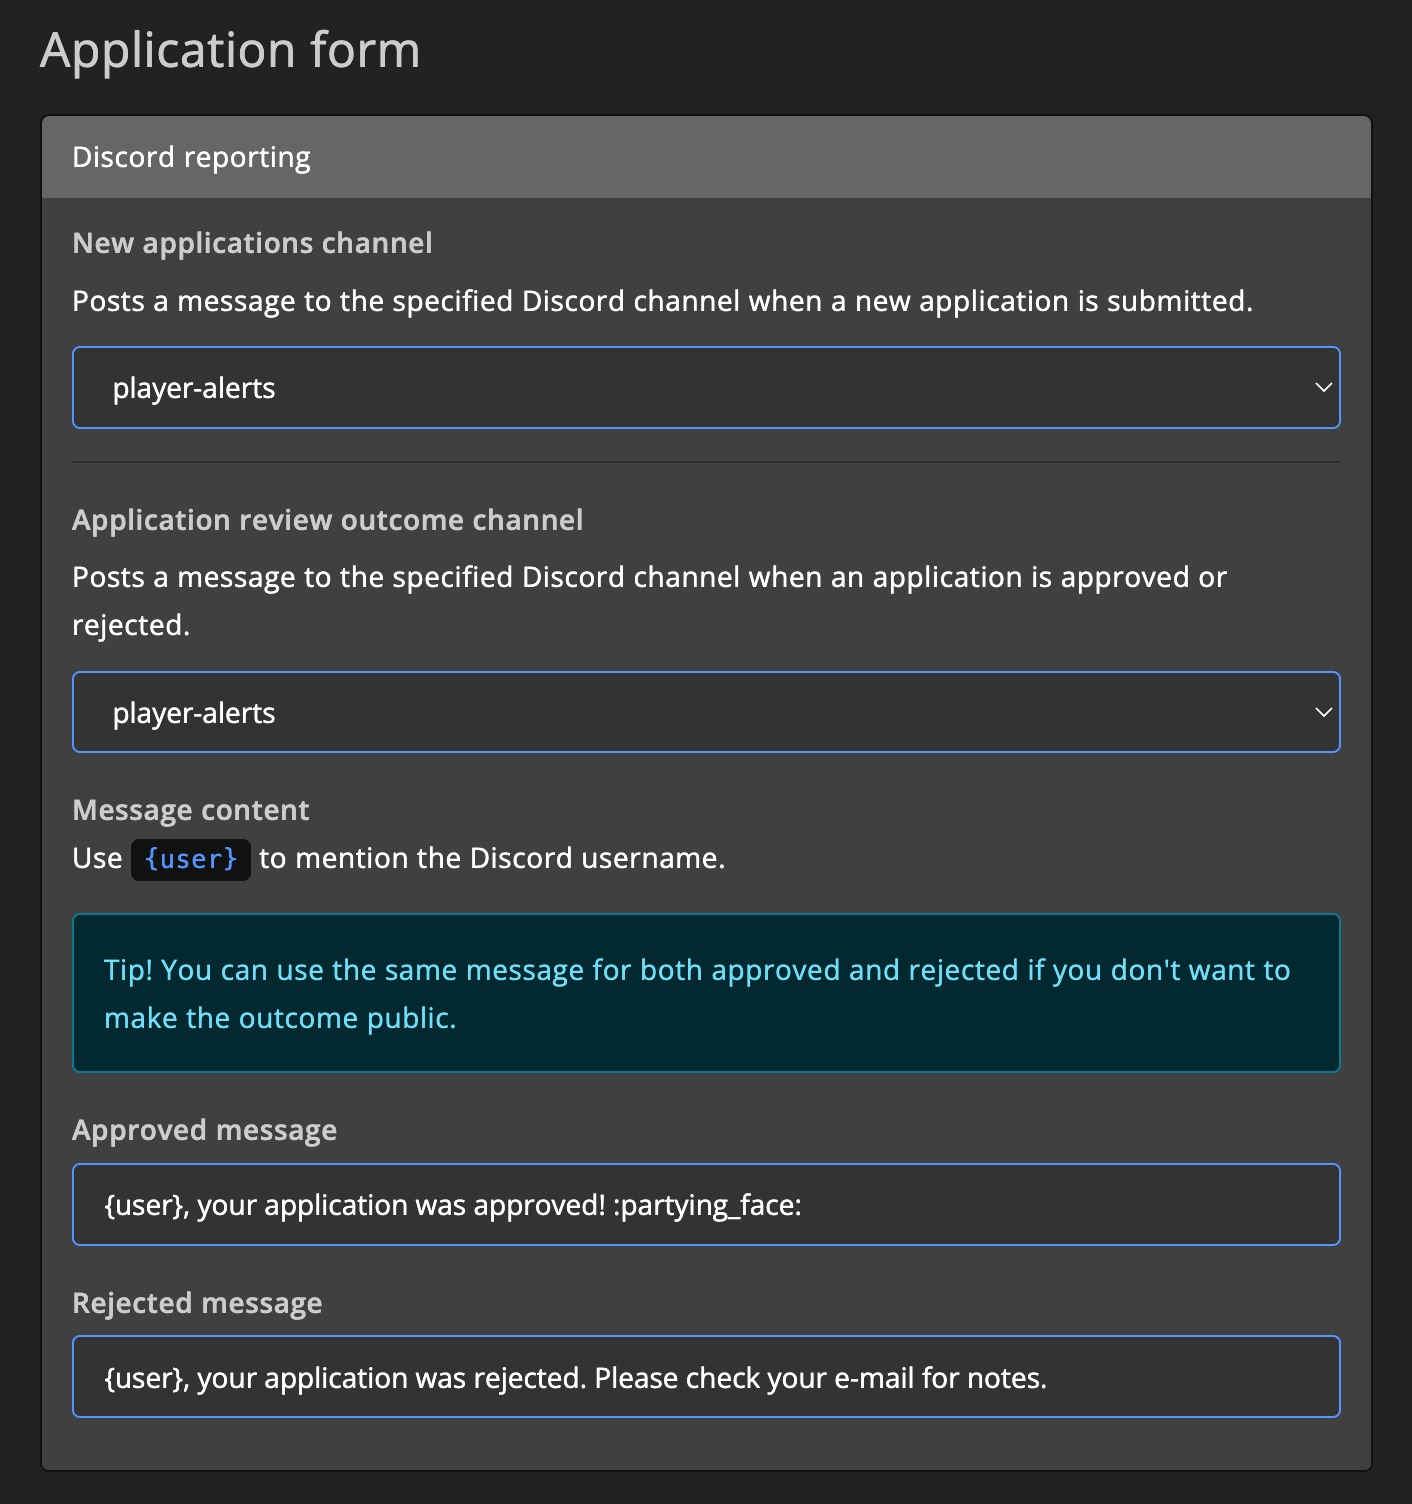
Email & Discord reporting
Set up messages for accepted or rejected applications.
You can also enable Discord reporting for updates in a chosen channel.