Forms
Let players submit applications, vote on polls, or complete surveys. Add custom forms to your Community website, no coding required.
Create a form
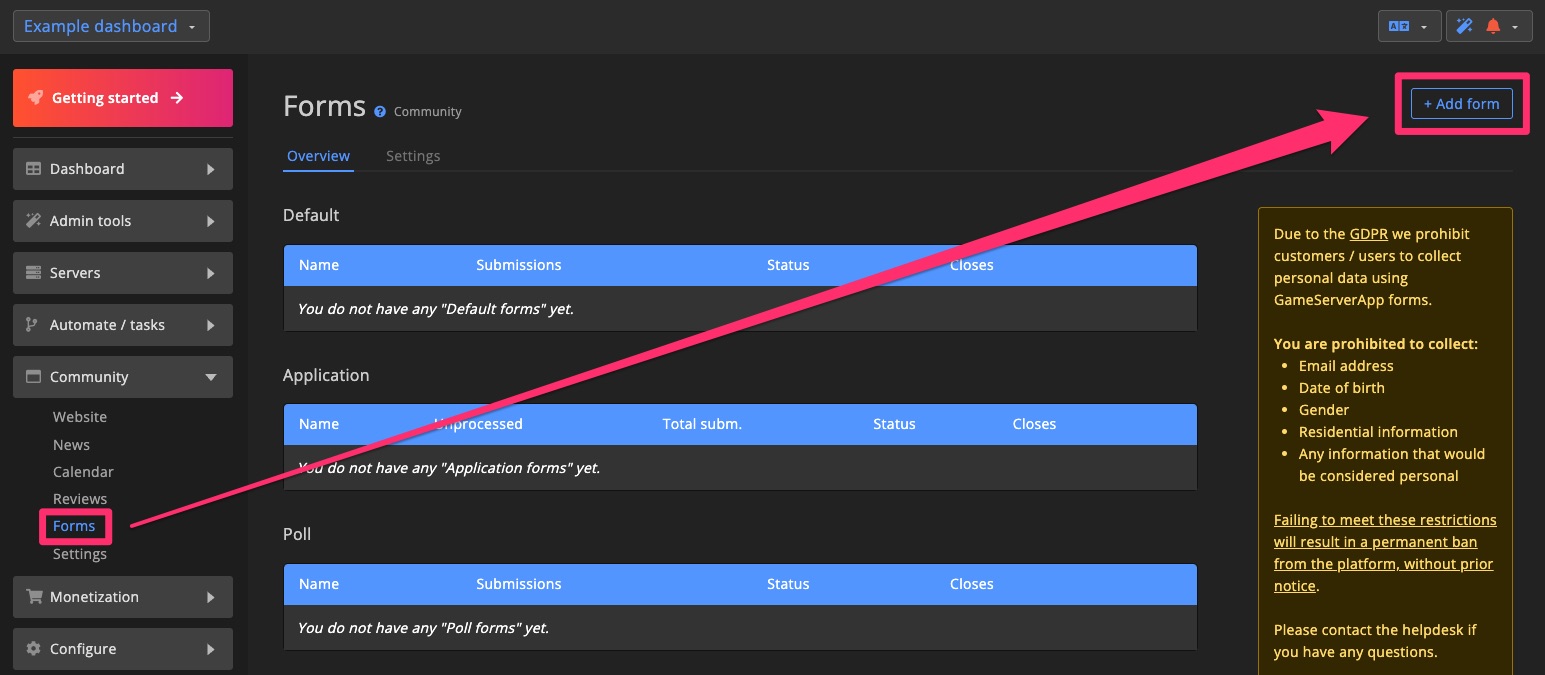
1. Click + Add form
Click + Add form in the top-right corner on the Forms overview page.
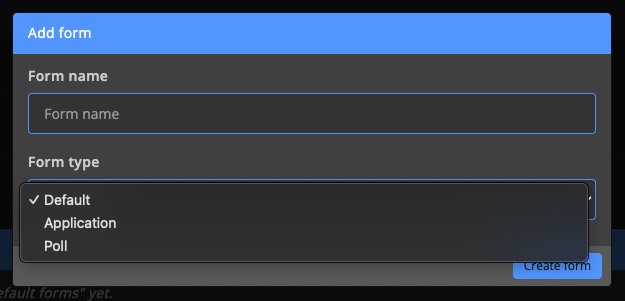
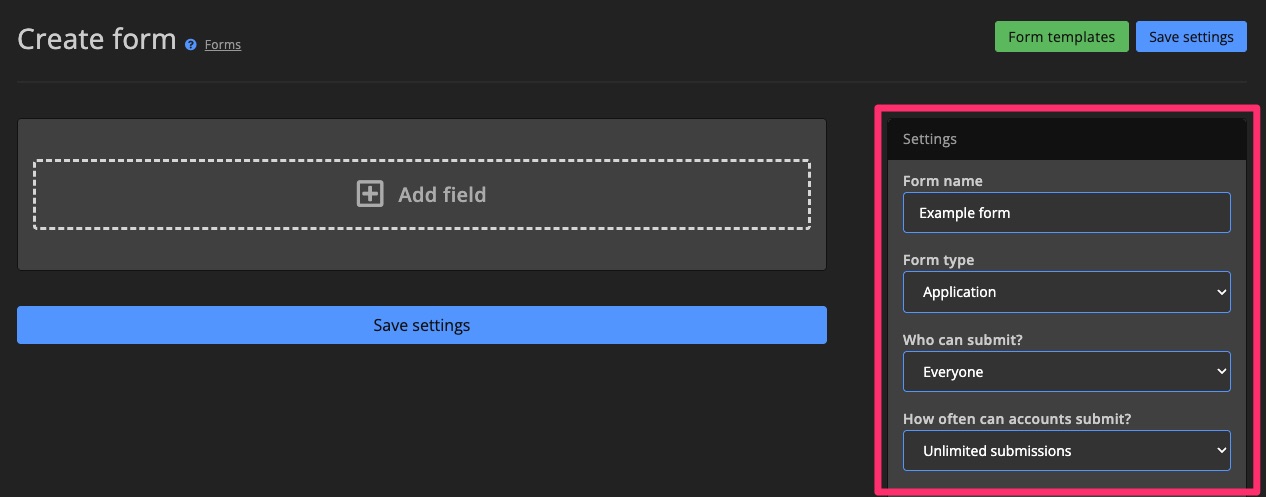
Enter a name for your form and select the form type.
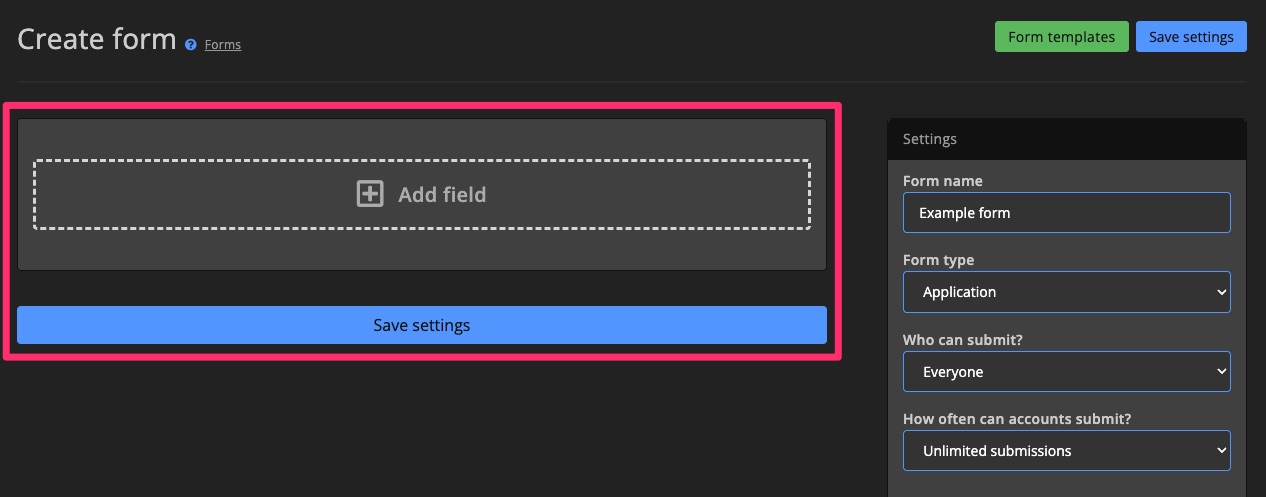
2. Add fields
Use the Form builder to add various components and questions to your form.
Learn more about Form builder >
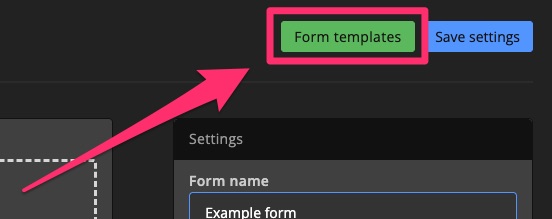
Speed up your process by selecting a form template.
3. Form settings
Each form type has unique settings. Learn more about all form settings >
Click Save settings when you’re done configuring.
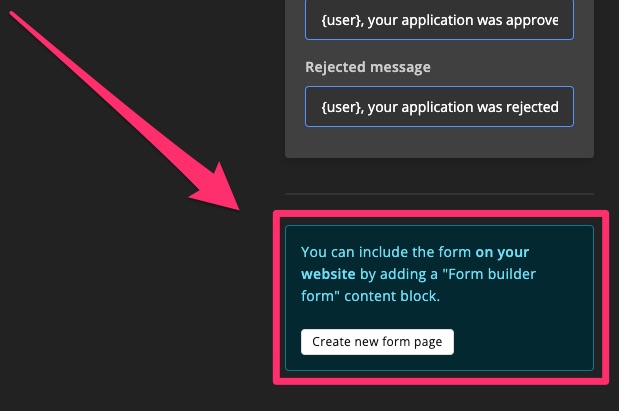
4. Add form to page
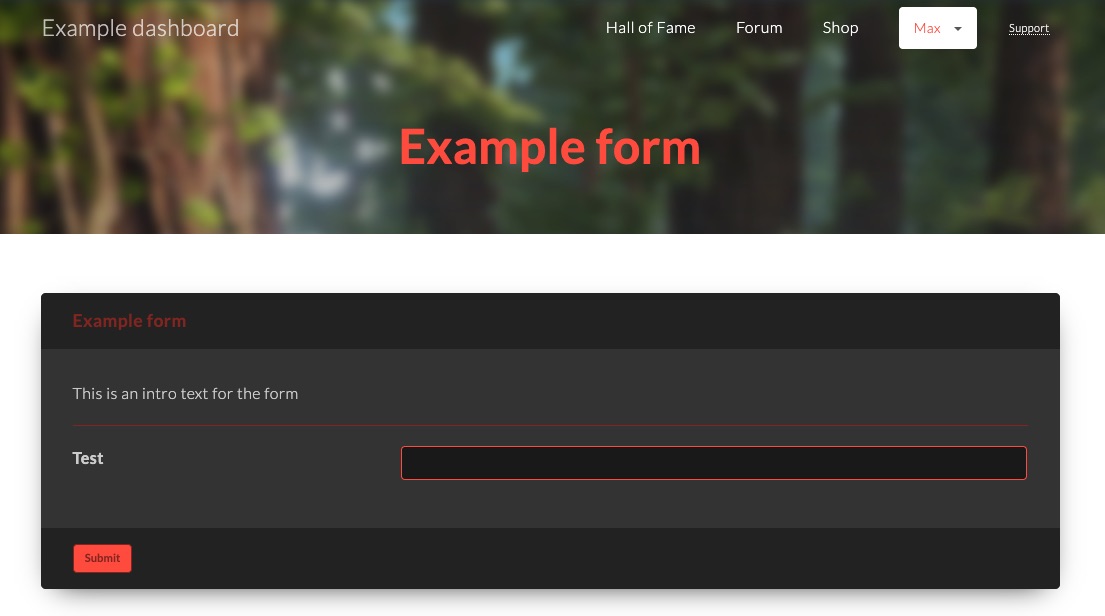
To publish the form on your Community website, scroll down in the form settings and click Create new form page. This generates a new page with the form ready to go.
Enter a title and any additional information you'd like to display.
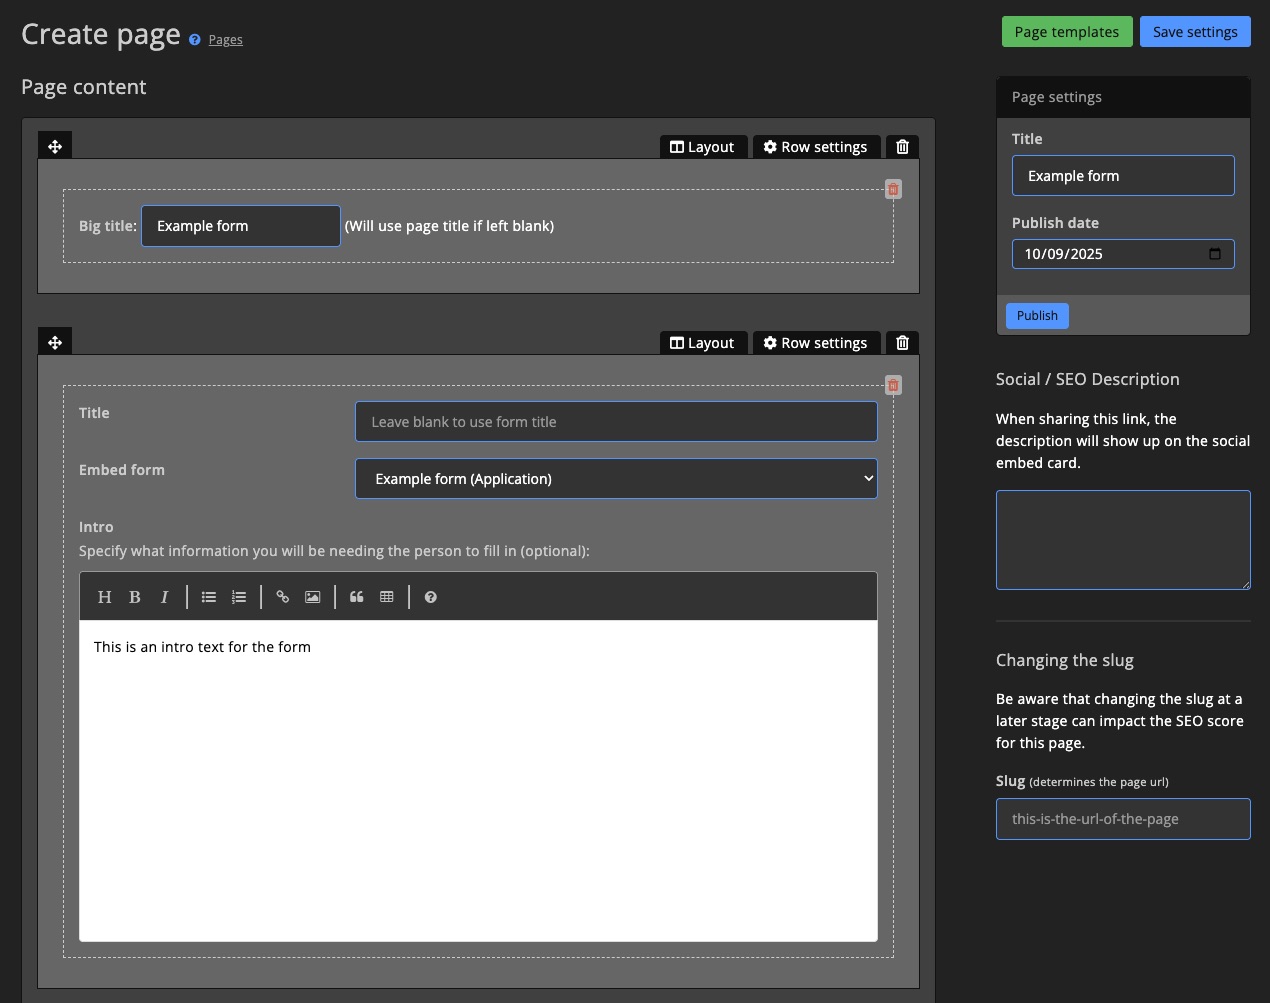
Click publish to make the form live.
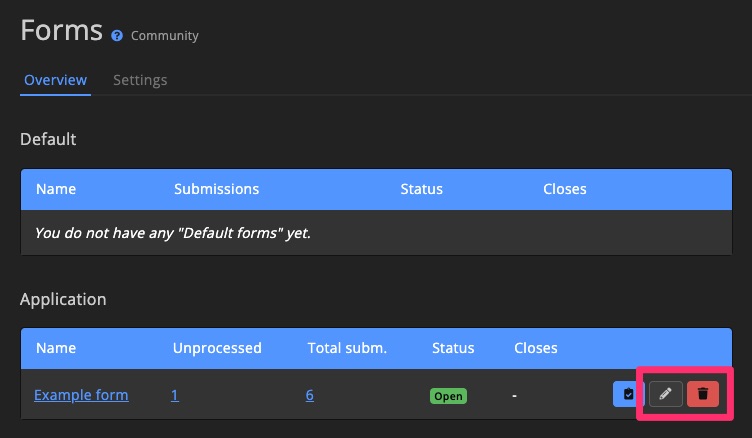
Manage forms
Edit or delete existing forms from the Forms overview page.
Form builder
The Form builder makes it easy to design forms using a visual drag-and-drop interface.
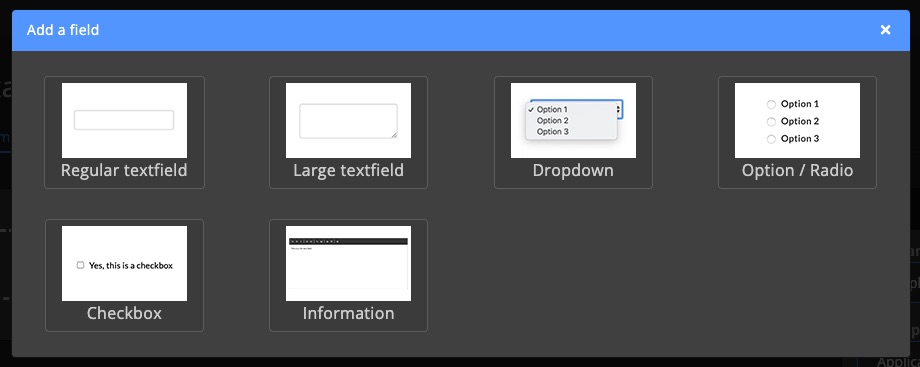
Add field
Click Add field to insert a new field into the form.
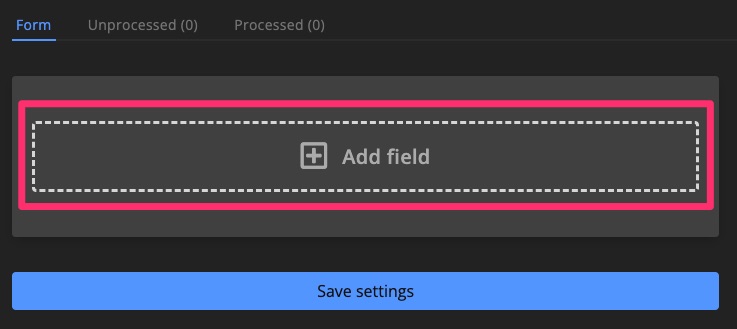
Choose the type of field you want to add.
Manage fields
Reorder fields by dragging them up or down with the icon, or delete a field by clicking .
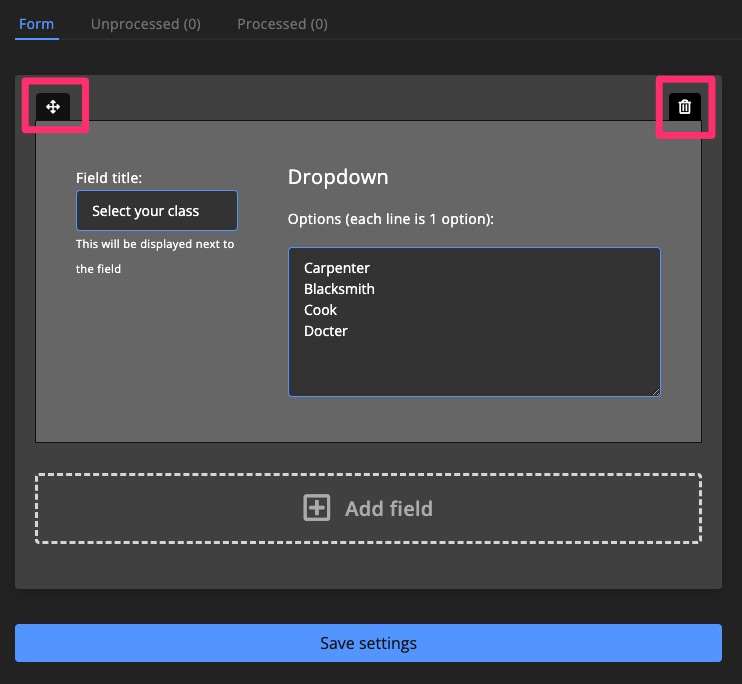
Form settings
Adjust the form's name, type, closing date, and more.
Form types
- Default – Use for general purposes like ban appeals or recruitment.
- Application – Collect player information for all kinds of applications.
- Poll – Let users vote on events, mods, etc.
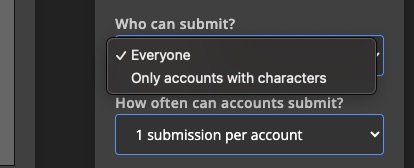
Restrictions
Control who can submit the form:
- Allow all players
- Restrict to accounts with characters only
You can also set submission limits:
- 1 submission per account
- Unlimited submissions
Players
Require players to link their Discord and/or email before submitting.
By default, banned players can't submit forms. You can override this for special forms, like ban appeals.

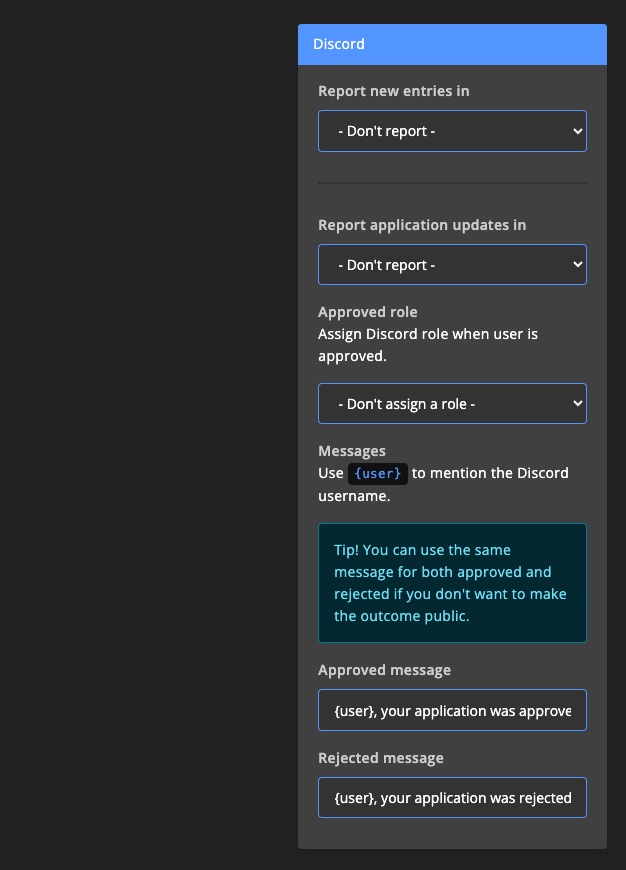
Discord
Automatically send form activity updates to Discord, this includes new submissions and approvals or rejections.
You can configure specific approval and rejection messages sent by the bot.
Applications
Admin team members with the right permissions can review applications / submissions.
Review applications
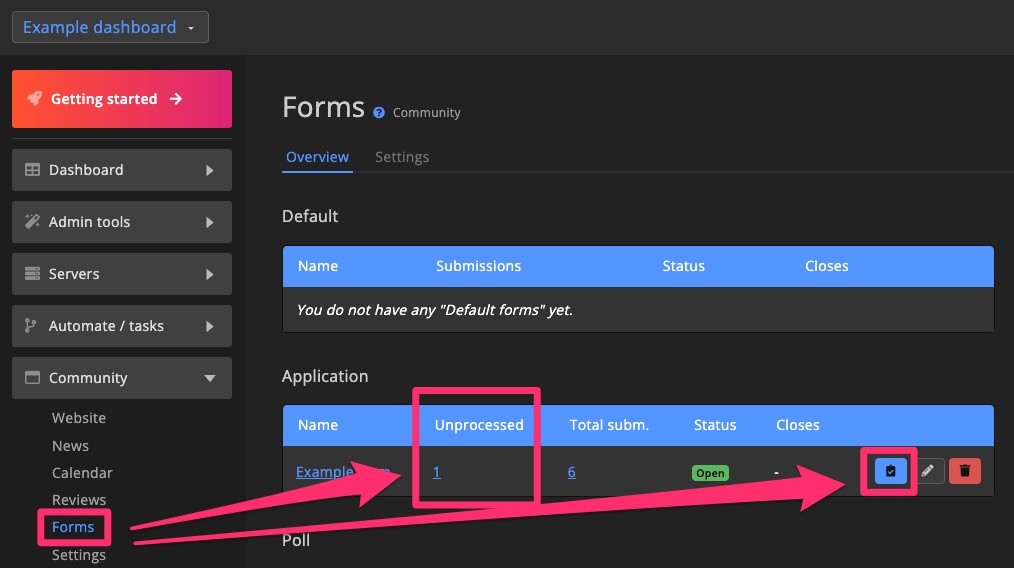
1. Go to Unprocessed
Click the number in the Unprocessed column or click the icon next to the form you want to review.
2. Find application
Use the search feature on the right to locate a specific application. Click Review to open it.

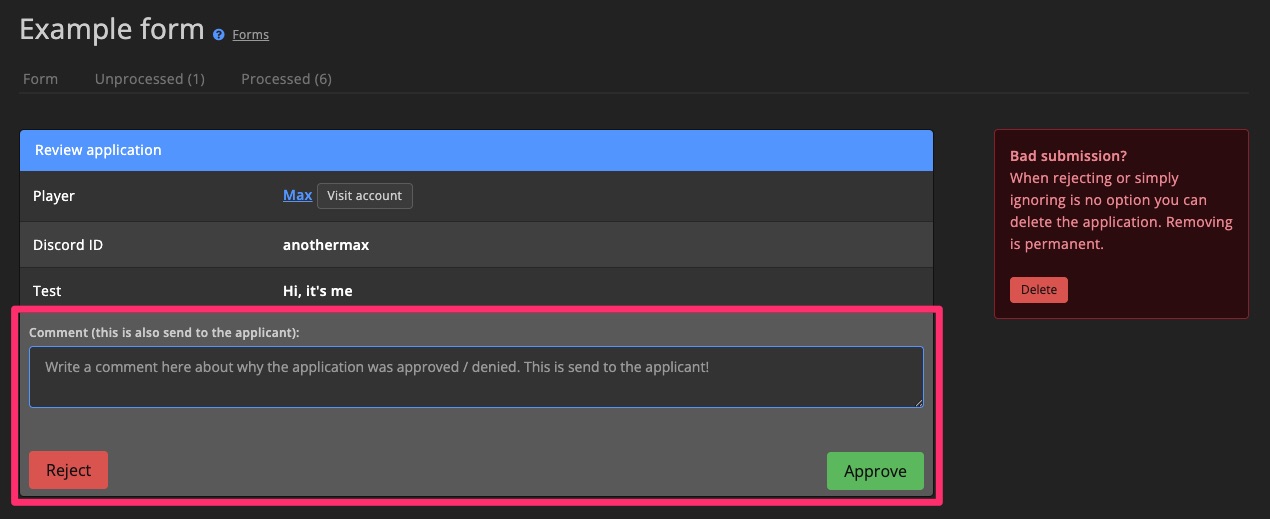
3. Approve / Reject
Carefully review the form submission and, if needed, add a note for the player. This note will be included in the email response to them.
Use the Delete option to remove any invalid or rule-breaking submissions. This also allows the player to try again if submission restrictions are in place.
Click Approve or Reject to complete the review.
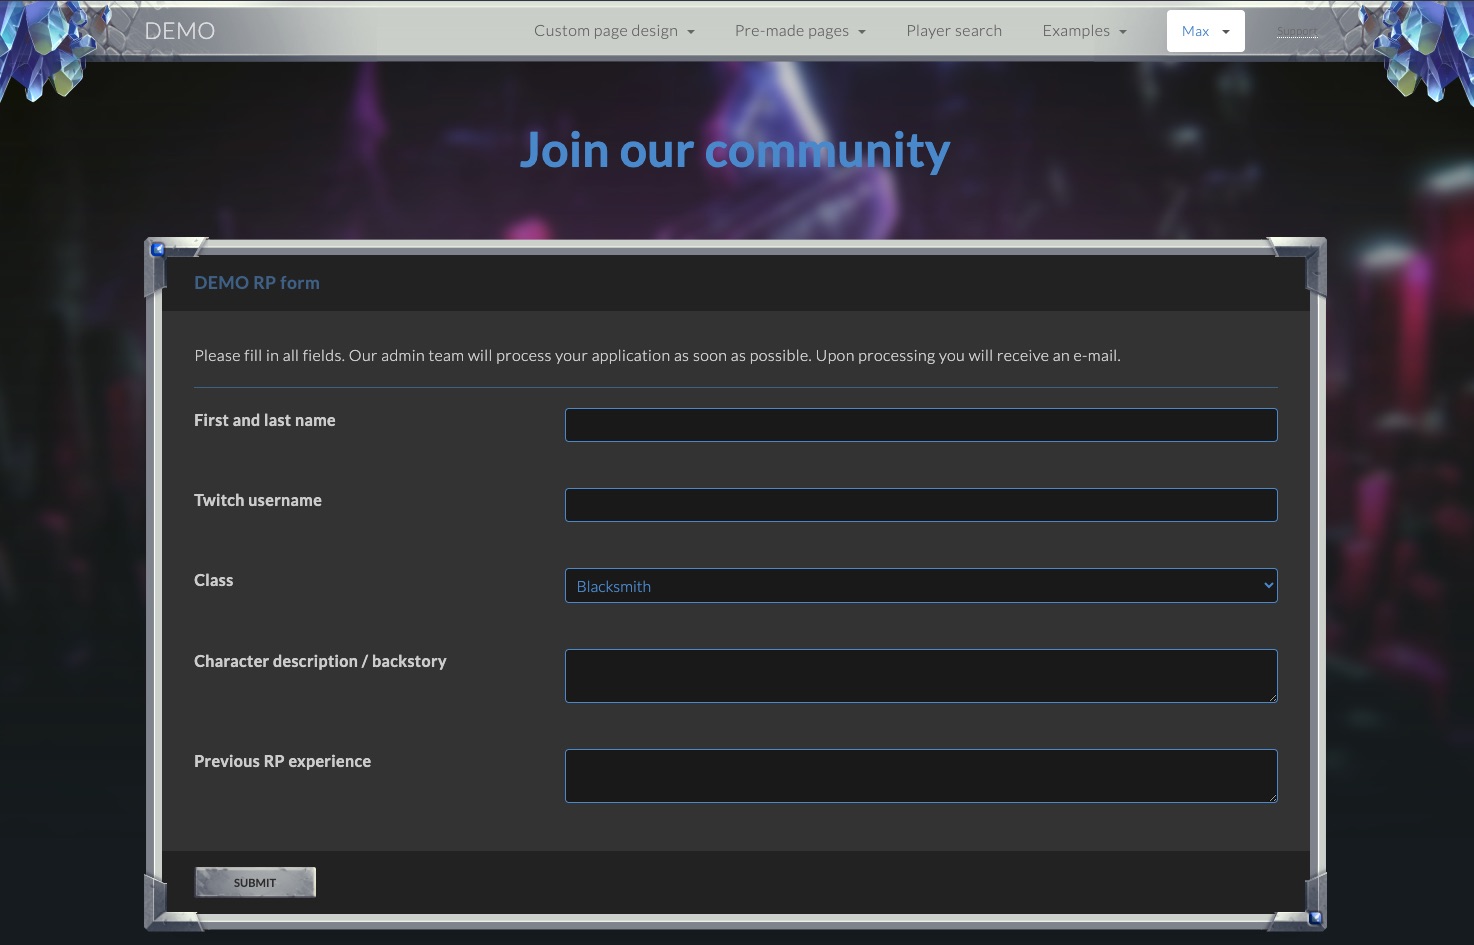
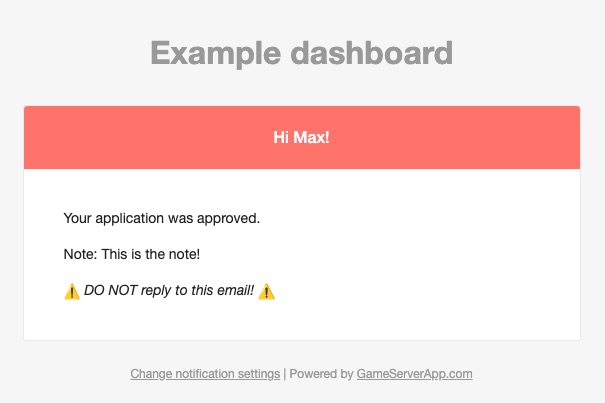
Player email example
Here is what players will see in their email. You can customize the email messages.
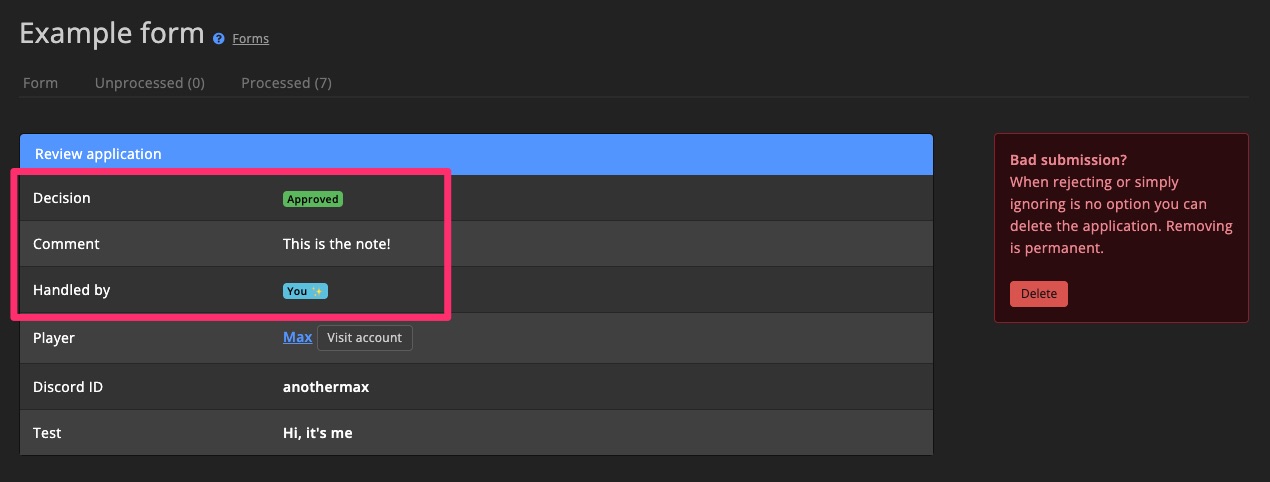
Processed applications
See a complete list of processed applications, who handled them, notes, and final decisions.

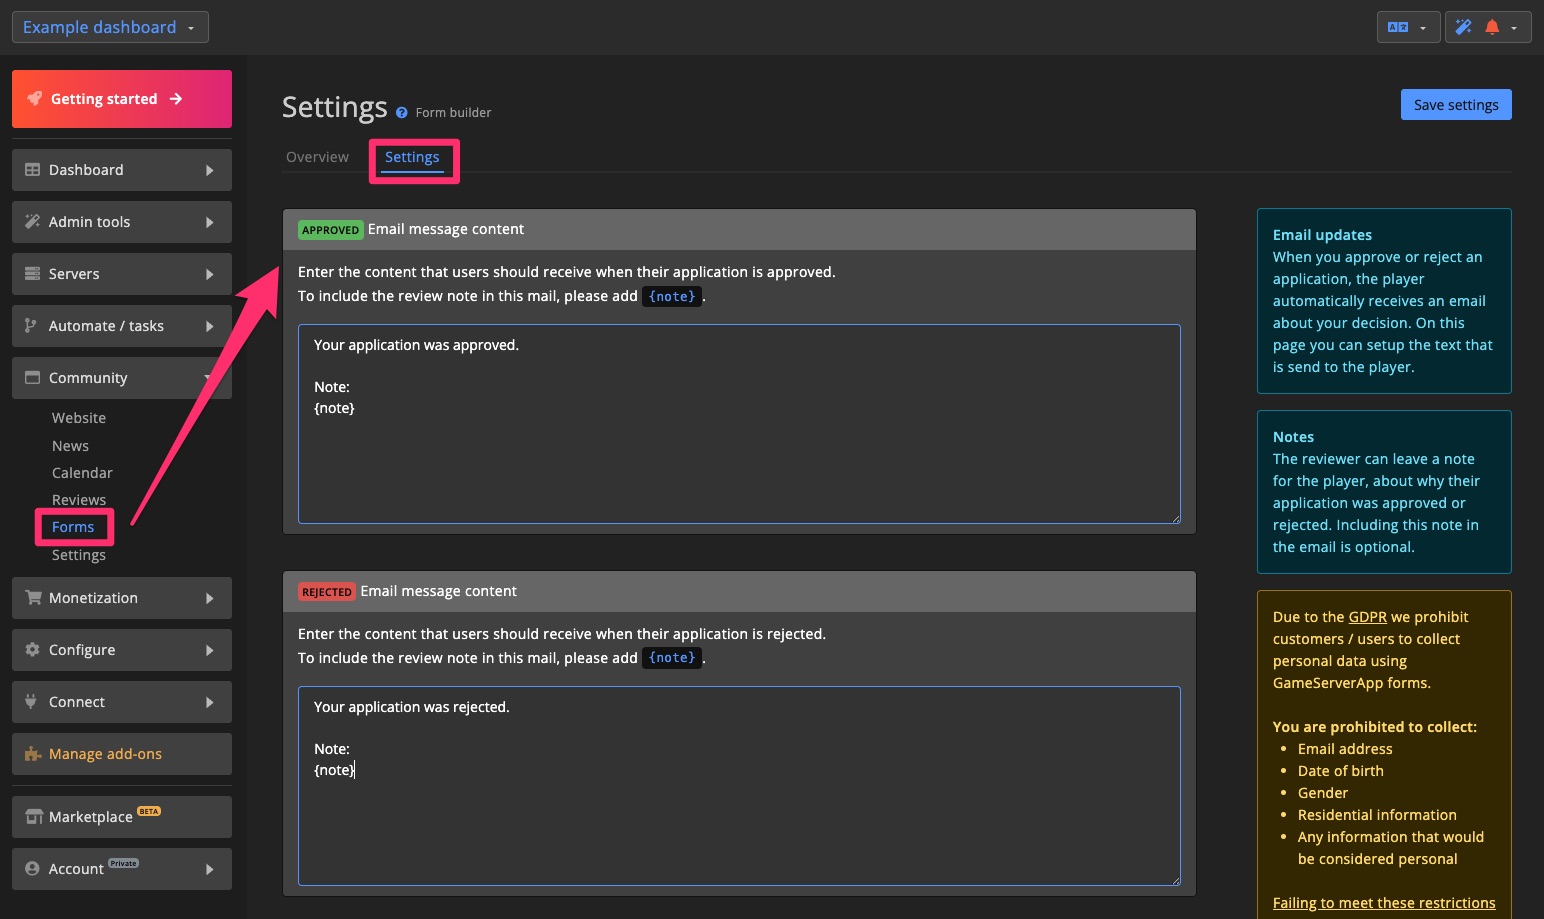
Email messages
Customize the emails that are sent to players when their applications are approved or rejected.
Use the {note} variable to insert the admin's note at a specific point in the email.