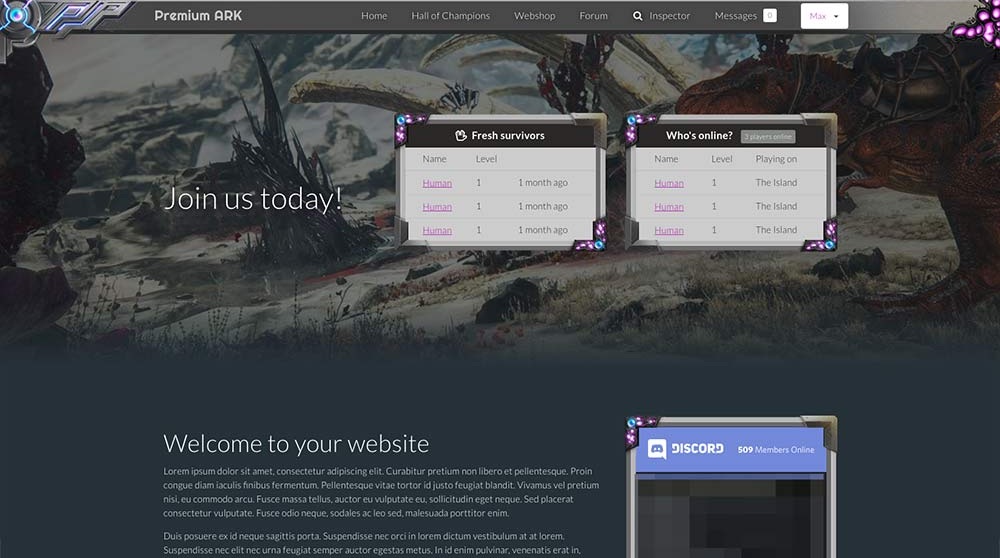
Website
Set up a website for online (whitelist) application forms and more. No coding experience required, it's all easy drag-and-drop.
Pages
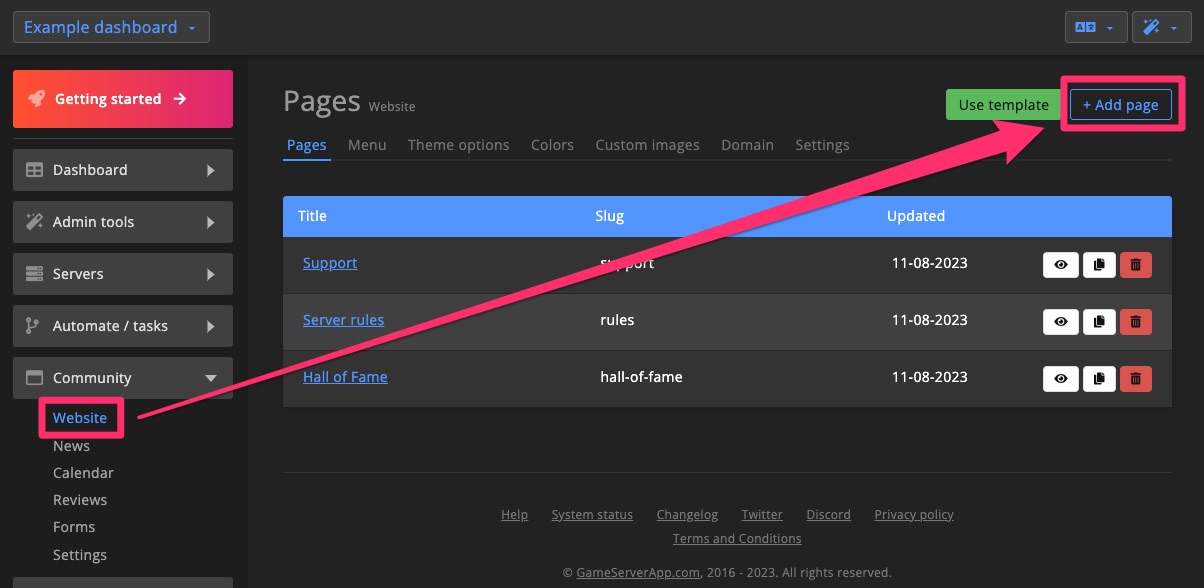
Create new page
1. Click + Add page
Click + Add page in the top-right corner of the Website page overview.
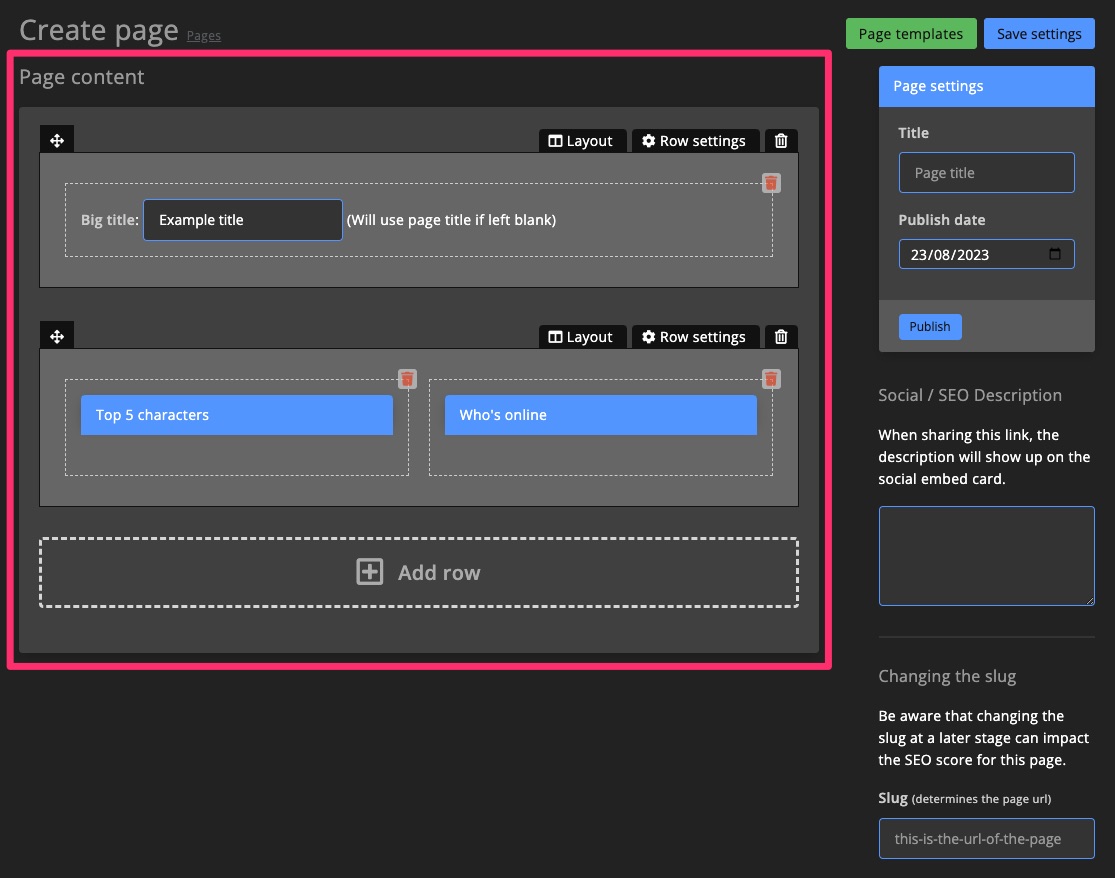
2. Add content
Use the Page builder to add different components to the page.
Learn more about Page builder >
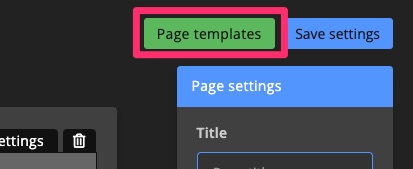
Use a page template to speed up the process of creating new pages.
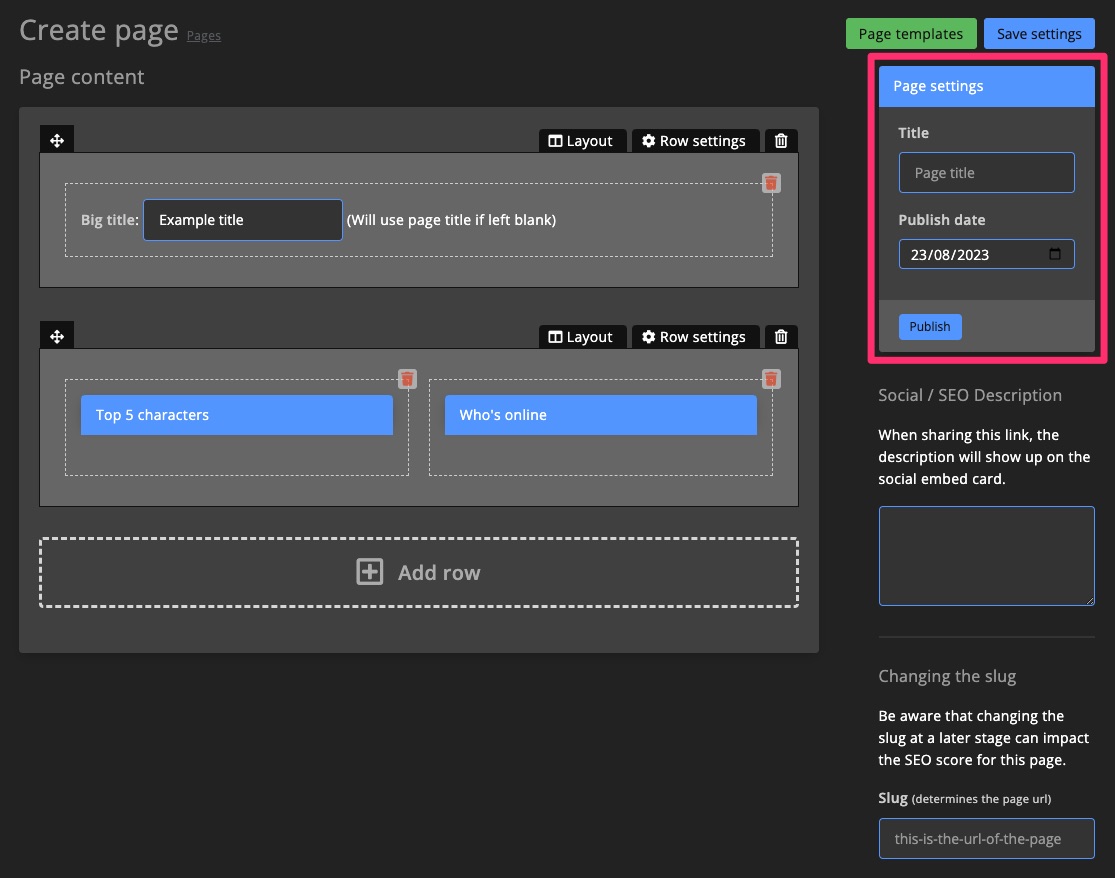
3. Finish settings
Enter a page title and publishing date. GSA will publish the page automatically on a future date if selected.
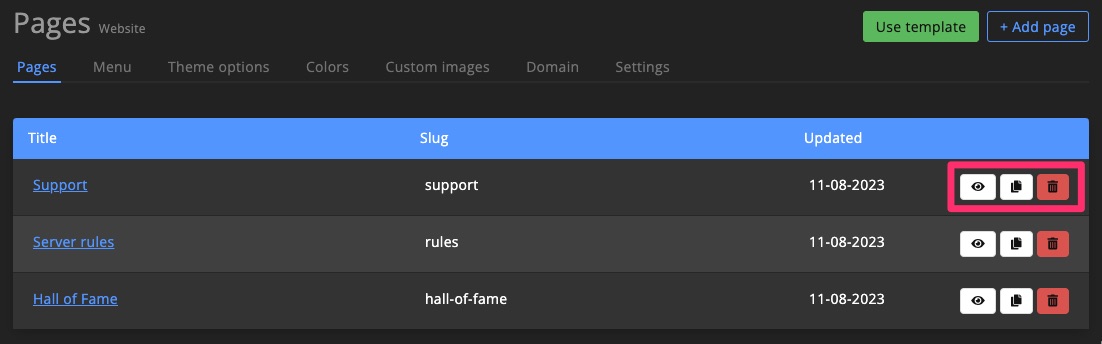
Manage pages
Clone or delete pages from the Page overview. Click the to preview the page on the Community website.
Page builder
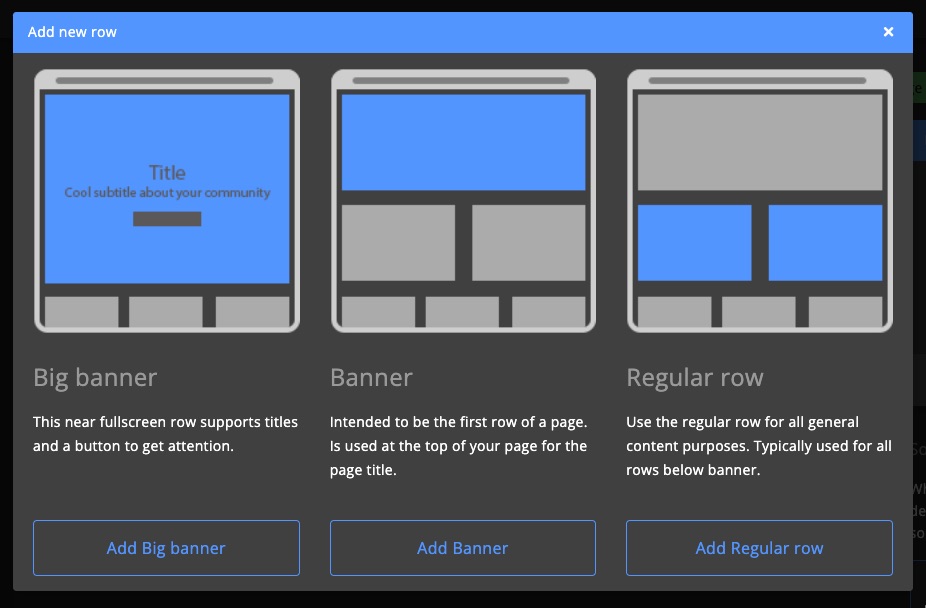
Add row
Click Add row at the bottom of the Page builder.
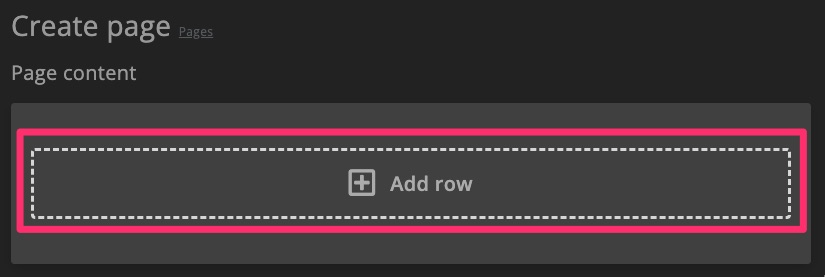
Choose the type of row you want to add.
Manage rows
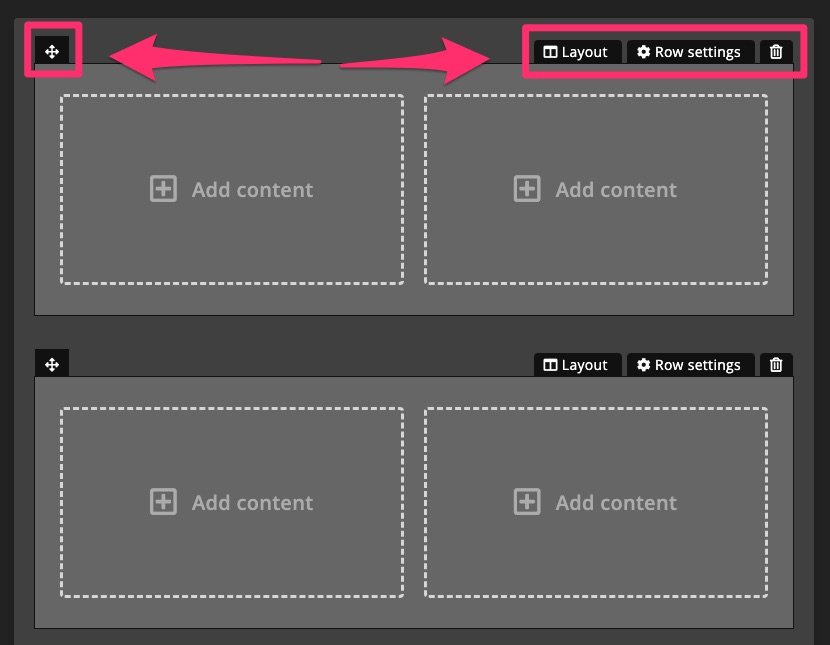
Use the icon to drag rows up or down to reorder. To remove a row, click .
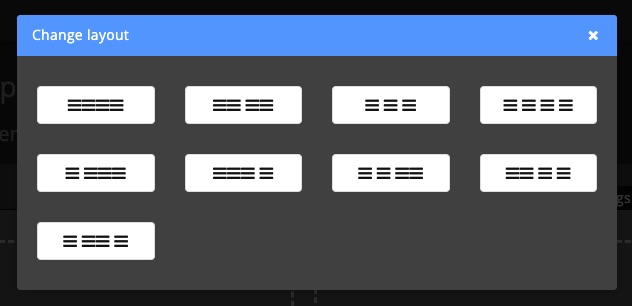
Change layout
Click Layout to adjust the layout of a row.
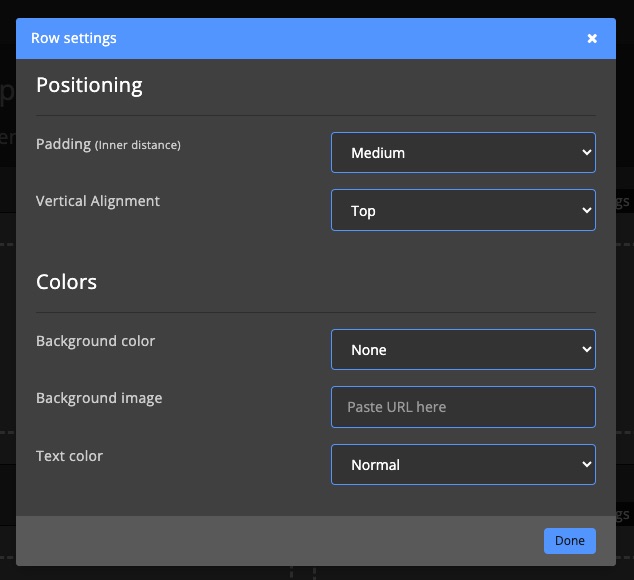
Row settings
Click Row settings to customize appearance and spacing.
Add content block to row
Click Add content within the row where you'd like to place a content block.

Choose a content block from the options provided.
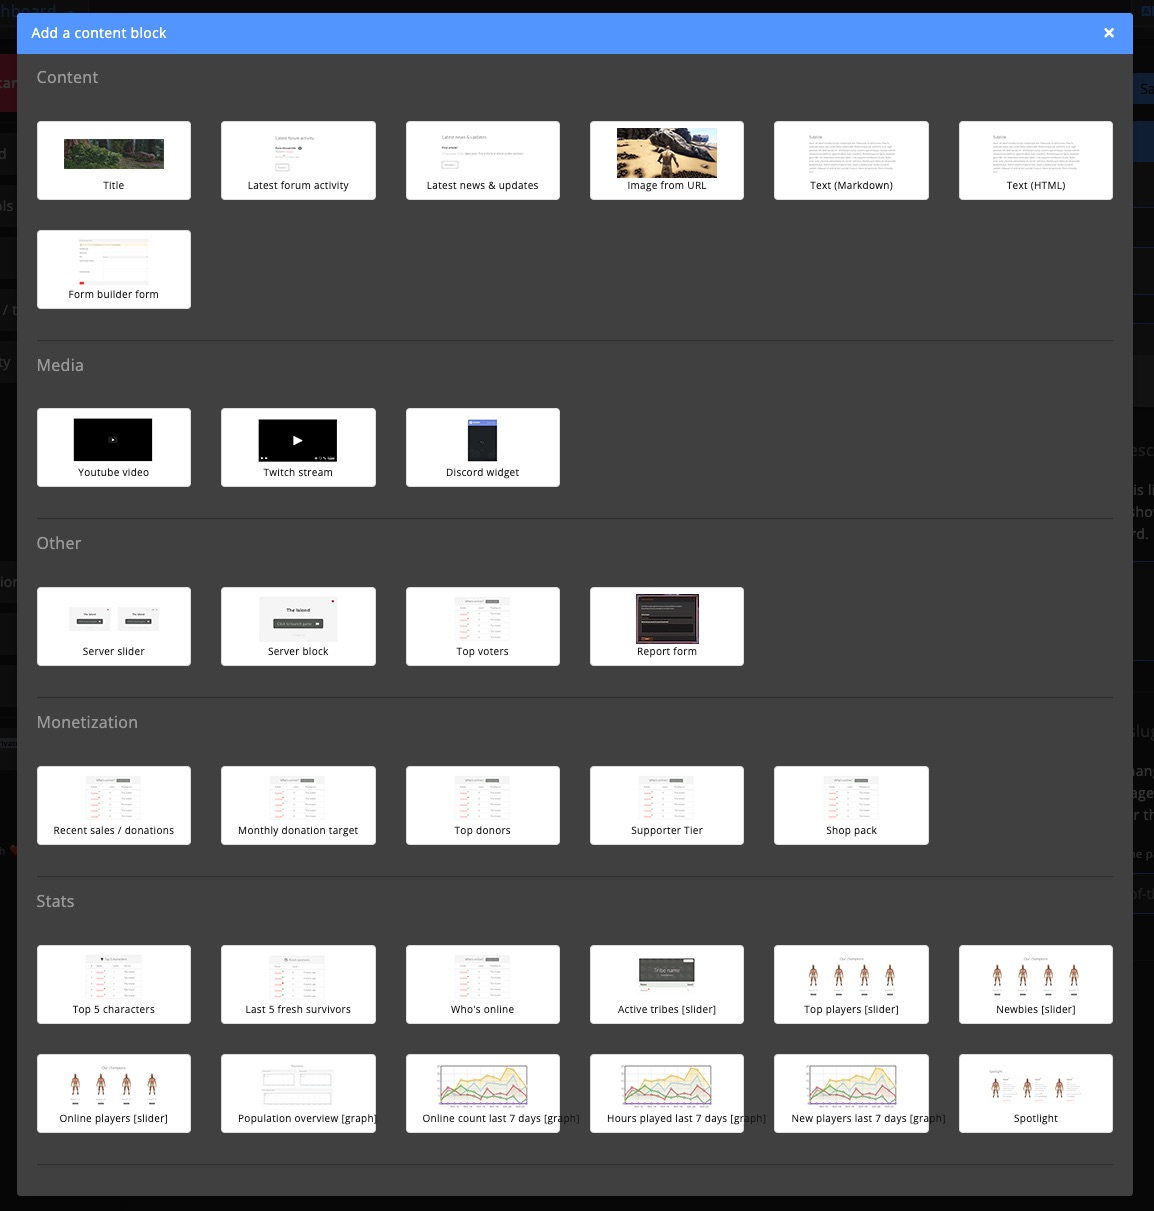
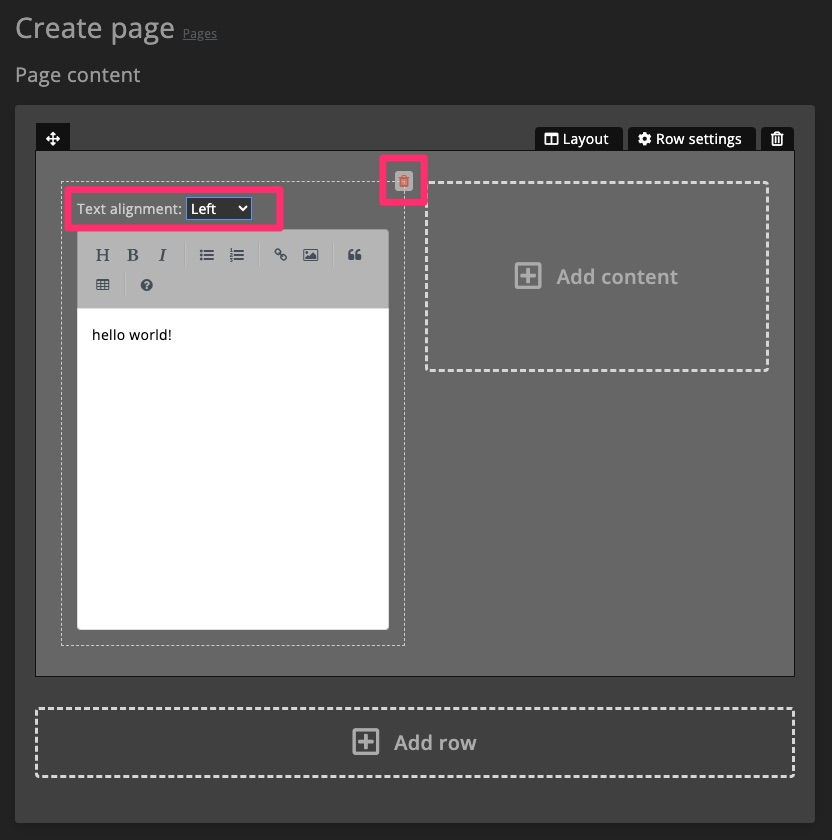
Manage content block
Content blocks offer specific settings, such as text alignment. Remove a content block by clicking .
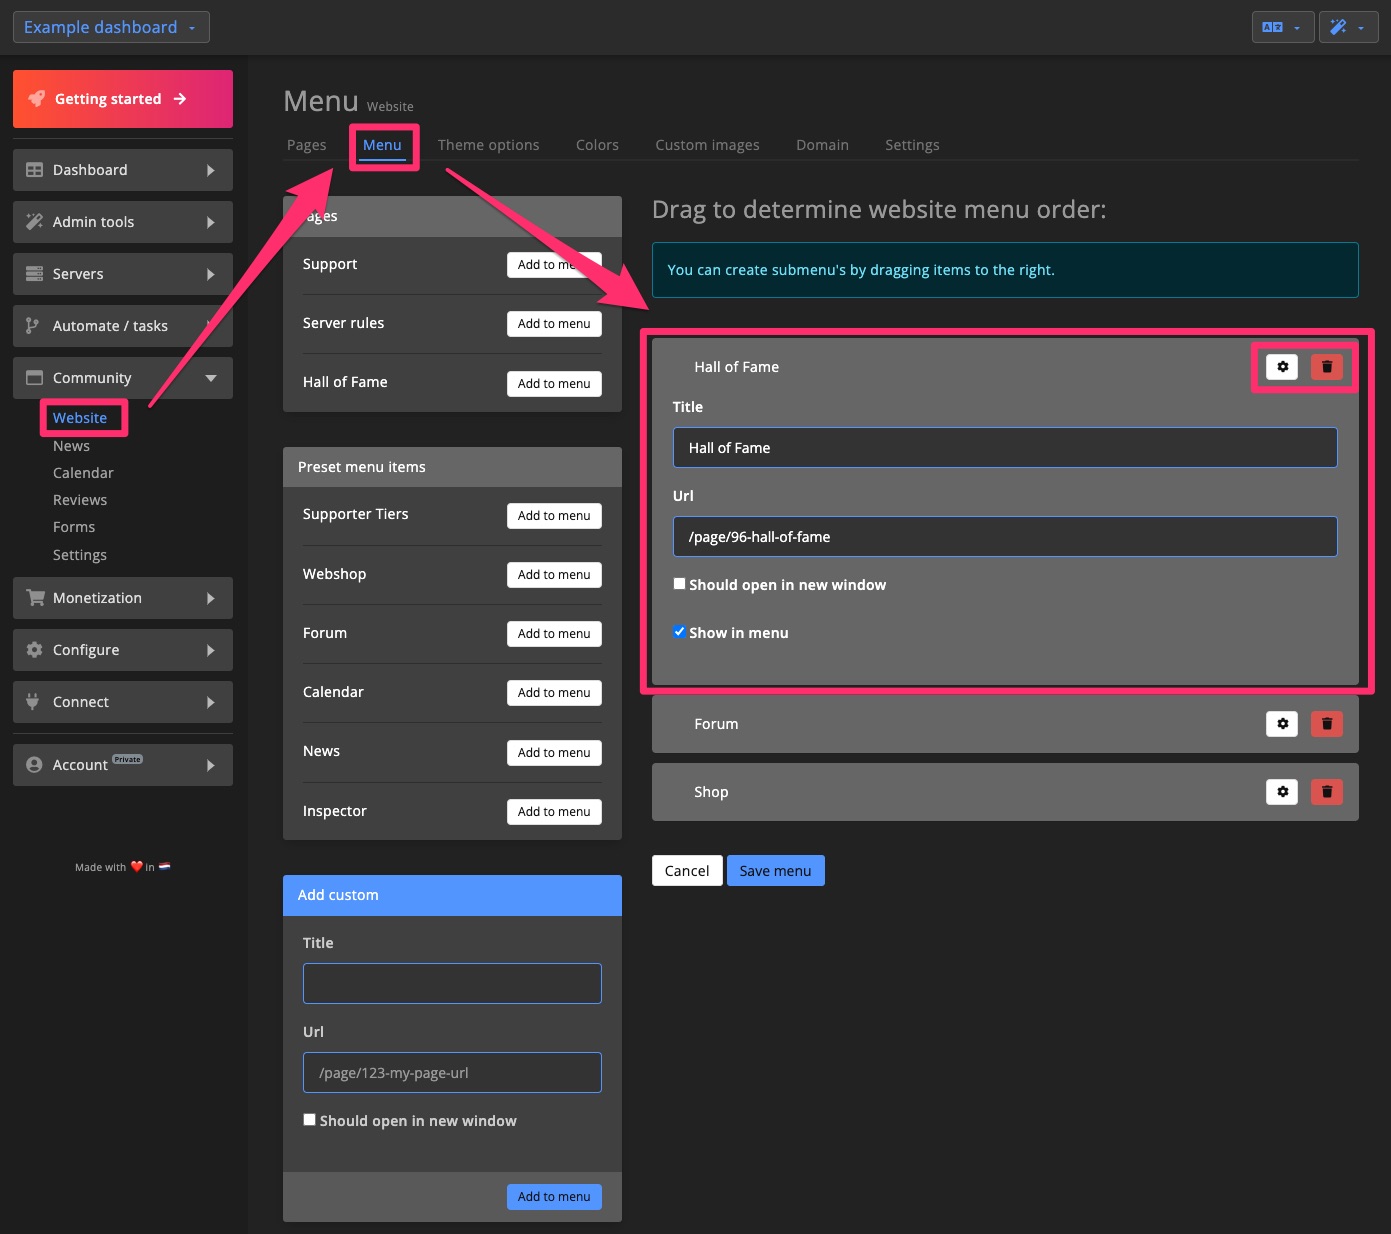
Menu
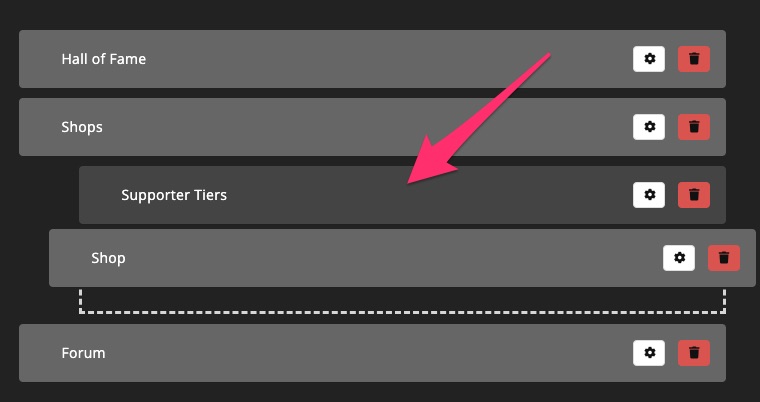
Use the sidebars on the menu page to add and rearrange menu items. Drag items to change their order.
To create a sub menu, drag items slightly to the right.
Theme options
Logos
Upload your community's logos and favicon.
![]()
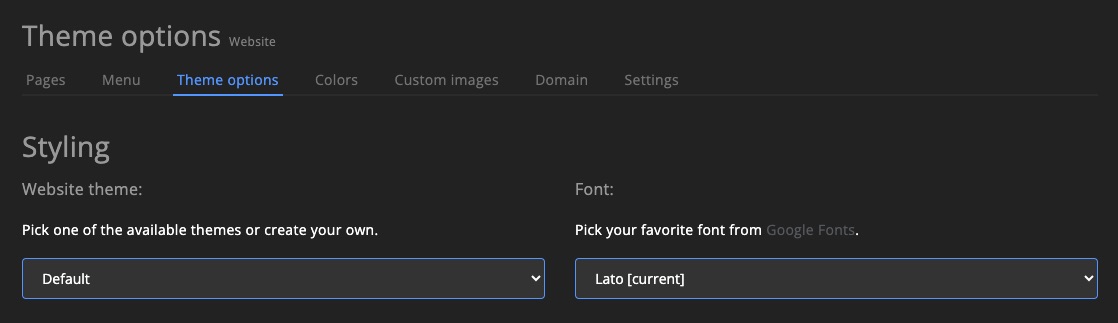
Website themes & font
Pick from various preset themes and fonts to personalize the website.
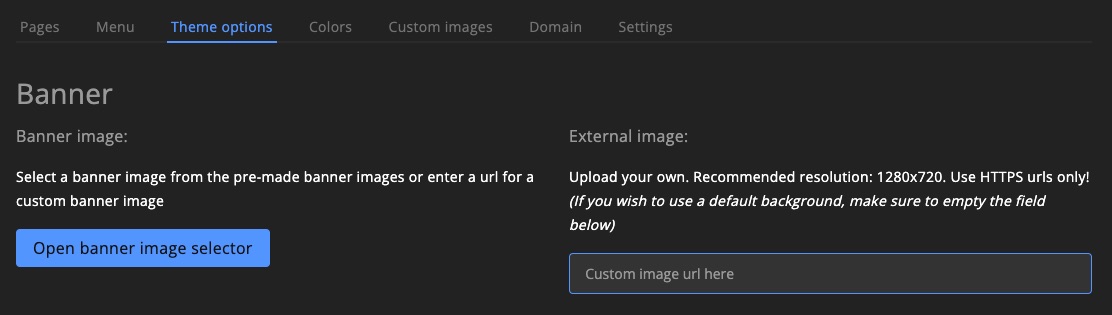
Change website background
Choose a banner background or enter a custom image URL.
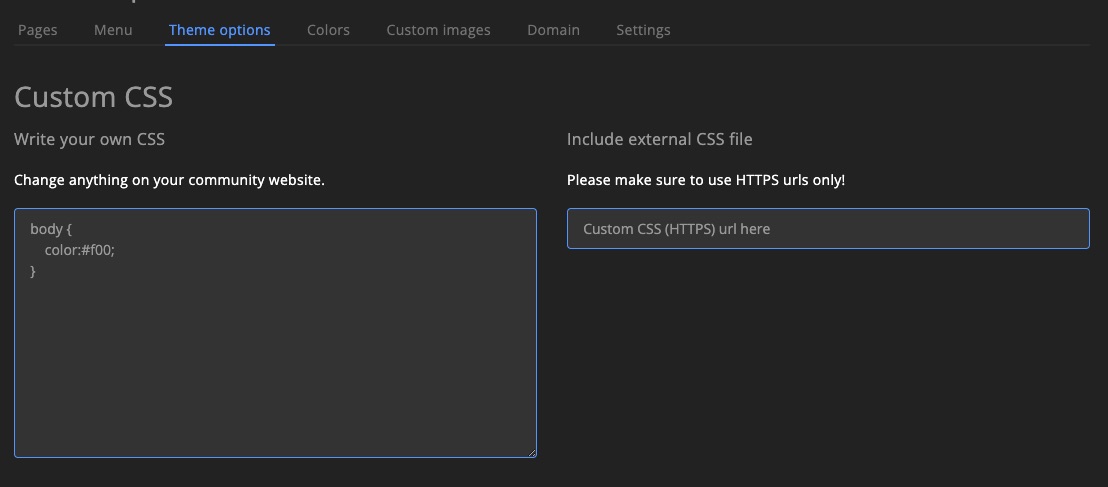
Custom CSS
Add custom styling by uploading your own CSS.
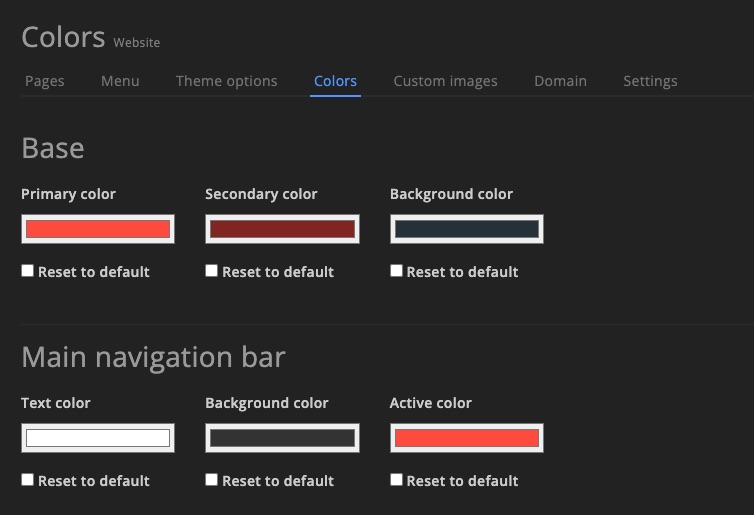
Colors
Adjust the color scheme of your Community website.
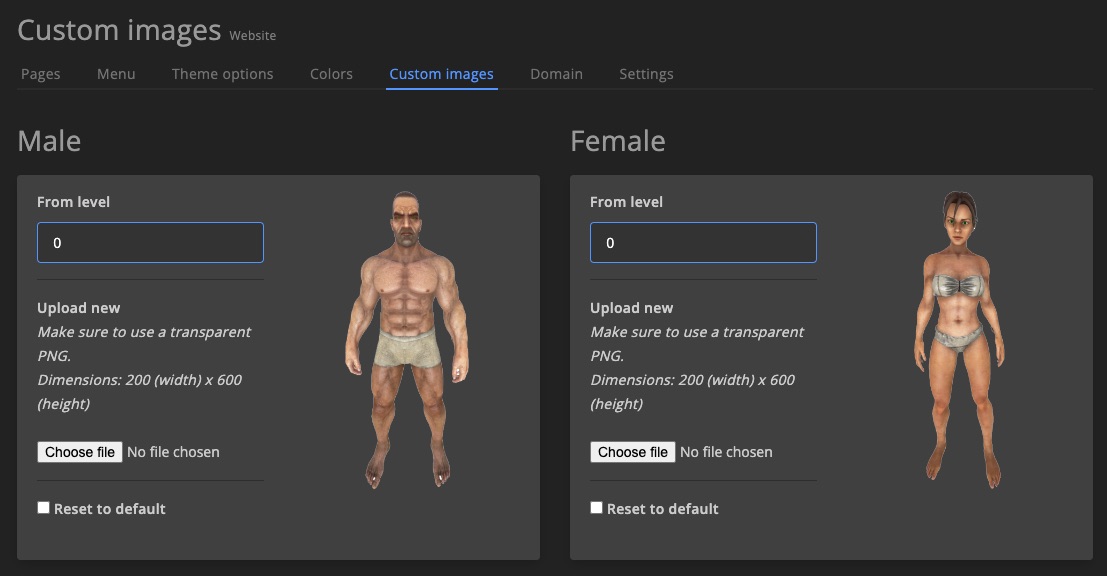
Custom images
Upload images for in-game characters to be displayed on the Community website.
Website domain
Change your Community website's subdomain or configure a custom domain.
1. Set up CloudFlare
To use a custom domain, it must run through CloudFlare. This service helps protect against DDoS attacks and is free to use.
Buy a domain from CloudFlare or set up CloudFlare for an existing domain.
If CloudFlare isn’t an option, consider self-hosting the community website.
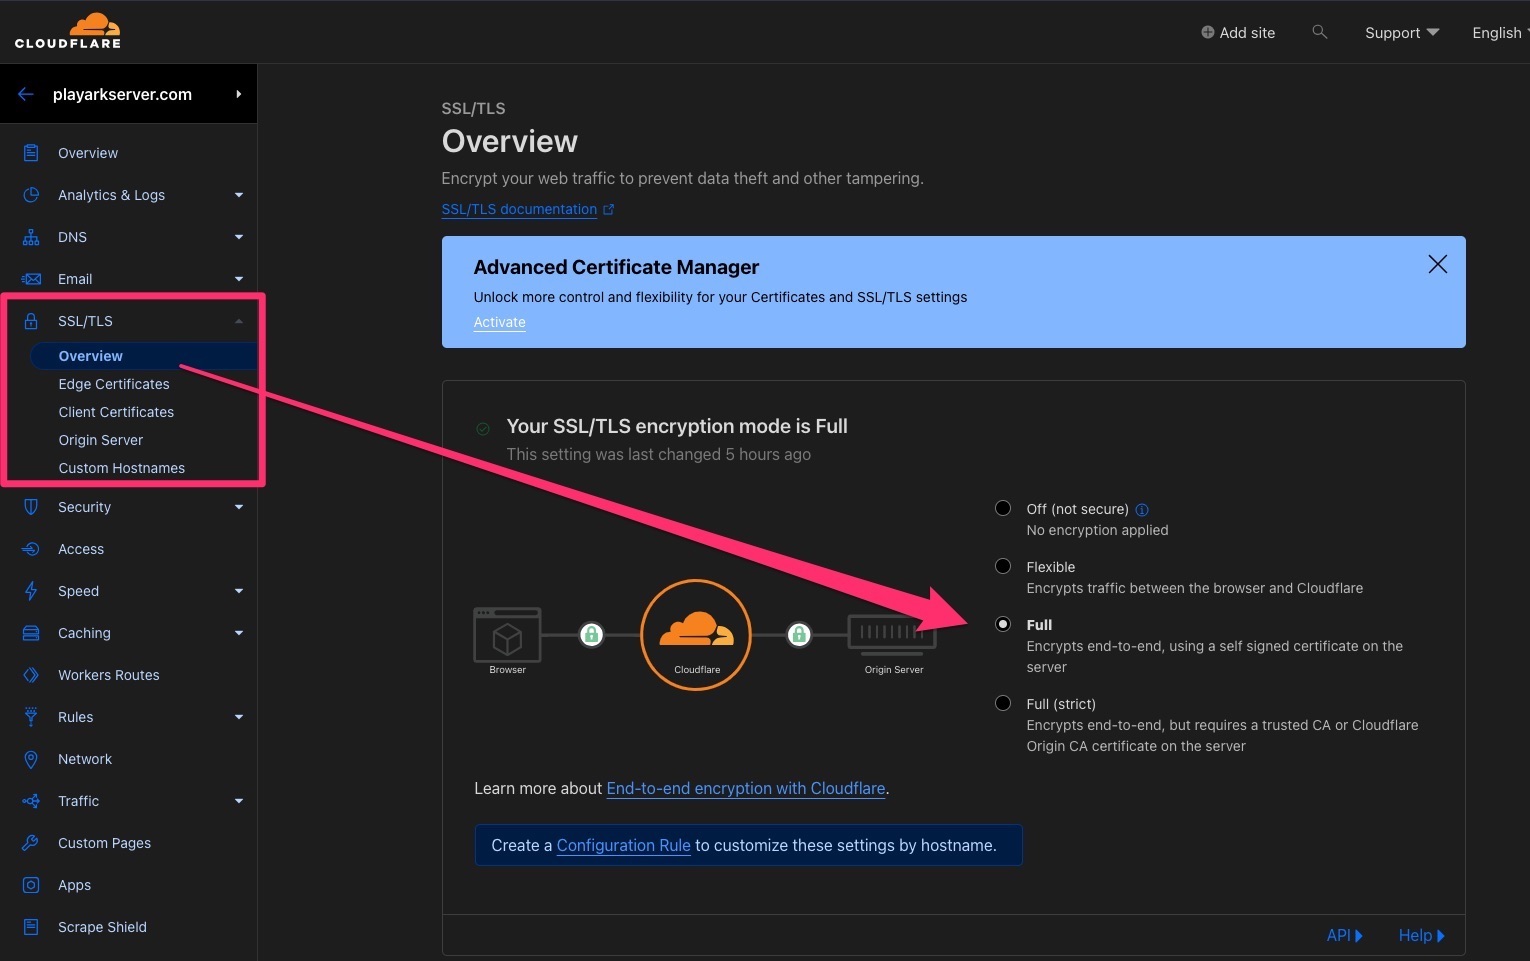
2. Configure SSL
In CloudFlare, navigate to SSL/TLS > Overview and set the SSL mode to Full.
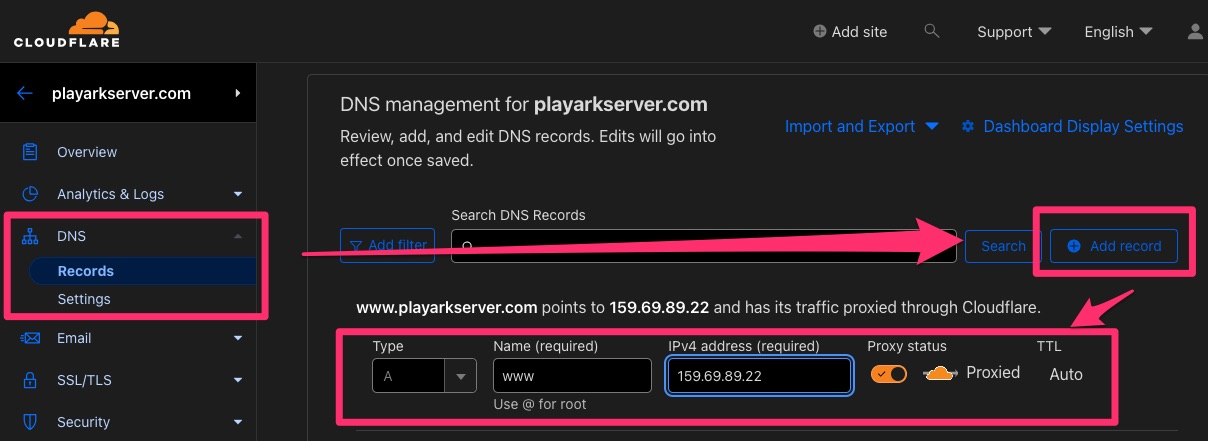
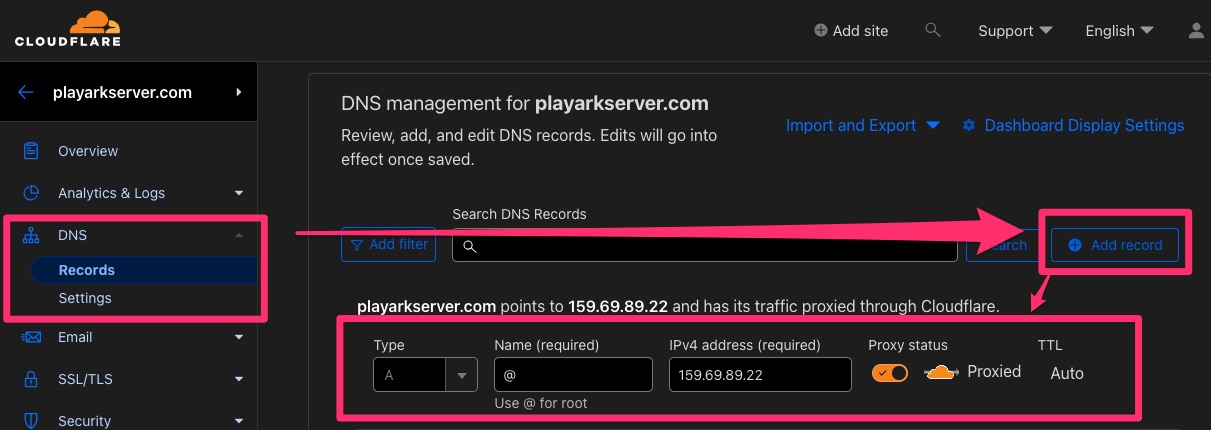
3. Set up DNS
Decide whether your domain should start with www or not: www.yourdomain.com or yourdomain.com. As you can see, one domain starts with www and the other does not.
WWW
If you want www.yourdomain.com, configure CloudFlare with the following:
IP: 159.69.89.22
Non-www
If you prefer yourdomain.com, configure CloudFlare as shown:
IP: 159.69.89.22
4. Enter Custom Domain on GSA
Enter your custom domain into the GSA dashboard exactly as chosen above (with or without www). If you have set with www above, you should also do that here.

Settings
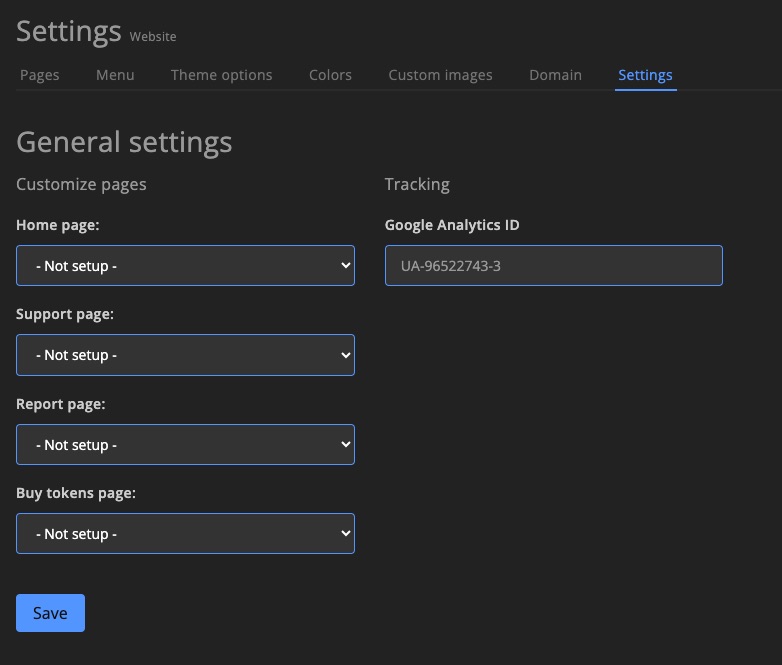
General settings
Set a custom homepage, enable forum as homepage, enter a Google Analytics ID, and assign custom pages to various site sections.
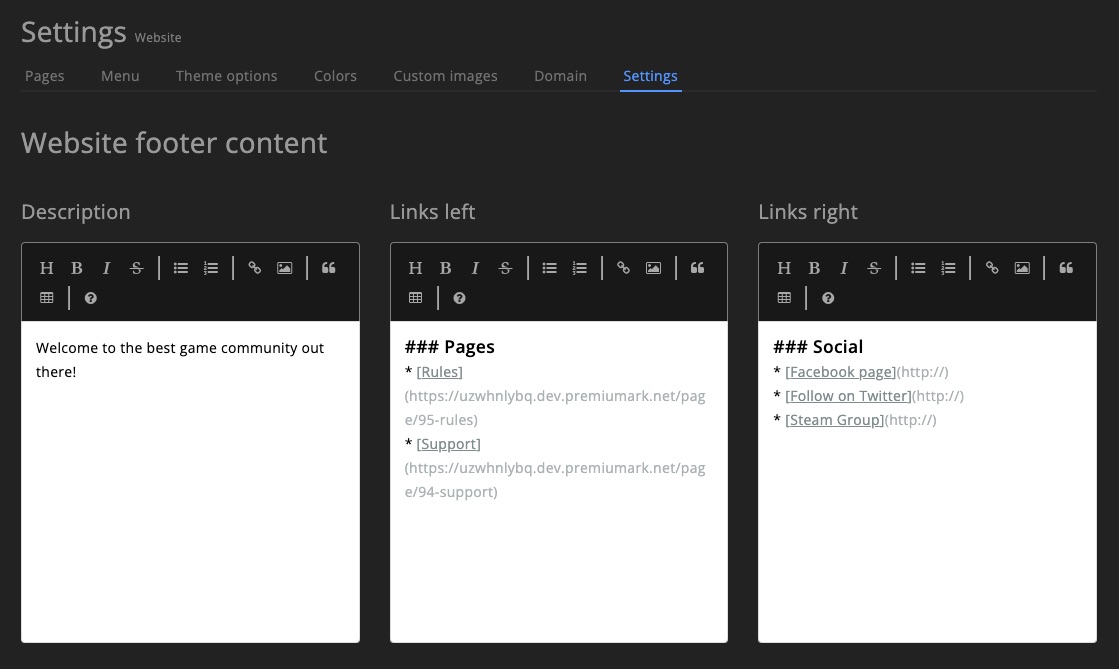
Footer settings
Update the footer content shown across all pages.
Other
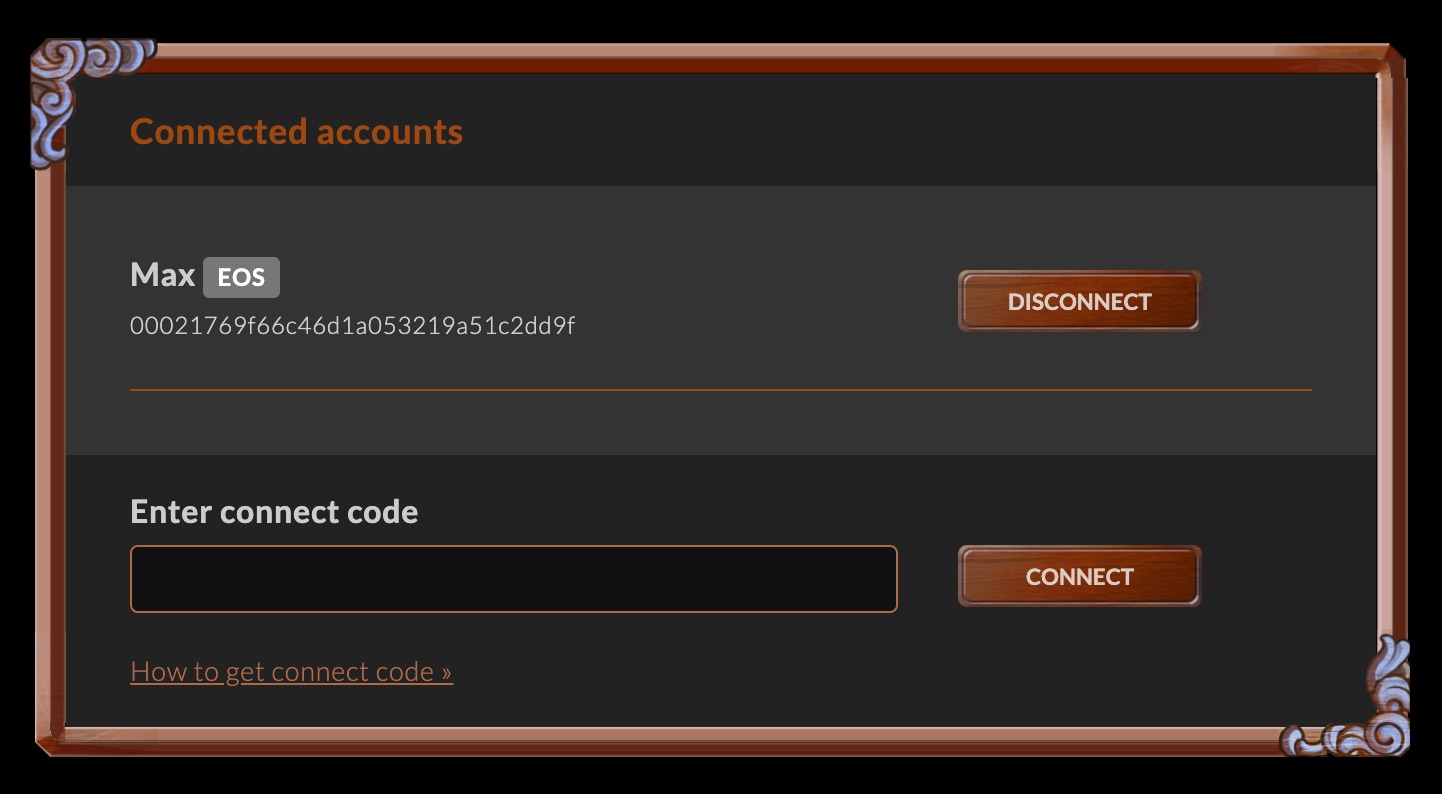
Connect sub-accounts on Community website
If players can’t log in via Steam, Epic, etc., they can link their in-game account to another supported account, allowing access to the shop and other features.
ARK:SAmay not work if a Steam, Epic, or character name contains special (non-UTF8) characters likeéøö$.ARK:SAmay break after changing your Steam username.- Reinstalling the mod on PC, Xbox, or PS can fix corrupted installs.
Try renaming the player to resolve issues.
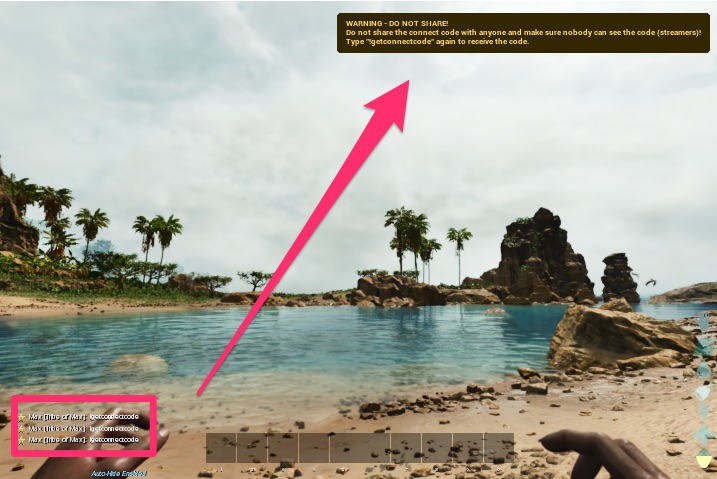
1. Request connect code in-game
Type !getconnectcode in-game with the account you want to link. You must enter the command twice for security reasons.
2. Go to Settings page on Community website
Open the Community website and enter the code in the Connect accounts section.
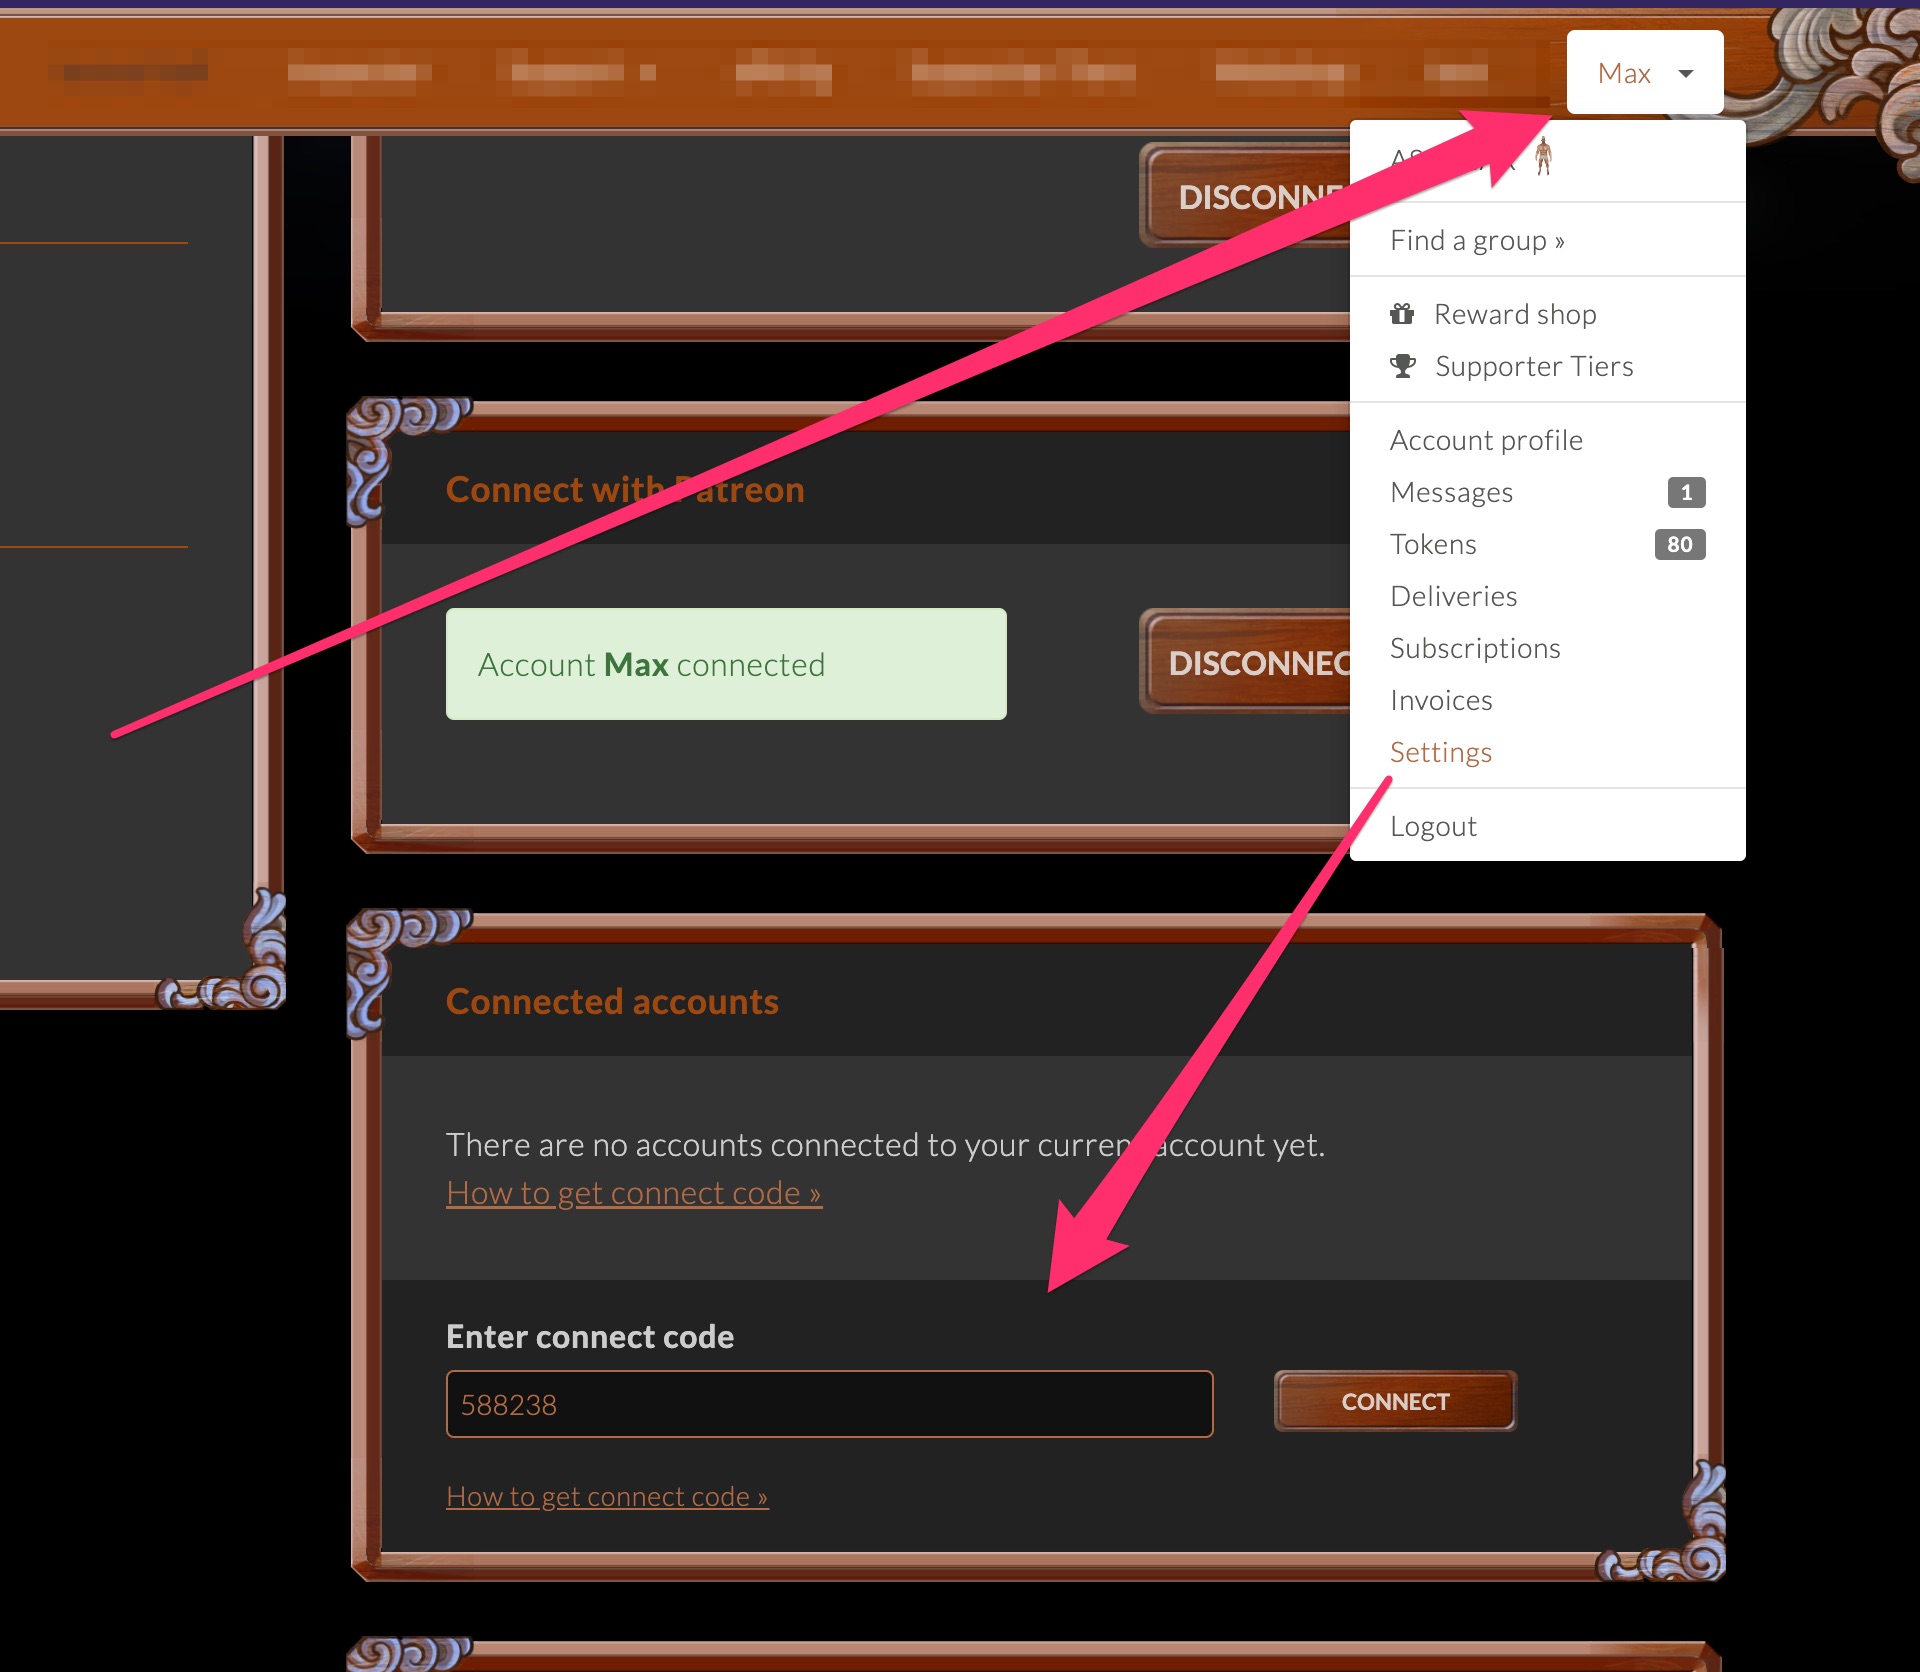
Done!
Your in-game account is now connected to the account currently logged in on the Community website.